• Skip to primary navigation
  • Skip to main content
  • Skip to primary sidebar
  • Skip to footer
  • Faith
  • Motherhood
    • Pregnancy
    • Meal Planning
      • Recipes
    • Large Families
  • Homeschooling
    • Homeschooling & Homemaking Printables {Free!}
    • Homeschool Room
    • Curriculum Reviews
    • Curriculum
    • Arts & Crafts
      • DIY
  • Special Needs
    • Dyslexia
    • Autism
  • About Us
    • Contact Us
  • Sponsors/Media Kit

Such a Time As This

Faith, Hope, & Love

02/16/2016

Overcoming the February Homeschool Blahs

Contains affiliate links.  Please see my disclosure policy.


For as long as I’ve been homeschooling, I’ve known about the February blahs.  Some call them the Winter Blues.  The point is we’ve all been there.  It’s the time of year where we are passed Christmas – passed the midway point of the year.  Possibly, we are getting weary of the curriculum we are using and tired of being cooped up in our house all day, trying to escape the frigid temperatures.  Maybe we are longing for the beauty of Spring or the warm of Summer.


So, when you are trapped here in this space what do you do?   Here is a quick list of how to beat the February blahs. Take a break and regain your sanity.  The age and grade level of your kids will determine what you will choose to use off this list, but when my older ones were little I would take a day “off” to lift everyone’s spirits.

Overcoming the February Blahs

Scrap the curriculum today and …


Cozy up on the couch and read great books! When mine were younger, we enjoyed Five in a Row.


Have a poetry tea time a la Brave Writer.


Break out the board games and have some fun.


If it’s snowing outside – get out and enjoy it!  Then come back in and make some hot chocolate.


Take a trip to the library and pick out some new books.


Take a field trip to the zoo, a science museum, or a landmark.


Build Lego models of whatever you are studying in history.


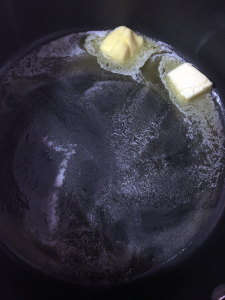
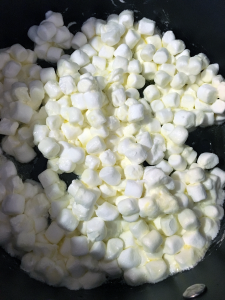
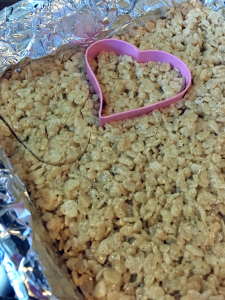
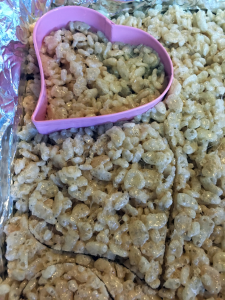
Bake with your kids – teach them math with measuring cups and brush up on their reading as they learn to make a yummy treat!


Watch education videos.  We love Drive Thru History: Ancient History.


Let your kids create: have an art day.  Get out the pencils, paints, pastels & charcoal.  Let them make something memorable as you read their history, science, or literature books. Try these artist tiles – my kids love them.


Go on a nature walk and get some fresh air.


Do some Science in the Kitchen!


Start a crafting day with some new fun hobbies.  Implement a handicraft afternoon.  Try loom knitting, engraving, crochet, weaving, woodworking, cross-stitch or jewelry making.


Have a playdate with another family.  Cheer each other up – I always feel refreshed when I can chat with another mom.


Have you experienced the February Blahs?  What do you do to overcome it? Leave a comment below!


Filed Under: Homeschooling Sasha

02/14/2016

Hot Cocoa Spoons

Contains affiliate links.  Please see my disclosure policy.


Happy Valentine’s Day!  I wanted to spread the love today by offering up a fantastic recipe that would go great for a birthday party,  a fun wintery get-together or just because it’s cold outside and more winter storms are going to be hitting us soon!  Cuddle up with your kiddos and make some fun hot cocoa spoons.  These are super simple to make and look great as decorations (and to use) for your next fun winter event.

Hot Cocoa Spoons


This recipe will yield one dozen hot cocoa spoons:

SUPPLIES NEEDED
12 Plastic Spoons
2 T solid shortening
3/4 cup Wilton white and or blue chocolate melts
Wilton edible snowflakes
Wilton sprinkles

DIRECTIONS
1.   Line a baking sheet with wax paper. Set aside.
2.   In a double boiler, melt the shortening.
3.   Add the chocolate melts and stir continuously until completely melted. Let cool for 1 minute.
4.   Dip each spoon into the melted chocolate, filling it completely.
5.   Lay each spoon onto the baking sheet with the handle of the spoon over the edge of the baking sheet. This will help balance the spoon so the chocolate does not spill out before it sets.
6.   Sprinkle spoons with edible snowflakes, sprinkles, nonpareils, pearls, etc.
7.   Let each spoon“set” for at least 20 minutes.
8.  ENJOY!!

Gift Idea- wrap each spoon in cellophane and tie with a pretty ribbon to give as a gift or favor!


Wilton Candy Melts-Blue

Wilton 1911-1300 Candy Melts, Bright White

Wilton Petite Snowflake Decor

Wilton 710-2094 Sprinkles Pearlized Snowflakes Sprinkles

  Hot Cocoa Spoons
I hope you enjoy them!  If you like this recipe, please share!

Filed Under: DIY, Recipes Sasha

02/07/2016

How to Sell Your House Even When You Are Homeschooling

sell your house while homeschooling stage your house

Hey, moms, do you ever get completely exhausted throughout the day?  You know the type of day that is so jam packed full of kid stuff like teaching, playing, art, music, snacks, that you just feel like you could collapse?


I’m not one to take naps during the day but this day, not too long ago, I was completely worn out.  I was was so tired I could barely walk to my bed.  All I could think about was my warm, fuzzy, blanket and buttery soft pillow.


My littles were safely sleeping in their rooms and cribs, and my bigs were off playing board games.  I was thrilled that I could steal a few moments to myself and recharge before it was time to make dinner.


Collapsing into my sheets, I felt myself fading into dreamland, only to be awoken by my husband shaking the blankets off my feet just moments later.  “Somebody wants to see our house in 30 minutes!” He whispered urgently. “Come on! We have got to get going!” Frantic, I popped out of bed and began to sporadically scan my environment for anything out of place, randomly throwing items in cabinets, lighting candles, wiping down toilets, all while grabbing kids shoes, coats, and making my way downstairs to our van.


That, my friend, is what nightmares are made of.  Sadly, this one was real. Trying to sell your house while homeschooling is not an easy process.


We had 6 young kids (12 and under) and were homeschooling all of them.  That means we had all of the toys, the zany art projects, the leftover bowls of crackers left on the kitchen table. We had the everything of the day for one kid. Times 6.  So, when we got the news that my husband had been laid off and we realized we were selling our home we had to come up with an action plan.

 How to Sell Your House While Homeschooling


If I could tell you one thing about my most recent experience with moving with 6 young kids – it’s this: you will make it through.  It might not feel like you will, but you will and you will come out stronger.  If I could tell you two things, I would add: Don’t Do It!  (Just kidding … sort of).


There were days when I wished I didn’t have to clean that day. And it’s not just the cleaning that is an issue, it’s the price I have to pay to make sure that I have the right products to clean. For example, my vacuum cleaner recently broke down so I’ve been looking at currently the UK’s best vacuum cleaner under £100 to help me save some money on that part. But still it’s a lot of money. So spending money is a problem and then spending my time cleaning is a problem. There were days when I decided I NEEDED an afternoon nap after homeschooling my kids all morning.  How in the world you sell your house while homeschooling? Can it be done?


The truth is: trying to sell your house while homeschooling or living with young kids means a whole new level of organization needs to be attained so that you can still live your life while dealing with the inconveniences of house showings. Alternatively, you could look to sell quickly, and move on with your new life sooner rather than later. In fact, there are many homebuyers such as We Buy Houses Richmond that aim to provide a smooth selling process.


So, what do I wish I had known when I started this whole crazy process?  Hmm, I wish I had a few tips that would make it just a little bit easier.  Some of these are common sense – and some are the “been there done that” kind of sense.  Some of these tips I just picked up along the way, but these would have helped me dramatically at the beginning of our journey. All of these should help if you are needing to sell your house while homeschooling at the same time.

12 Tips to Sell Your Home while Homeschooling at the Same Time 

12 Tips to Sell Your Home while Homeschooling at the Same Time


STAGE YOUR HOME 1:  Get rid of what you don’t need

I mean it.  If you don’t use it, toss it.  You wouldn’t believe all of the “extra stuff” we were holding on to.  I think having kids makes it doubly hard. You might be thinking “I might use that” or “they will miss that” but seriously if it isn’t used a lot and enjoyed, kick it to the curb.  We had multiples of several things (types of toys that we had received near duplicates of).  We donated much of our toys to a local therapy center for special needs kids.  What they didn’t need we gave to Goodwill.


STAGE YOUR HOME 2: Sell extra or large furniture

Crowded homes look cluttery – and cluttery homes are harder to sell.  Of course, this depends on how much furniture you have and if you are moving cross country or within the same town.  It also matters if you are downsizing or not.  Bulky furniture that you can rebuy at Ikea or Walmart might not be the best thing to lug halfway across the country in a big moving van.  Decide if you love it – if it is a family heirloom, obviously we held on to it – but some stuff we just didn’t need.


STAGE YOUR HOME 3: Store what you don’t use

So, you might have extra stuff that you want to keep but it isn’t necessarily being used daily – store it.  We packed up a bunch of boxes and are storing them in closets and in the garage.  You could even use a storage unit. This gets things out of the house and allows you to “stage the house” for sale.


STAGE YOUR HOME 4: Clean off flat surfaces

Hopefully, you aren’t like me, and you actually keep your surfaces cleared and cleaned … however, if you do the same thing I do, remember to clear it off so that when people come to look they see a house that shows “like a model home”.  I mean, tables, islands, counters, sinks, benches, dressers and nightstands.  All these areas are a trap for extra clutter, dust, and other stuff that could distract the buyers.


STAGE YOUR HOME 5: Scrub the Walls

If your children are like my three year old, you might have some crayon marks grazing the walls or some handprints around doorways and stairwells.  That is life with young kids.  My husband went around and scrubbed all the surfaces of the home, before we put it up for sale.  We also did just a little touch up with paint.  This just gives the house a fresh feel.


STAGE YOUR HOME 6: Start up a cleaning schedule

If you aren’t already using a tried and true cleaning routine, this may be the time to start.  There are a lot of ideas on the web – once such idea would be to do a cleaning day once a week (vacuum, dust, bathrooms, mop) and then keep the kitchen clean, daily.  It is also a good idea to do a general tidy every morning before your phone buzzes that you have buyers coming to see it in 45 minutes! Download our printable cleaning chart here!


STAGE YOUR HOME 7: Set up Your Expectations

Talk with your realtor on what is a good amount of time to give you before buyers come to see your house.  If you are out of the house all day, you would need very little notice (or maybe no notice) but if you are a stay at home mom, with young children, the more notice the better.  What is the shortest amount of time you would need to get things in order and get out of the door?  We chose one hour.  You would need to decide if that is realistic for you.  Some people choose longer time windows (such as 24 hours) – just remember that this might lower your chances of the right buyer seeing your house.


STAGE YOUR HOME 8: Print off a Last Minute Checklist

Use our last minute cleaning checklist to make sure you don’t forget anything before the buyers come to see your sparkling clean home!

kitchen


STAGE YOUR HOME 9: Leave some cabinets and drawers empty

No matter how much I planned, and how much I cleaned there would be a few items that needed to be put away before the potential buyers came by.  I found that hiding a few things under the sink or in an empty drawer helped tremendously!


STAGE YOUR HOME 10: Small Touches

When we were looking through homes, my husband quickly noticed small dishes of candy and other niceties that I actually overlooked.  When we placed our home on the market, we made sure to do just that.  Include a candy dish with a small note that said, “help yourself”, a soft yummy smelling candle (we picked vanilla or buttercream frosting to not be overbearing), and some other LED type candles for warmth.  We also added some soft background music. Small touches can range from anything though to be honest, for example, it might be moving the furniture around a little bit, or leaving those sweets in a bowl for people to have. But it could also mean big changes as well, for example you might decide that you want to change your garden up completely to get people to really say “wow” as they walk up to your house. If this is something that you are in interested then you could check out a website like https://www.legionlandscaping.com/ to get your outside bit of your house looking amazing.


STAGE YOUR HOME 11: Extra Touches

We also noticed that some people prefer to have “extra information”.  We decided to make this available to them as they are looking through the home.  For instance, that might mean putting little signs around to show special features in your home.  It might mean leaving a printed sheet that gives a rough estimate of energy and water usage charges (in a large home or a home with two laundry areas, for instance), a printed floor plan that the potential buyers can take with them are all nice touches.  These things might help because most often, it won’t be your realtor showing the home but their realtor (who most likely isn’t familiar with how awesome your home really is!)


STAGE YOUR HOME 12: Have a Plan

Decide ahead of time where you will go with your kids when buyers are looking at your home.  Create a plan because the buyers won’t always stick to one, but you can! Most buyers took less than the window need, some took more. Sometimes, we had two buyers back to back which made it that much longer that we needed to entertain the kids.

Just think through a plan – we usually took the kids to the park or the mall.  Make sure you have what you need already in the car.  We use a double stroller, so made sure that is kept in the trunk for the time we were showing our house.  There usually isn’t enough time to pack for the outing.

Keep these things in your car or truck:

  1. Your Diaper Bag
  2. Extra Diapers
  3. Extra Outfits
  4. Wipes
  5. Snacks
  6. A Stroller
  7. A Blanket
  8. A Baby Carrier/Sling


Did this post help you? Please consider pinning it now!

sell your house while homeschooling
Do you need to sell your house while homeschooling your kids? I hope these tips help you and you are successful in the process! Did you stage your home? What is your best tip?

Leave a note below and let me know what helped you when you were showing and selling your house while homeschooling!


Filed Under: Homemaking, Homeschooling, Large Families Sasha

01/31/2016

Valentine’s Day Heart Shaped Treats

Contains affiliate links.  Please see my disclosure page.


Valentine’s Day is right around the corner and I’ve been thinking of some fun treats the kids and I can make together.  This one is so easy – but they look fantastic.  I love that my 8 year old and I can make these together.  Who doesn’t love Rice Krispie Treats?  Put a new spin on an old favorite with these Heart Shaped Rice Krispie Treats for Valentine’s Day!


V-Day Heart Shaped RK Treats In-Process #1

Melt butter on low heat in large stovetop pot.

V-Day Heart Shaped RK Treats In-Process #2

Slowly stir in marshmallows until evenly combined.

V-Day Heart Shaped RK Treats In-Process #3

Remove from heat.

Slowly stir in Rice Krispies until evenly coated with marshmallow mixture.

V-Day Heart Shaped RK Treats Ingredients #3

Gather your supplies.

V-Day Heart Shaped RK Treats In-Process #4

Firmly press Rice Krispies mixture into a lined or sprayed baking sheet
until you have a thin layer -1”-1.5”

V-Day Heart Shaped RK Treats In-Process #5

After allowing to set for at least 10 minutes, cut approximately 24 medium size
heart-shaped treats from layer. Place into refrigerator.

V-Day Heart Shaped RK Treats In-Process #6

Roll red and white fondant into thin layers.

V-Day Heart Shaped RK Treats In-Process #7 V-Day Heart Shaped RK Treats In-Process #8

Cut approximately 12 heart shapes from each color with medium size cookie cutter.

V-Day Heart Shaped RK Treats In-Process #9

V-Day Heart Shaped RK Treats In-Process #10

Remove treats from refrigerator. Place heart-shaped fondant onto each treat.
Gently press down to secure fondant.

V-Day Heart Shaped RK Treats In-Process #11 V-Day Heart Shaped RK Treats Ingredients #2

Decorate each treat to your liking with writing gel and fondant designs
(using fondant knife and small size heart-shaped cookie cutter).

V-Day Heart Shaped RK Treats In-Process #12

V-Day Heart Shaped RK Treats In-Process #13

V-Day Heart Shaped RK Treats In-Process #14

See Recipe below:


Valentine's Day (1)


Valentine’s Day Heart-Shaped
Rice Krispies Treats
Time: 45 Minutes
Serves: 24 Heart-Shaped Treats
Ingredients
  • 3 tbsp. Butter
  • 4 cups Marshmallows Minis
  • 6 cups Rice Krispies cereal
  • Wilton Red Fondant
  • Wilton White Fondant
  • Wilton Red Sparkle Gel
  • Wilton Black Sparkle Gel
Tools
Fondant Roller

(Wilton Fondant Rolling Pin)

Fondant Knife Tool

(Fondant and Gum Paste Tool Set)

Medium Size Heart-Shaped Cookie Cutter

Small Size Heart-Shaped Cookie Cutter

 (Wilton From The Heart Nesting Cookie Cutter Set)
Instructions
1. Melt butter on low heat in large stovetop pot.
2. Slowly stir in marshmallows until evenly combined.
3. Remove from heat.
4. Slowly stir in Rice Krispies until evenly coated with marshmallow mixture.
5. Firmly press Rice Krispies mixture into a lined or sprayed baking sheet until you have a thin layer (1”-1.5”).
6. After allowing to set for at least 10 minutes, cut approximately 24 medium size heart-shaped treats from layer. Place into refrigerator.
7. Roll red and white fondant into thin layers. Cut approximately 12 heart shapes from each color with medium size cookie cutter.
8. Remove treats from refrigerator. Place heart-shaped fondant onto each treat. Gently press down to secure fondant.
9. Decorate each treat to your liking with writing gel
and fondant designs (using fondant knife and small size heart-shaped cookie cutter).
Enjoy!

Filed Under: Recipes, Uncategorized Sasha

01/25/2016

Valentine’s Day Math Printables

Math Printable K-1 Valentine's Day

Valentine’s Day Math Printables

It feels like we just celebrated New Years but it’s almost Valentine’s Day!  Yikes!  I wanted to quickly share with you some brand new printables that I’ve added to this site in celebration of one of my favorite holidays.  Hearts and Kisses … hugs and love what better way to darken up this snowy winter cold weather we are experiencing right now!


I’m giving my readers a FREE math pack for grades K – 1.  I love printing out fun holiday centered math worksheets during the younger grades – so I’m sharing the love with you!  Feel free to print them out now and work through them over the next few weeks.  So fix a cup of hot cocoa and cuddle up with your little one as you work through these fun sheets together.

Math Printables K-1 Valentine's Day

Feel free to share these Math Printables with your friends.  Don’t forget to pin it for later, too!


Download here:

Printable Valentine’s Day Math Pack

Filed Under: Printables Sasha

« Previous Page
Next Page »

Primary Sidebar

Welcome

Hi There! I'm so glad you're here! I'm Sasha, wife to my best friend and mama to 7 kids. My passion is homemaking, homeschooling, and encouraging parents of kids with special needs. We are all on a journey. Find what you were made for with some hope and encouragement on the way. xo Sasha

Free Printables

homeschooling homemaking printables

Pinterest

Looking for something?

Footer

Archives

Looking for something?

Recent Posts

  • Gluten-Free Candy Cane Cookies
  • The Best Gluten-Free Chewy Gingerbread Cookies
  • My Pandemic Birth
  • Hope When There Is No Hope
  • When You Walk Through The Fire: An update on our Year (2019)

© 2015 Pretty Happy WordPress Theme · By: Pretty Darn Cute Design