• Skip to primary navigation
  • Skip to main content
  • Skip to primary sidebar
  • Skip to footer
  • Faith
  • Motherhood
    • Pregnancy
    • Meal Planning
      • Recipes
    • Large Families
  • Homeschooling
    • Homeschooling & Homemaking Printables {Free!}
    • Homeschool Room
    • Curriculum Reviews
    • Curriculum
    • Arts & Crafts
      • DIY
  • Special Needs
    • Dyslexia
    • Autism
  • About Us
    • Contact Us
  • Sponsors/Media Kit

Such a Time As This

Faith, Hope, & Love

06/16/2015

Easy Kids Crafts for Busy Moms

Easy Kids Crafts for Busy Moms


Ahhh, Summer.  You get a break from school work only to find it’s 100° outside. The kids are miserable and so are you.  Enter crafts.  I love crafts.  They give a great escape from the dreaded screen.  They also give an escape from the heat of Summer.  They are fun for the kids and give them something new to learn while using their imagination and their creative side.  The downside to crafts is that they can take a lot of time for us moms.  Sometimes, we want to have a few minutes of peace to catch up on some reading or cleaning … whatever needs to be done.  Sometimes, we do not know how to do said craft.  Sometimes we just need a break.  So, I present to you:

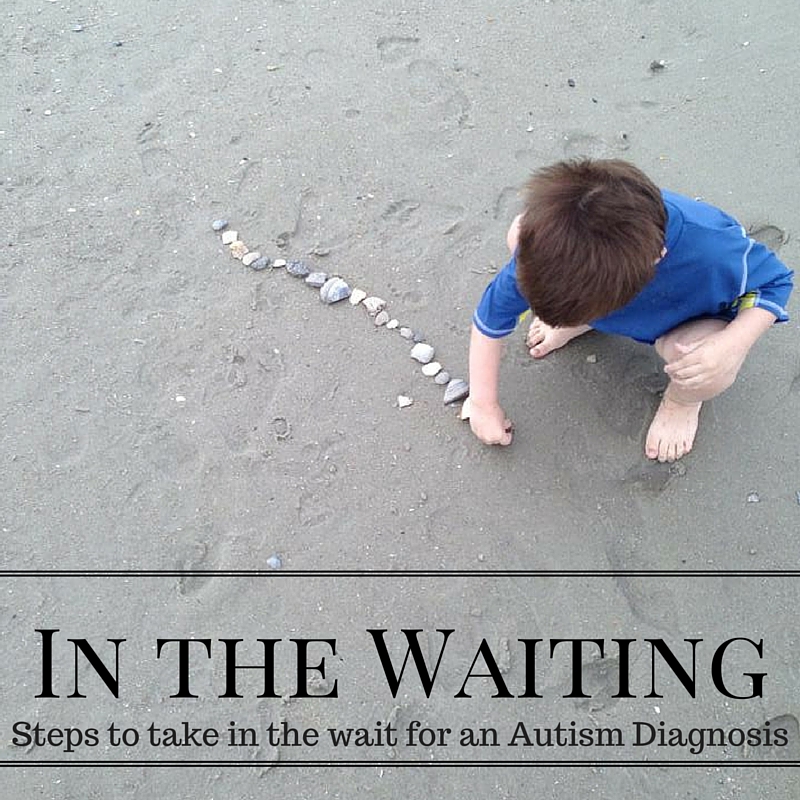
The Best and Worst Kids Crafts for Busy Moms

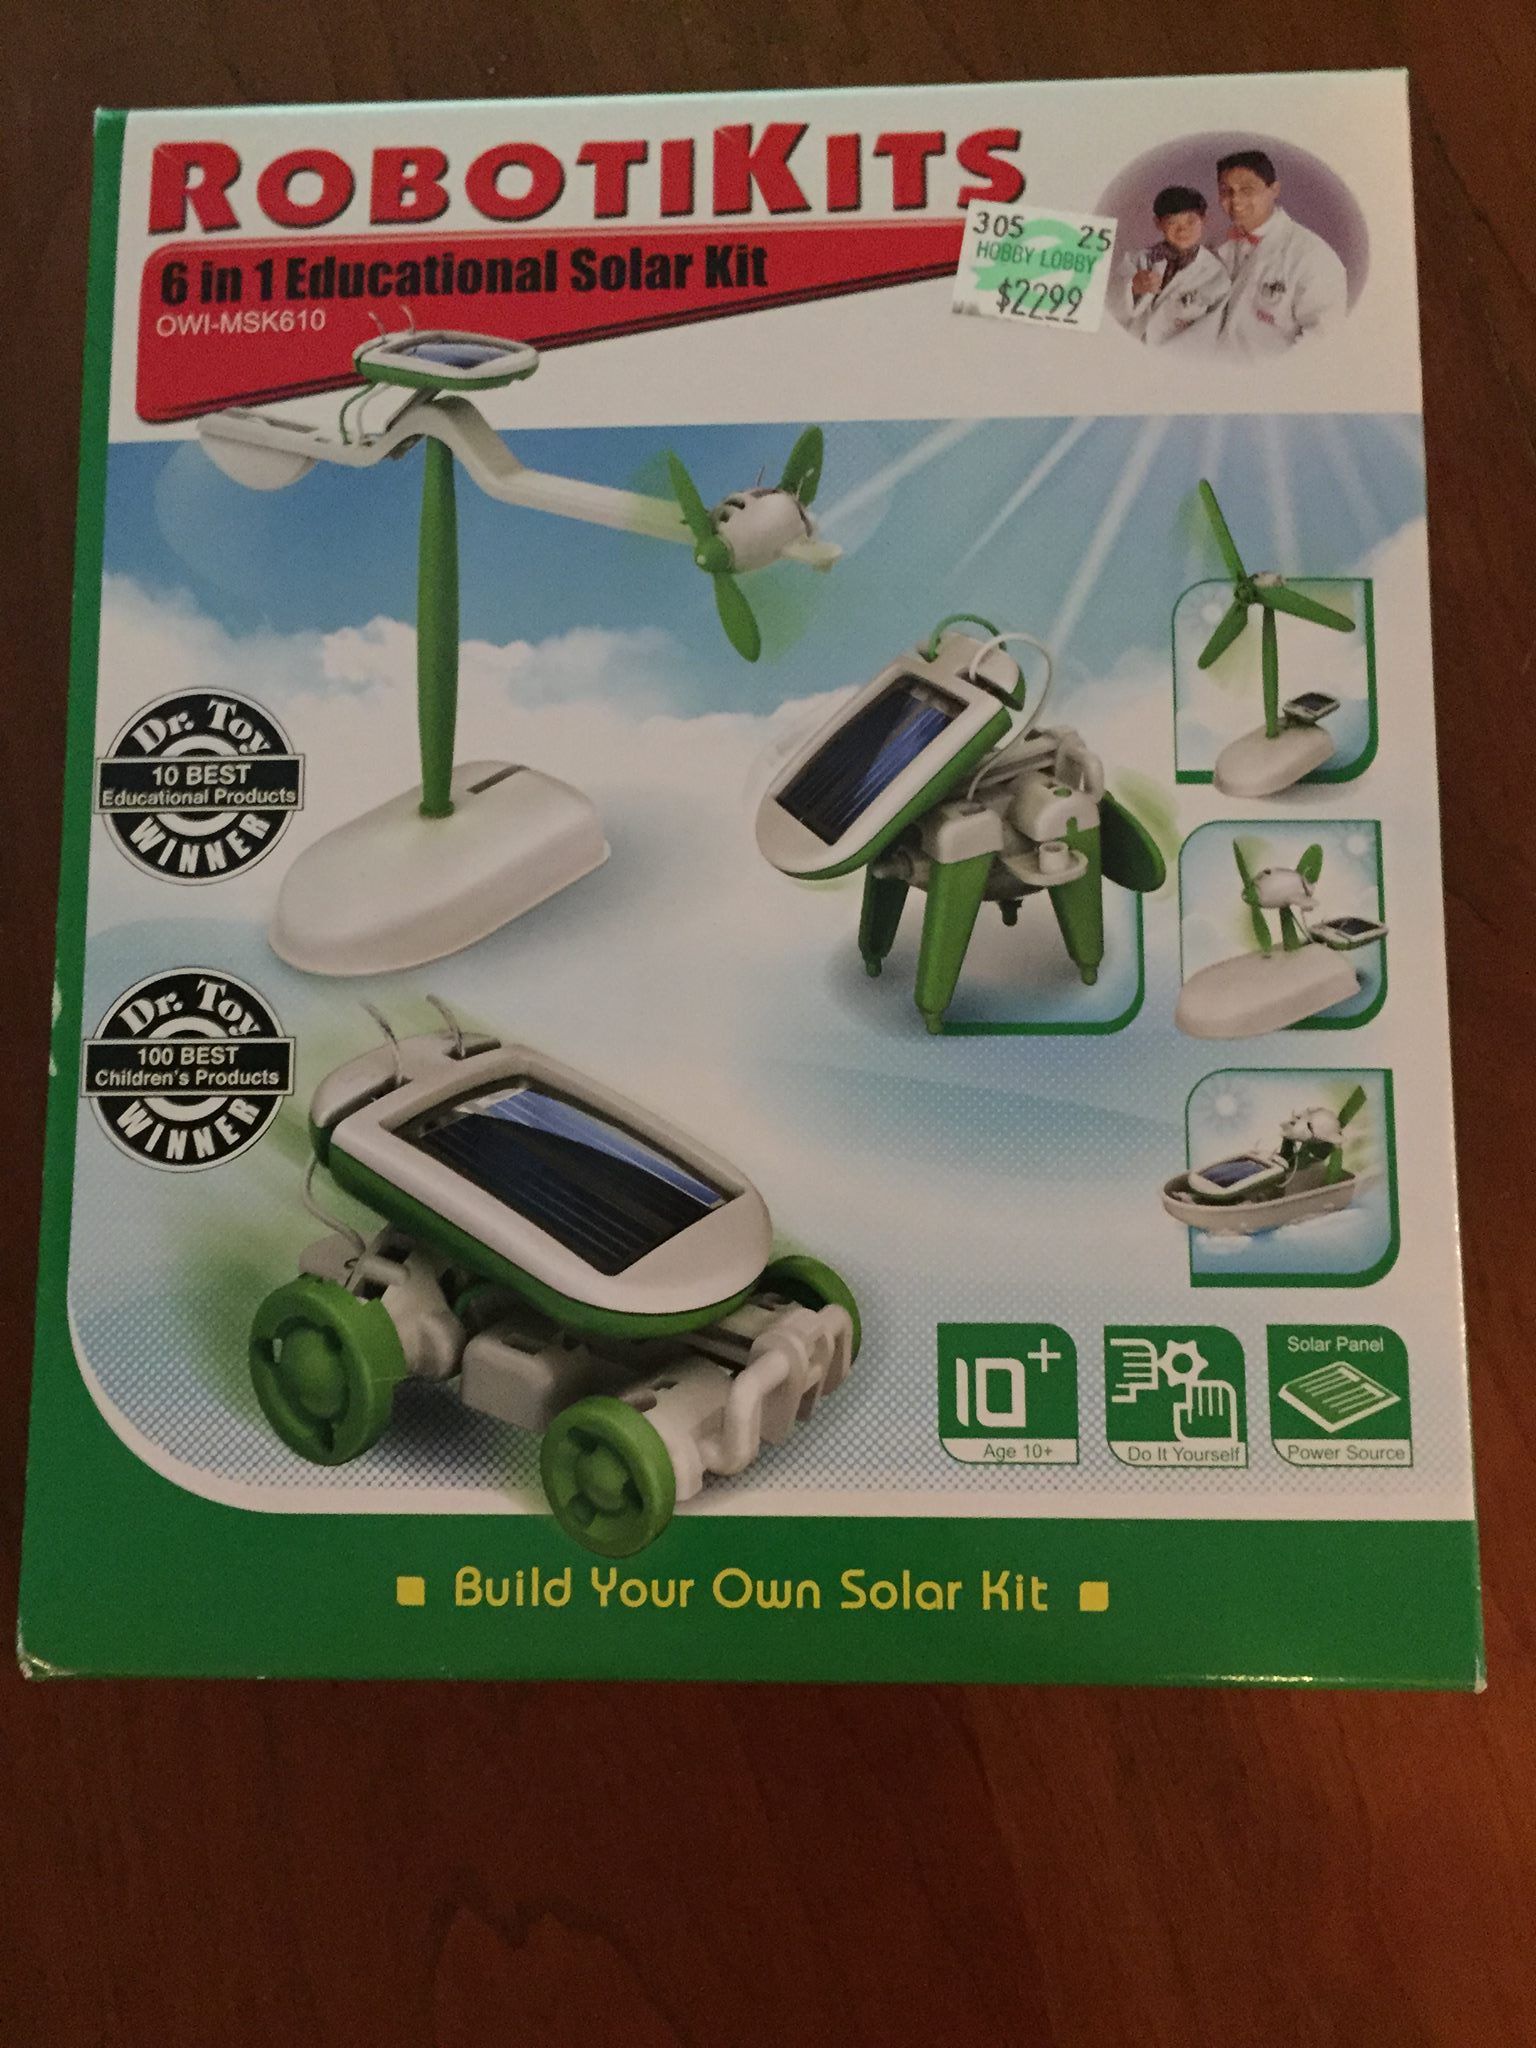
Let’s start with the worst first.  This RobotiKits Solar Kit looked awesome.  The 10 year old went nuts when he realized he could build his own robots that were solar powered.

Easy Kids Crafts for Busy Moms

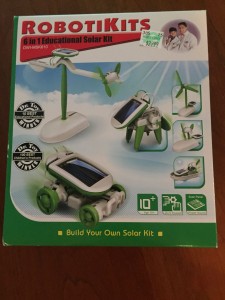
Then upon opening the box we realized how complex this is.  It says 10+ on the package and while it is possible for some 10 year olds to put it together, it was very difficult for us.  It took both my husband and 10 year old son over an hour to assemble one of these.

The clincher? It didn’t work!  It was put out in direct sunlight and never charged correctly.  To be fair, it is very possible that we didn’t put it together right.  As I stated above – we had a very hard time figuring out how to put it together.  However, we are unsure of this product.  Because of that we listed it:

♥ – Ease of Use

♥ ♥ – Functionality/Creativity


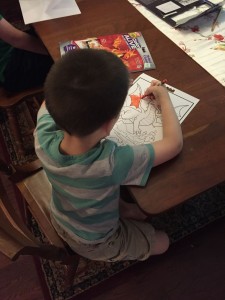
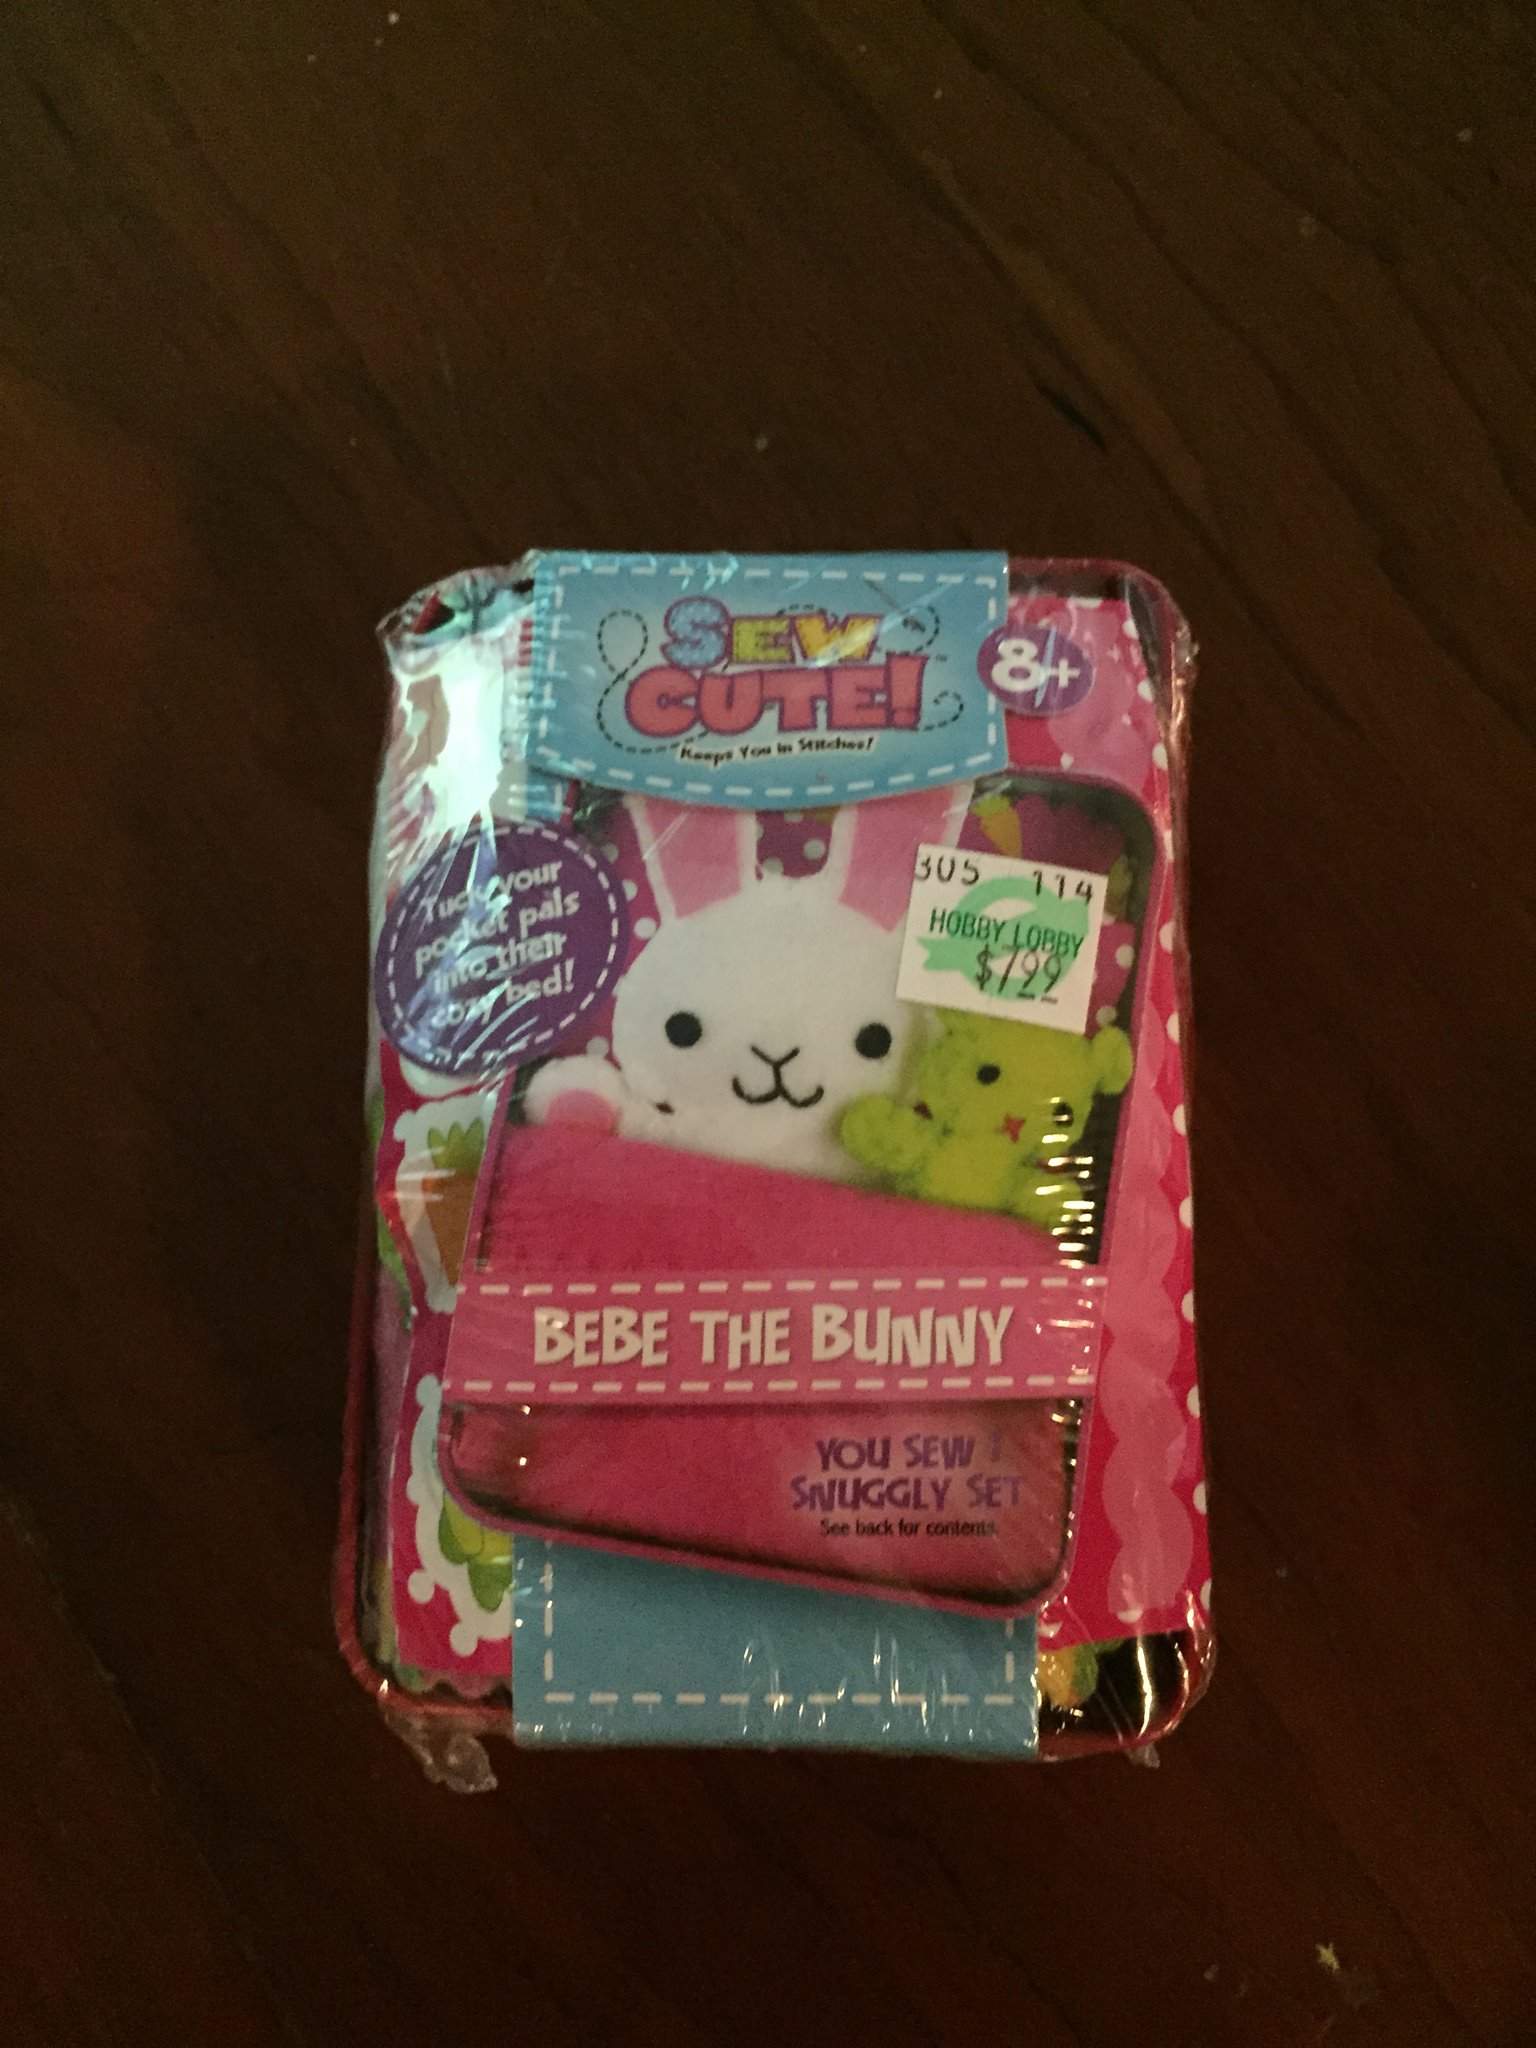
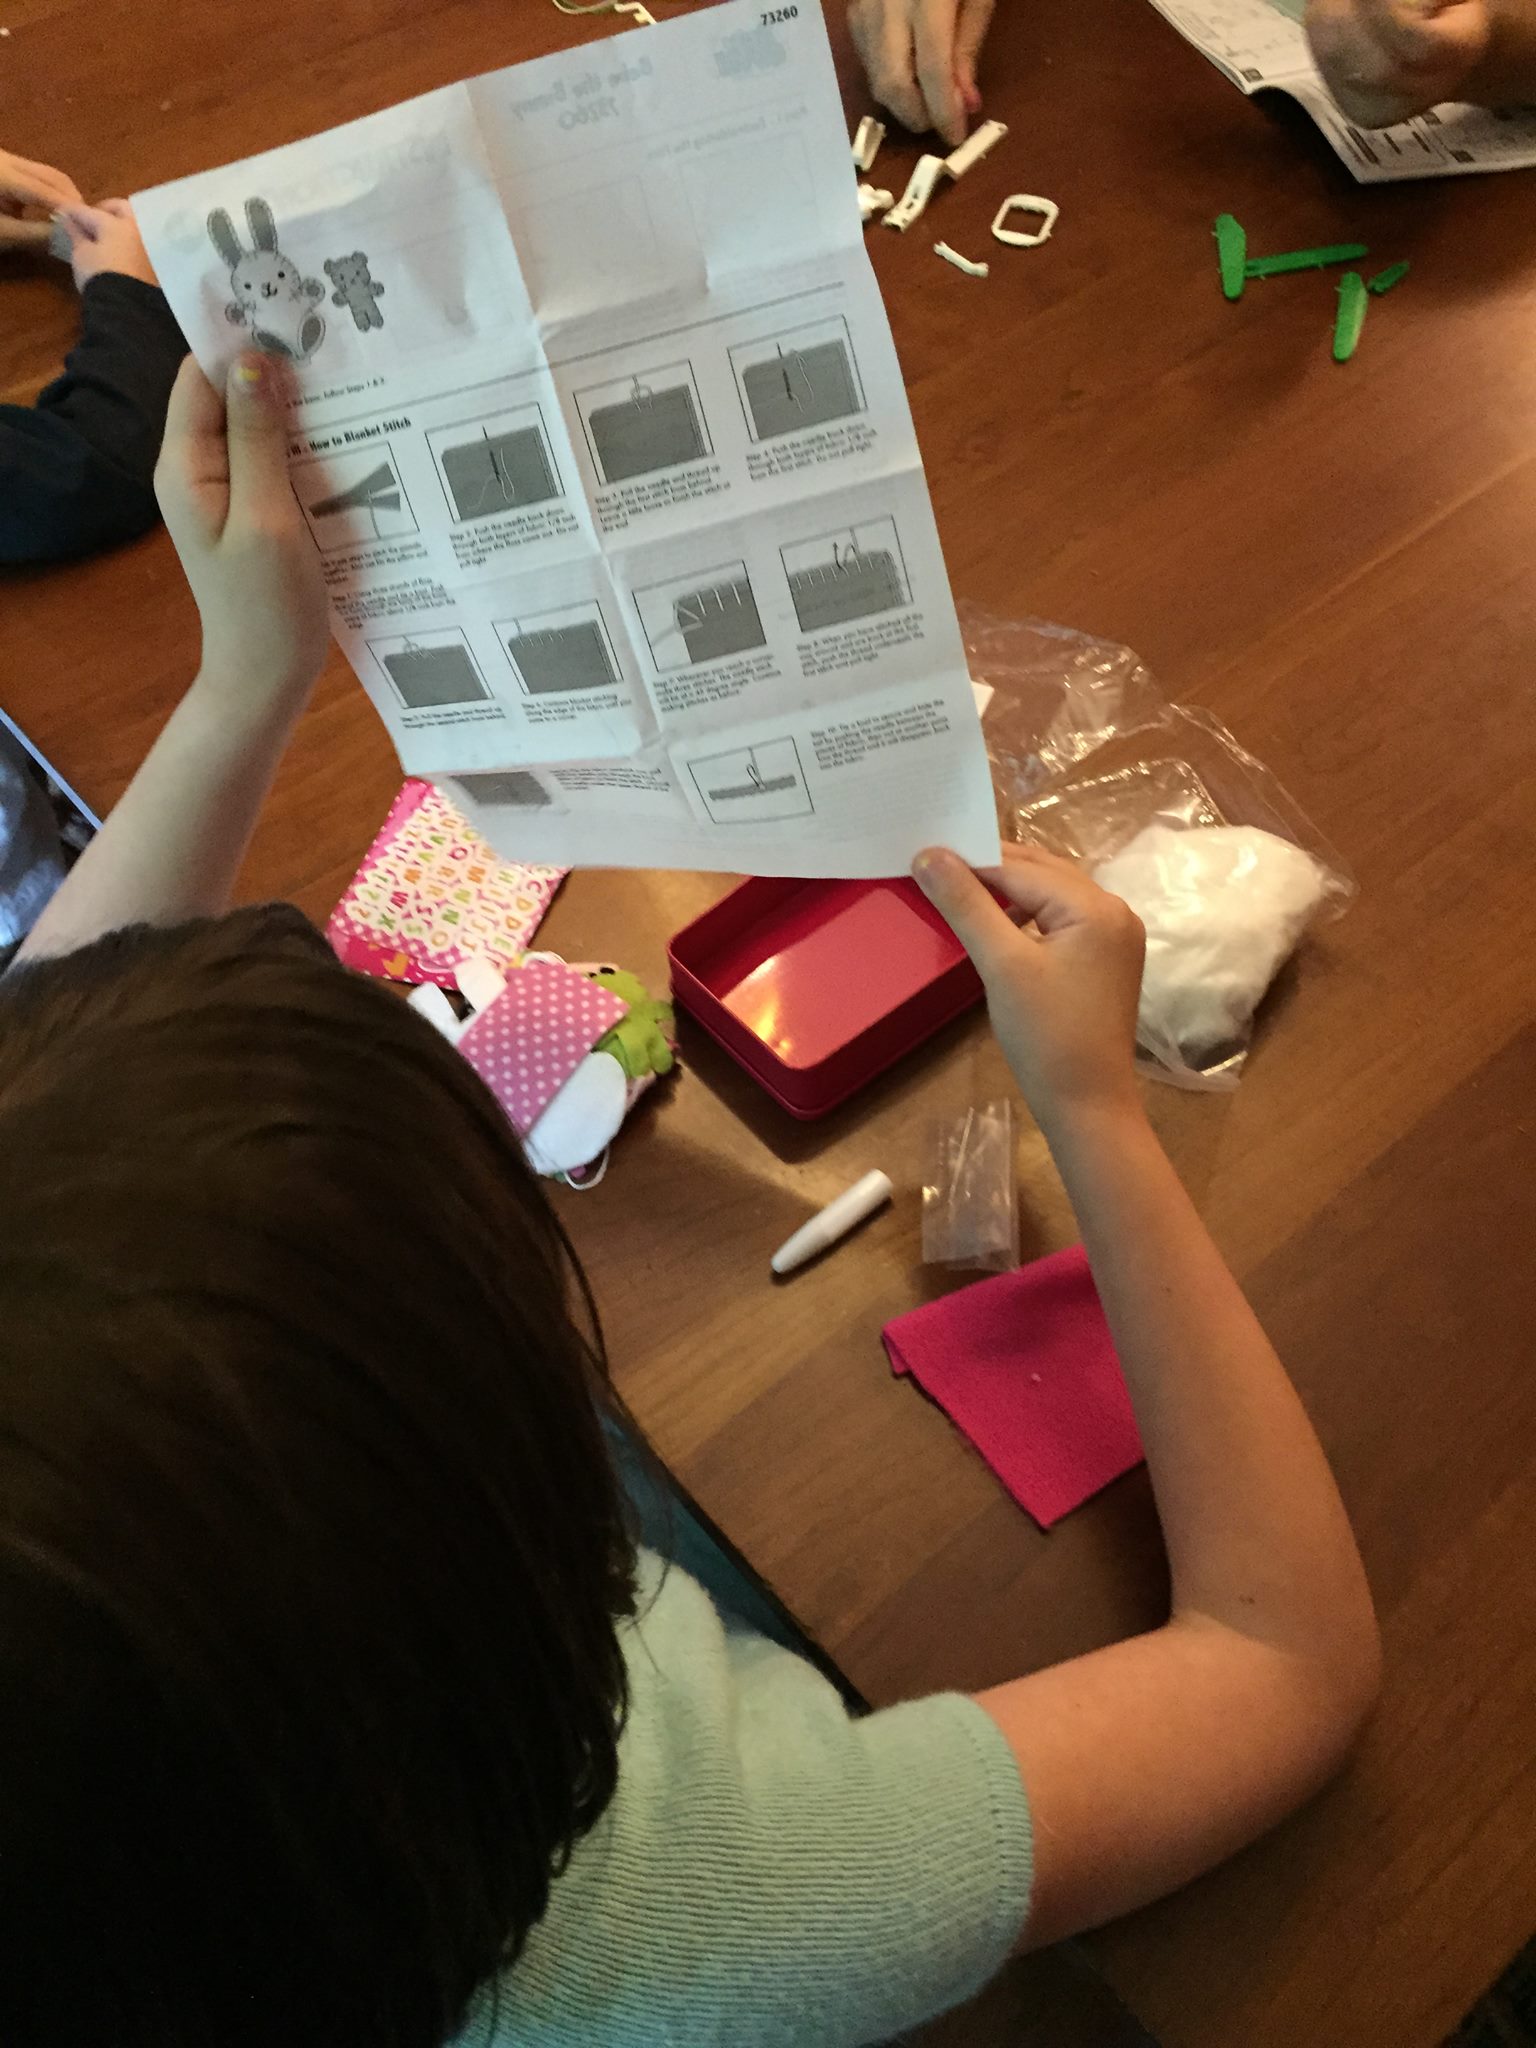
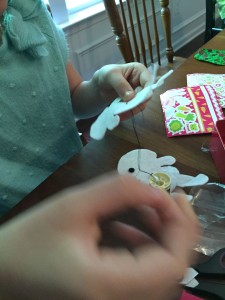
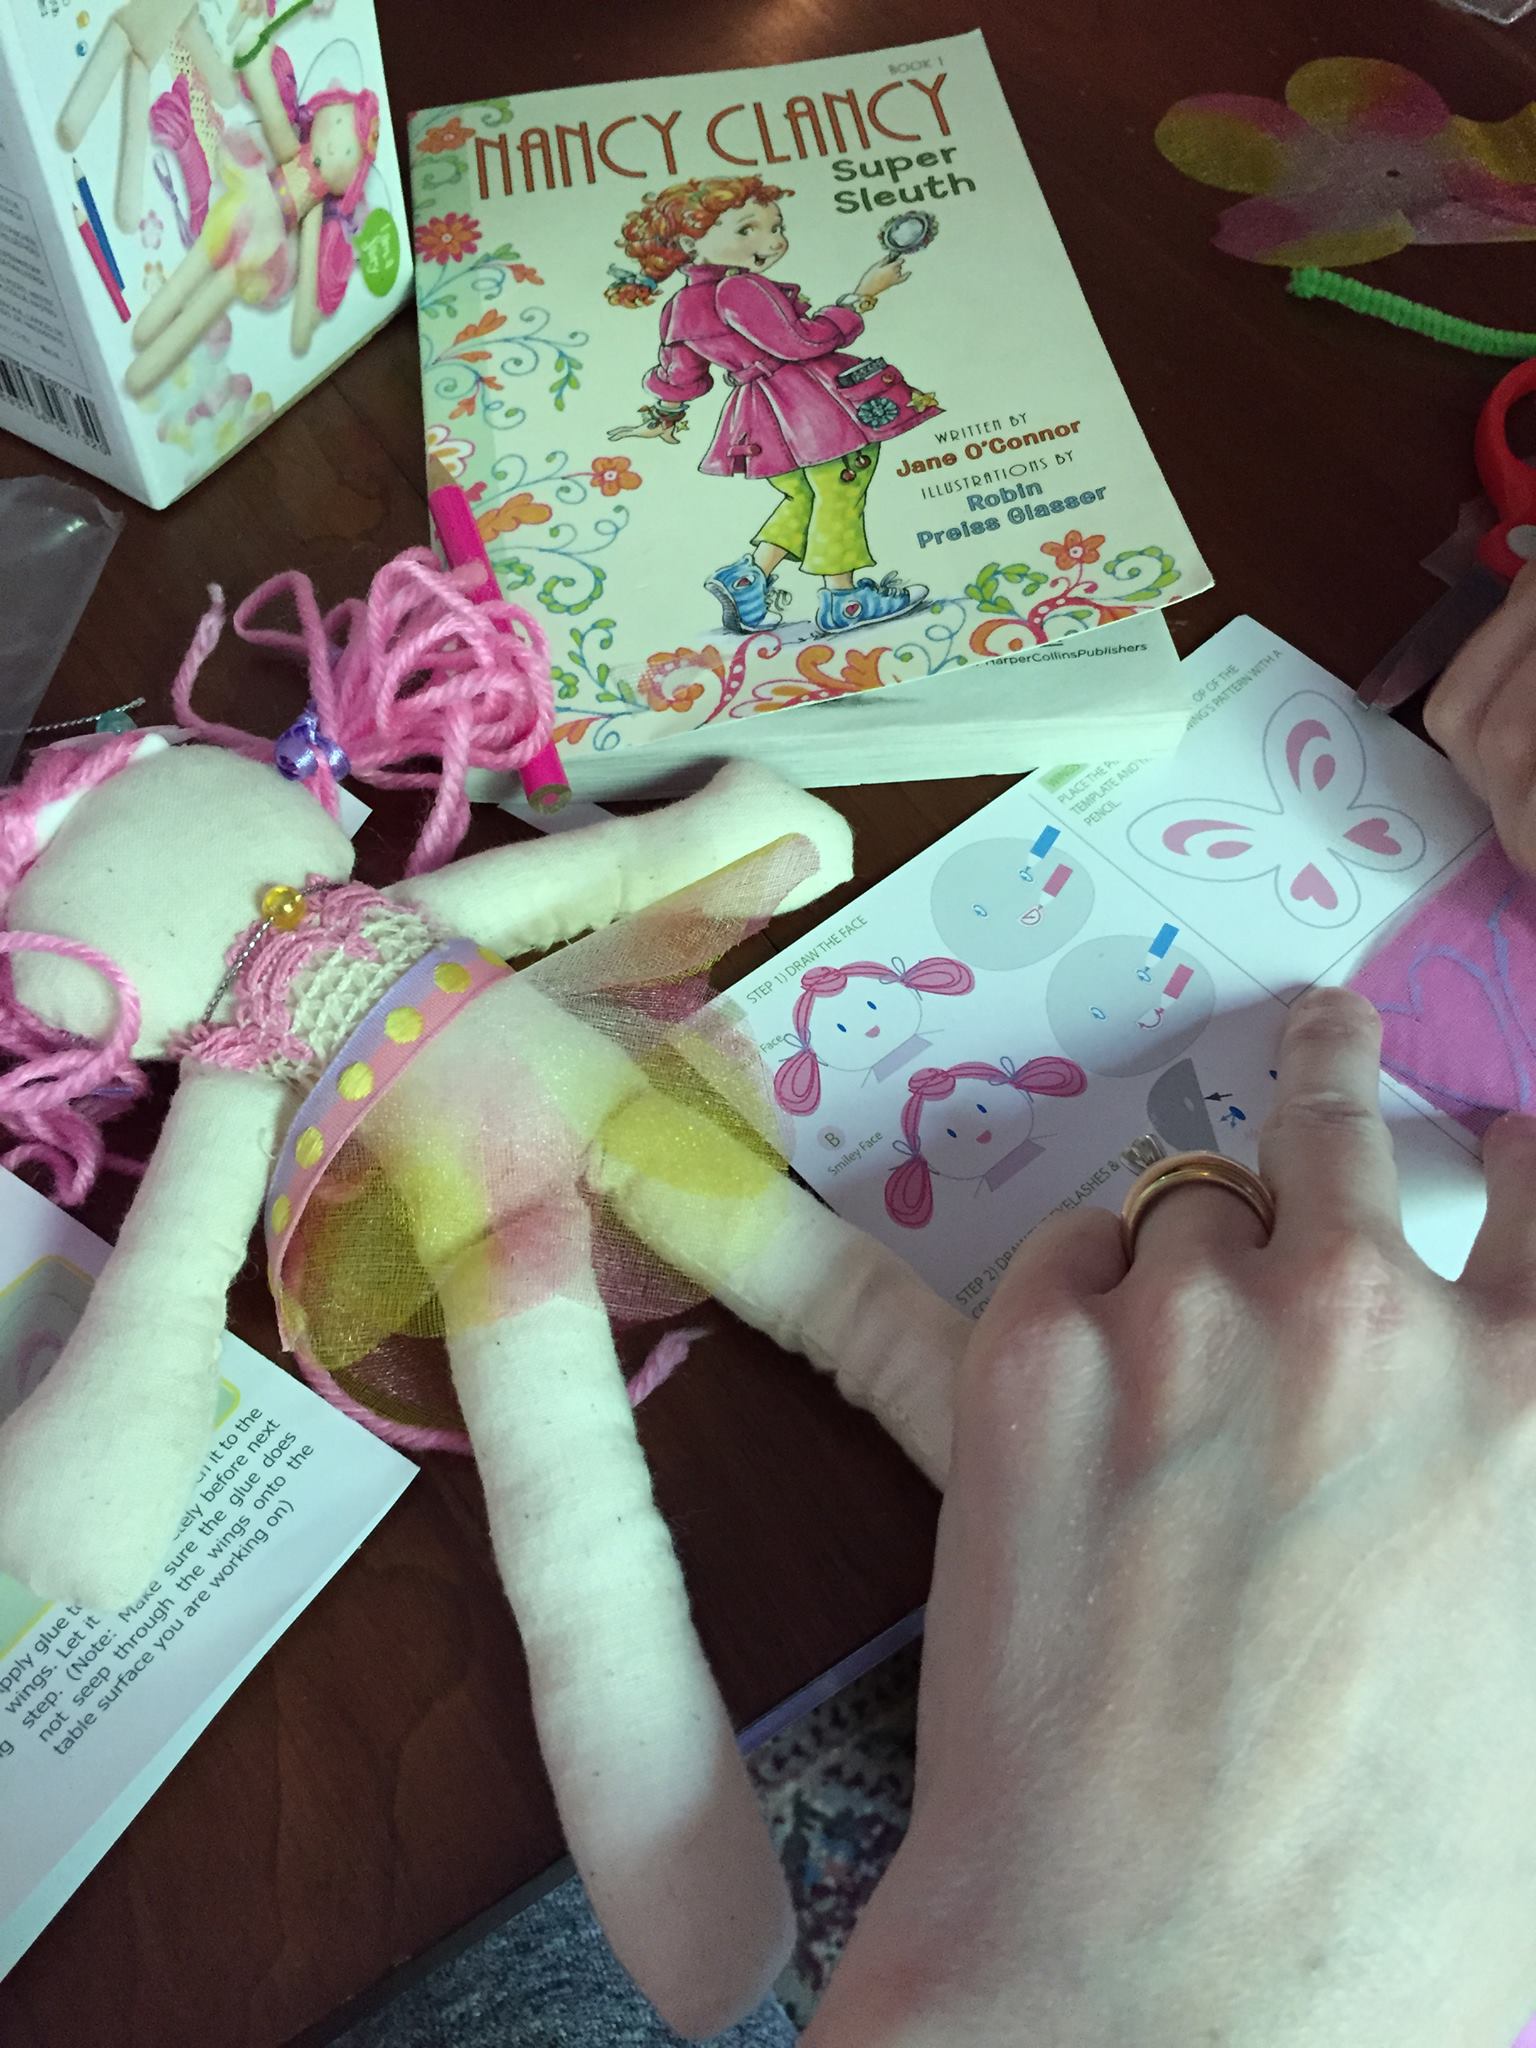
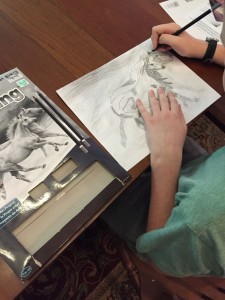
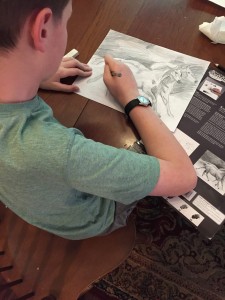
The 8 year old picked out this cute little bunny craft from Hobby Lobby.  This is a hand sewing project.  We started this out at the same time the boys began their robot project above.  We got about half-way through it in the 90 minutes we were working.  We ended up stopping and taking a break.  We had many problems along the way.  We had a lot of problems threading our needle.  I would suggest that your child will need help with that part.  There are also some issues if you don’t know how to do a blanket stitch.  The instructions weren’t great and you will need *some* sewing knowledge.  You do not have to be a seamstress to make this bunny – but you will need some background on hand sewing.

Easy Kids Crafts for Busy Moms

Easy Kids Crafts for Busy Moms

Easy Kids Crafts for Busy Moms♥♥ – Ease of Use

♥♥♥♥ – Learning/Crafting Creativity


Easy Kids Crafts for Busy Moms

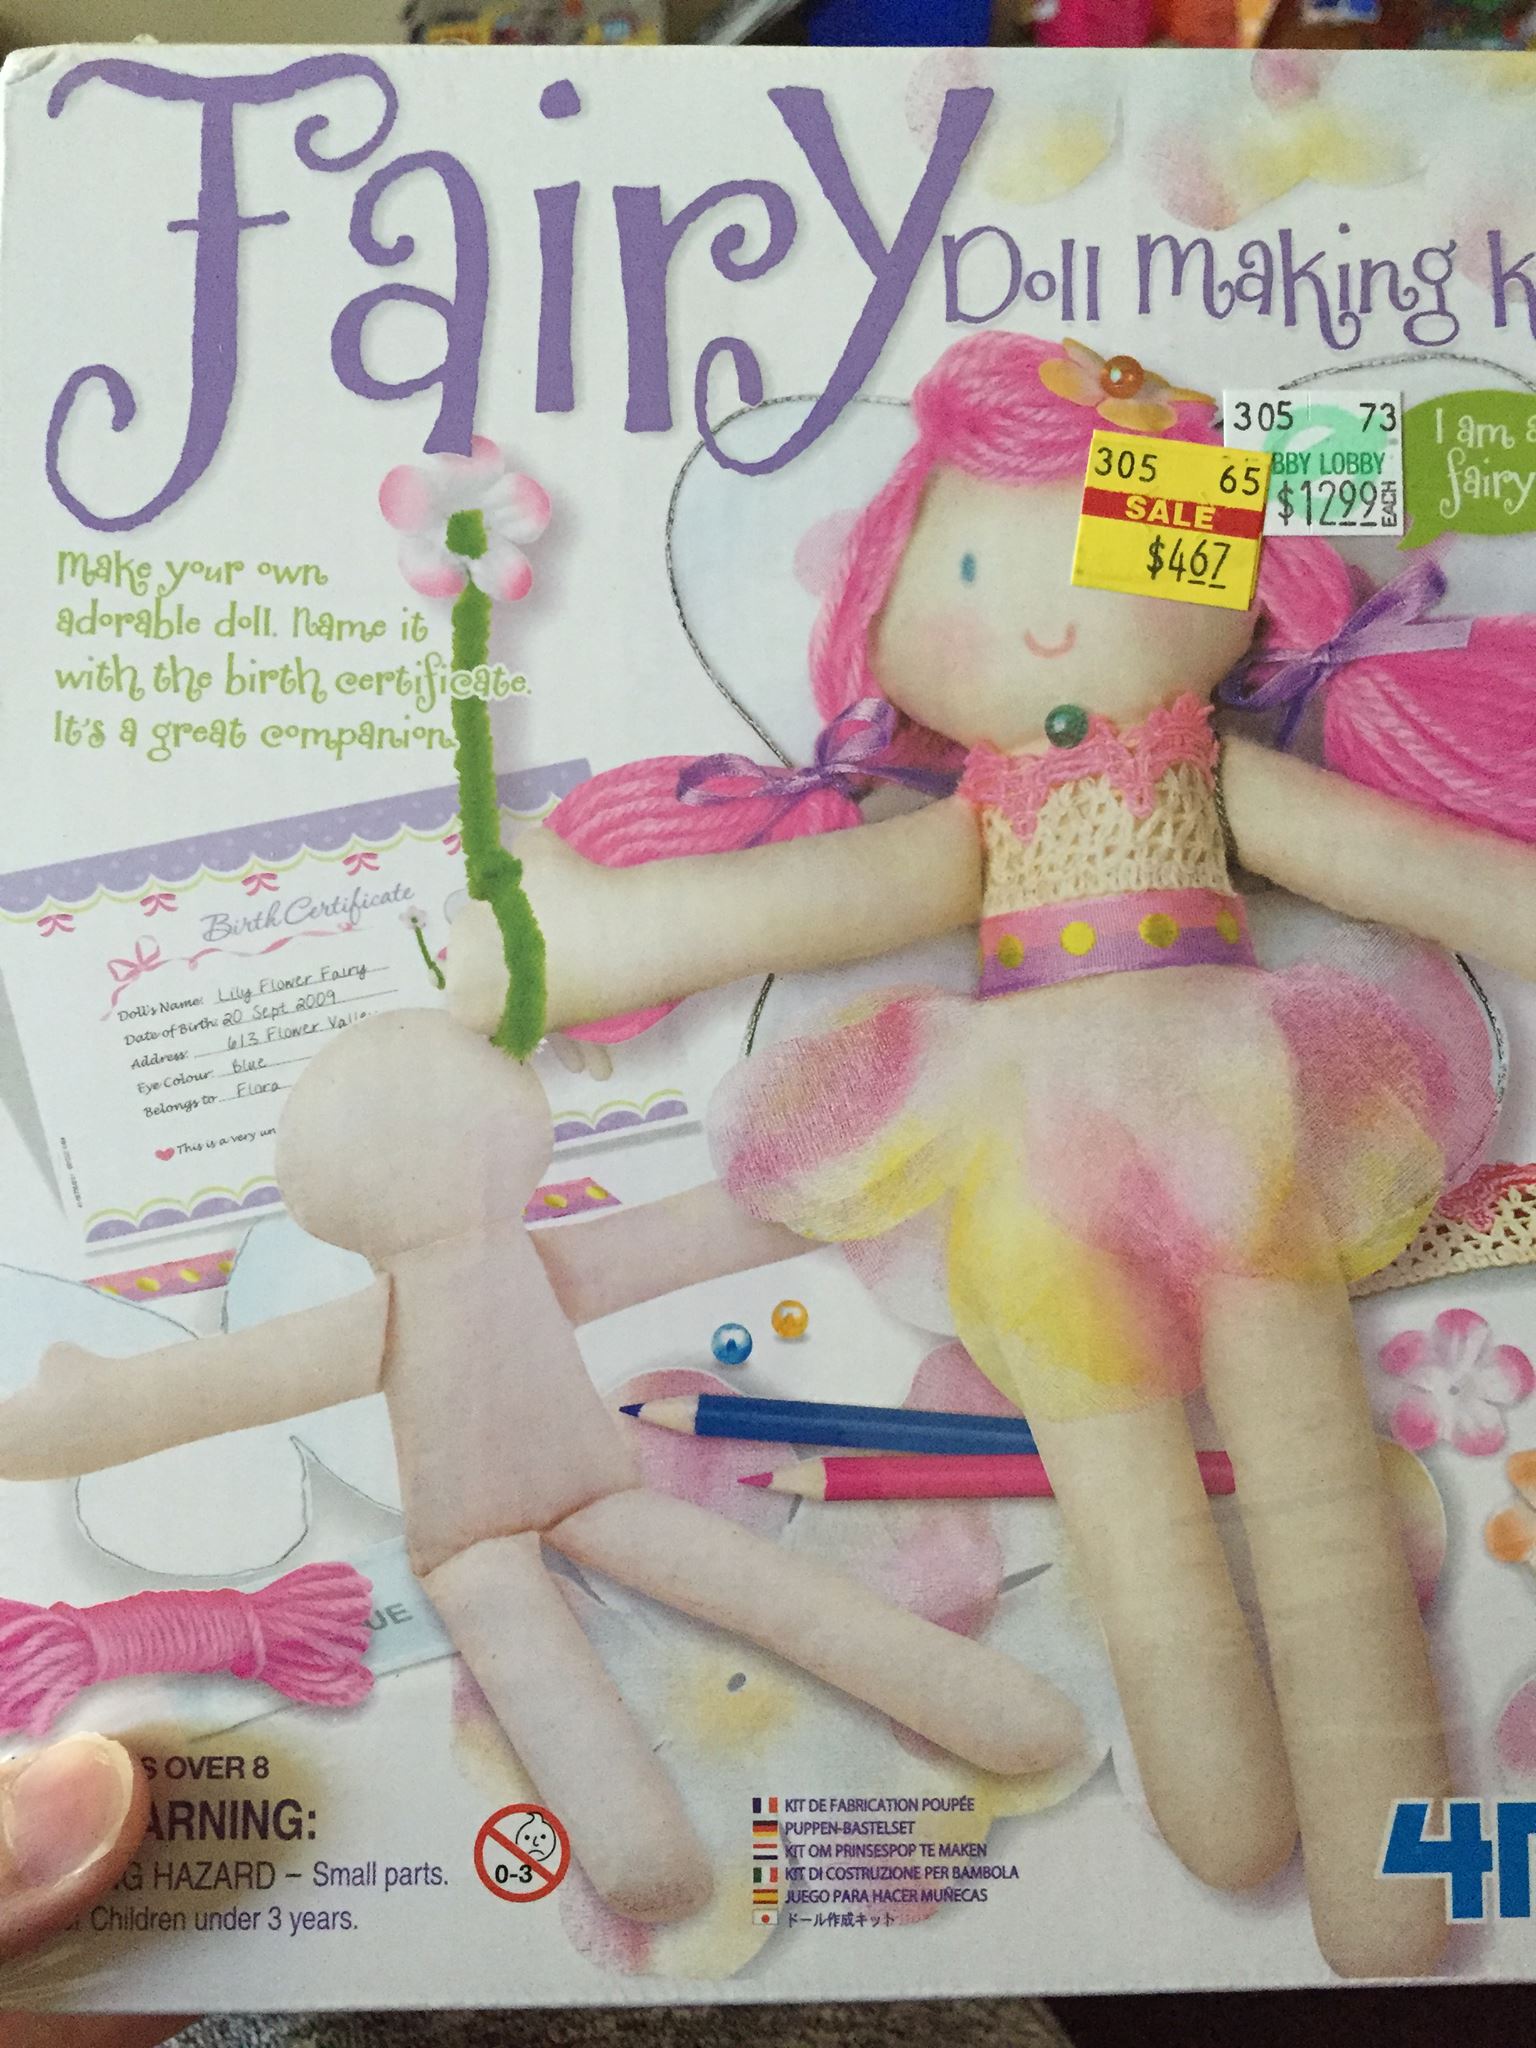
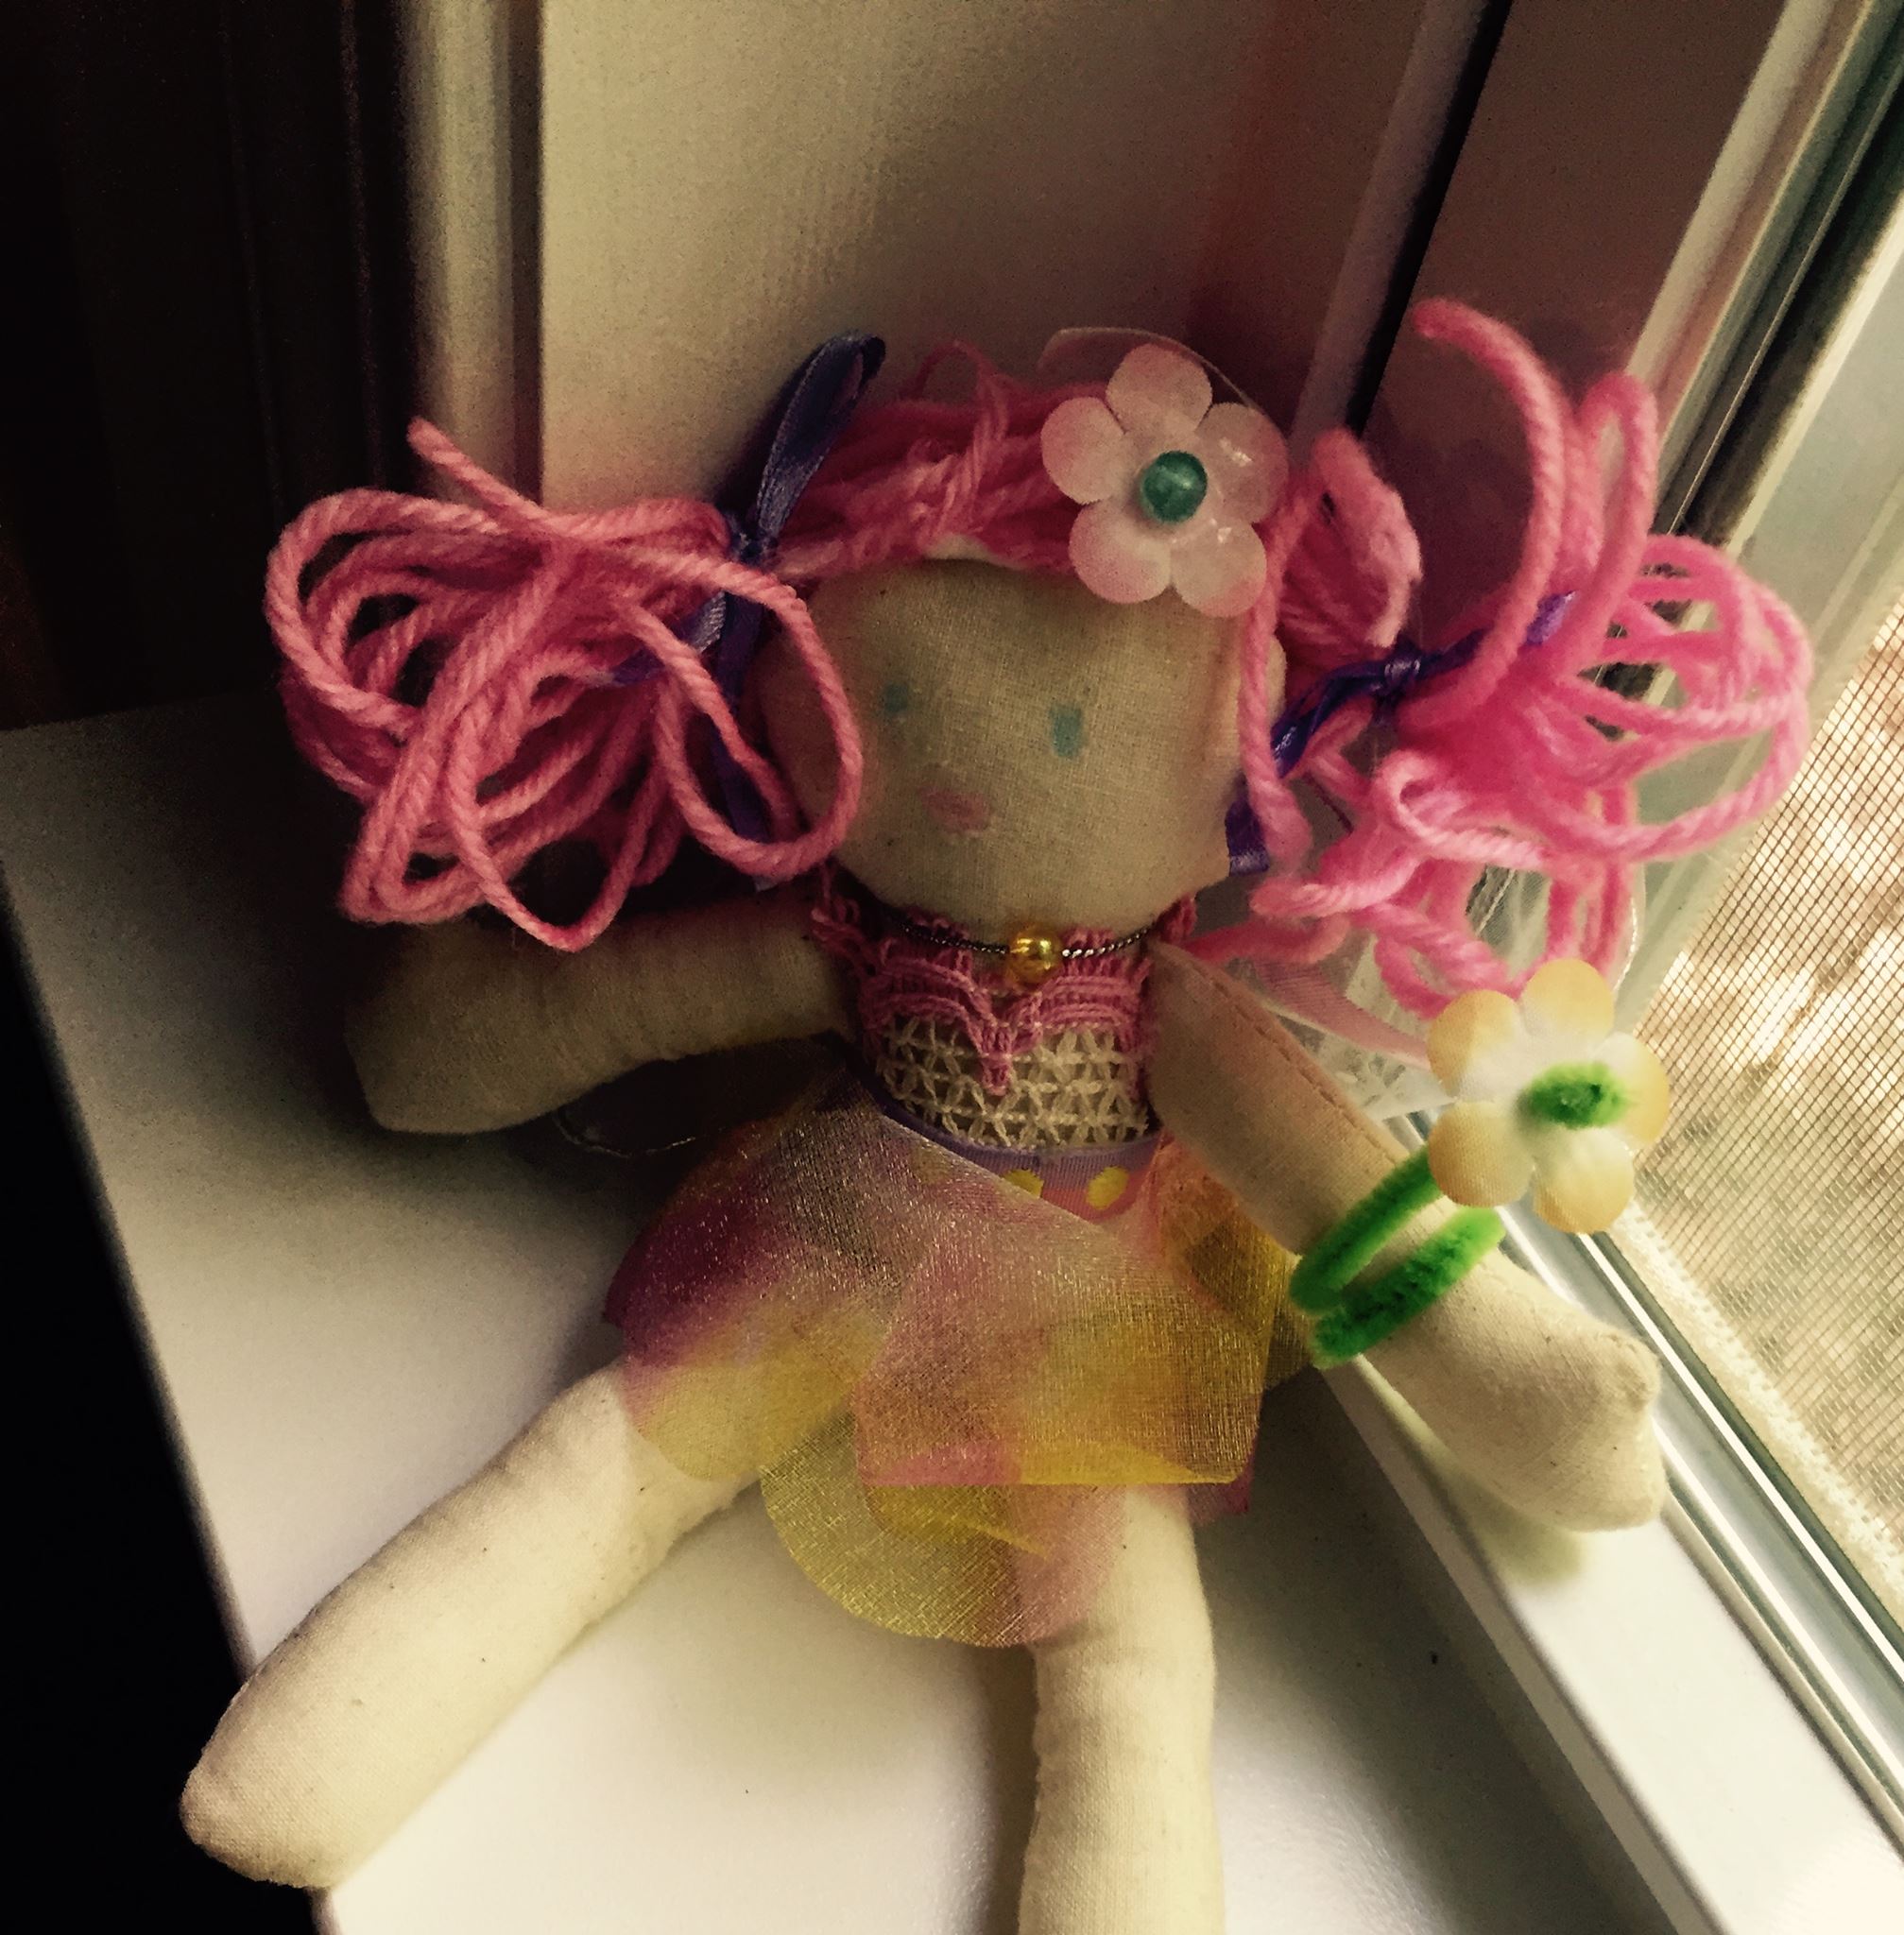
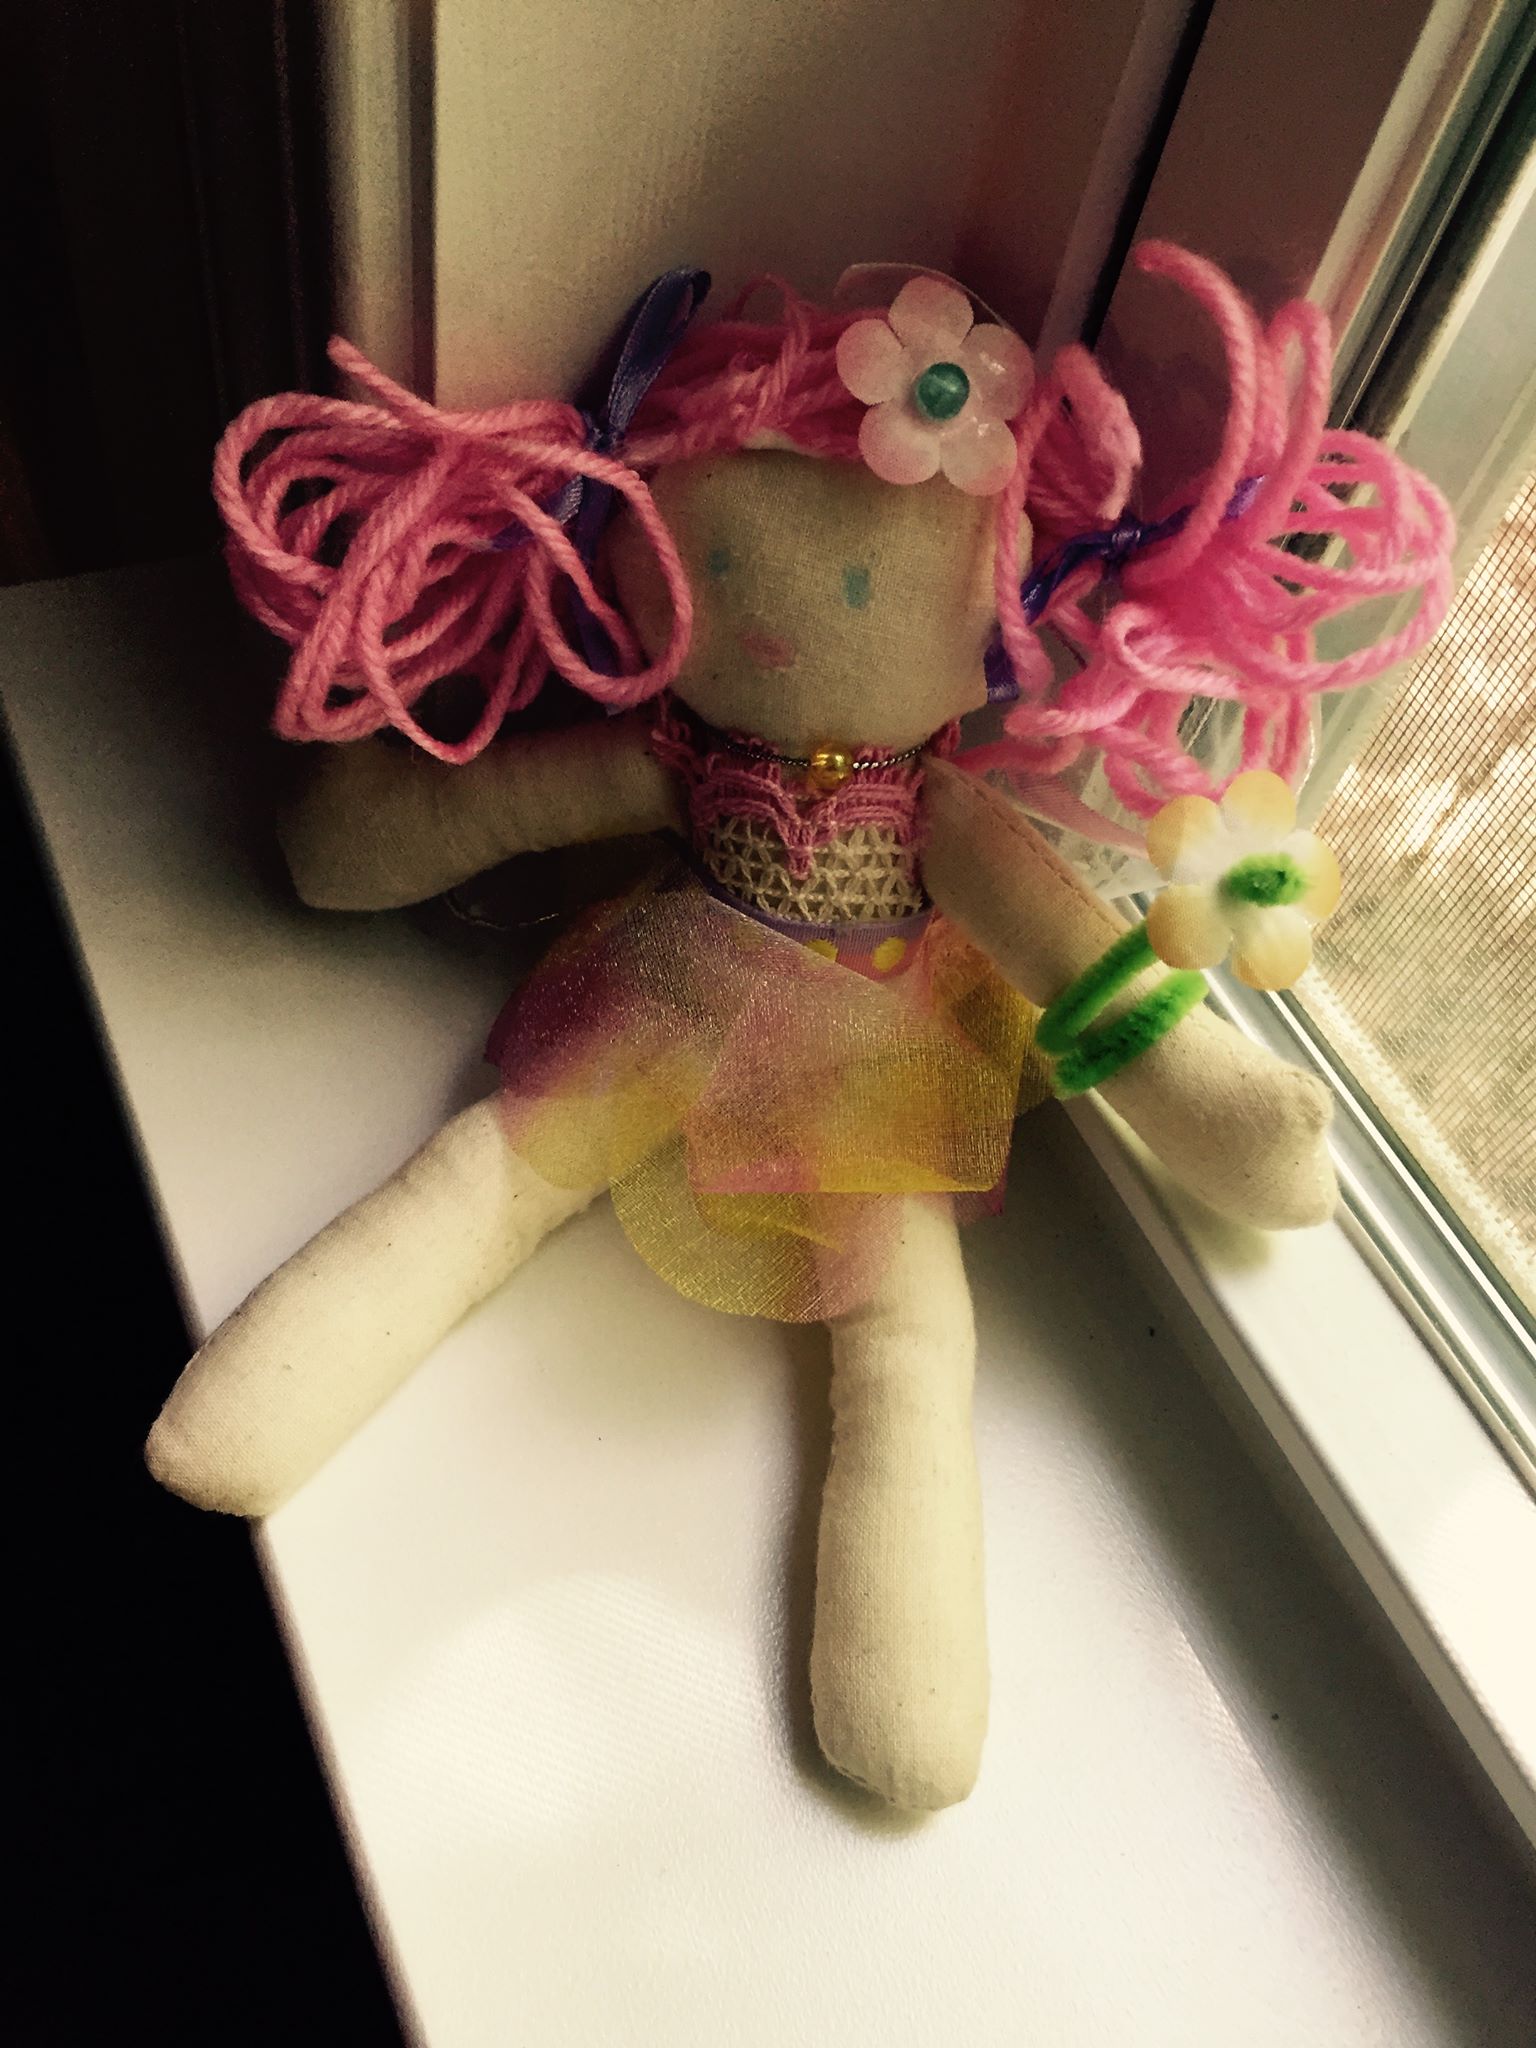
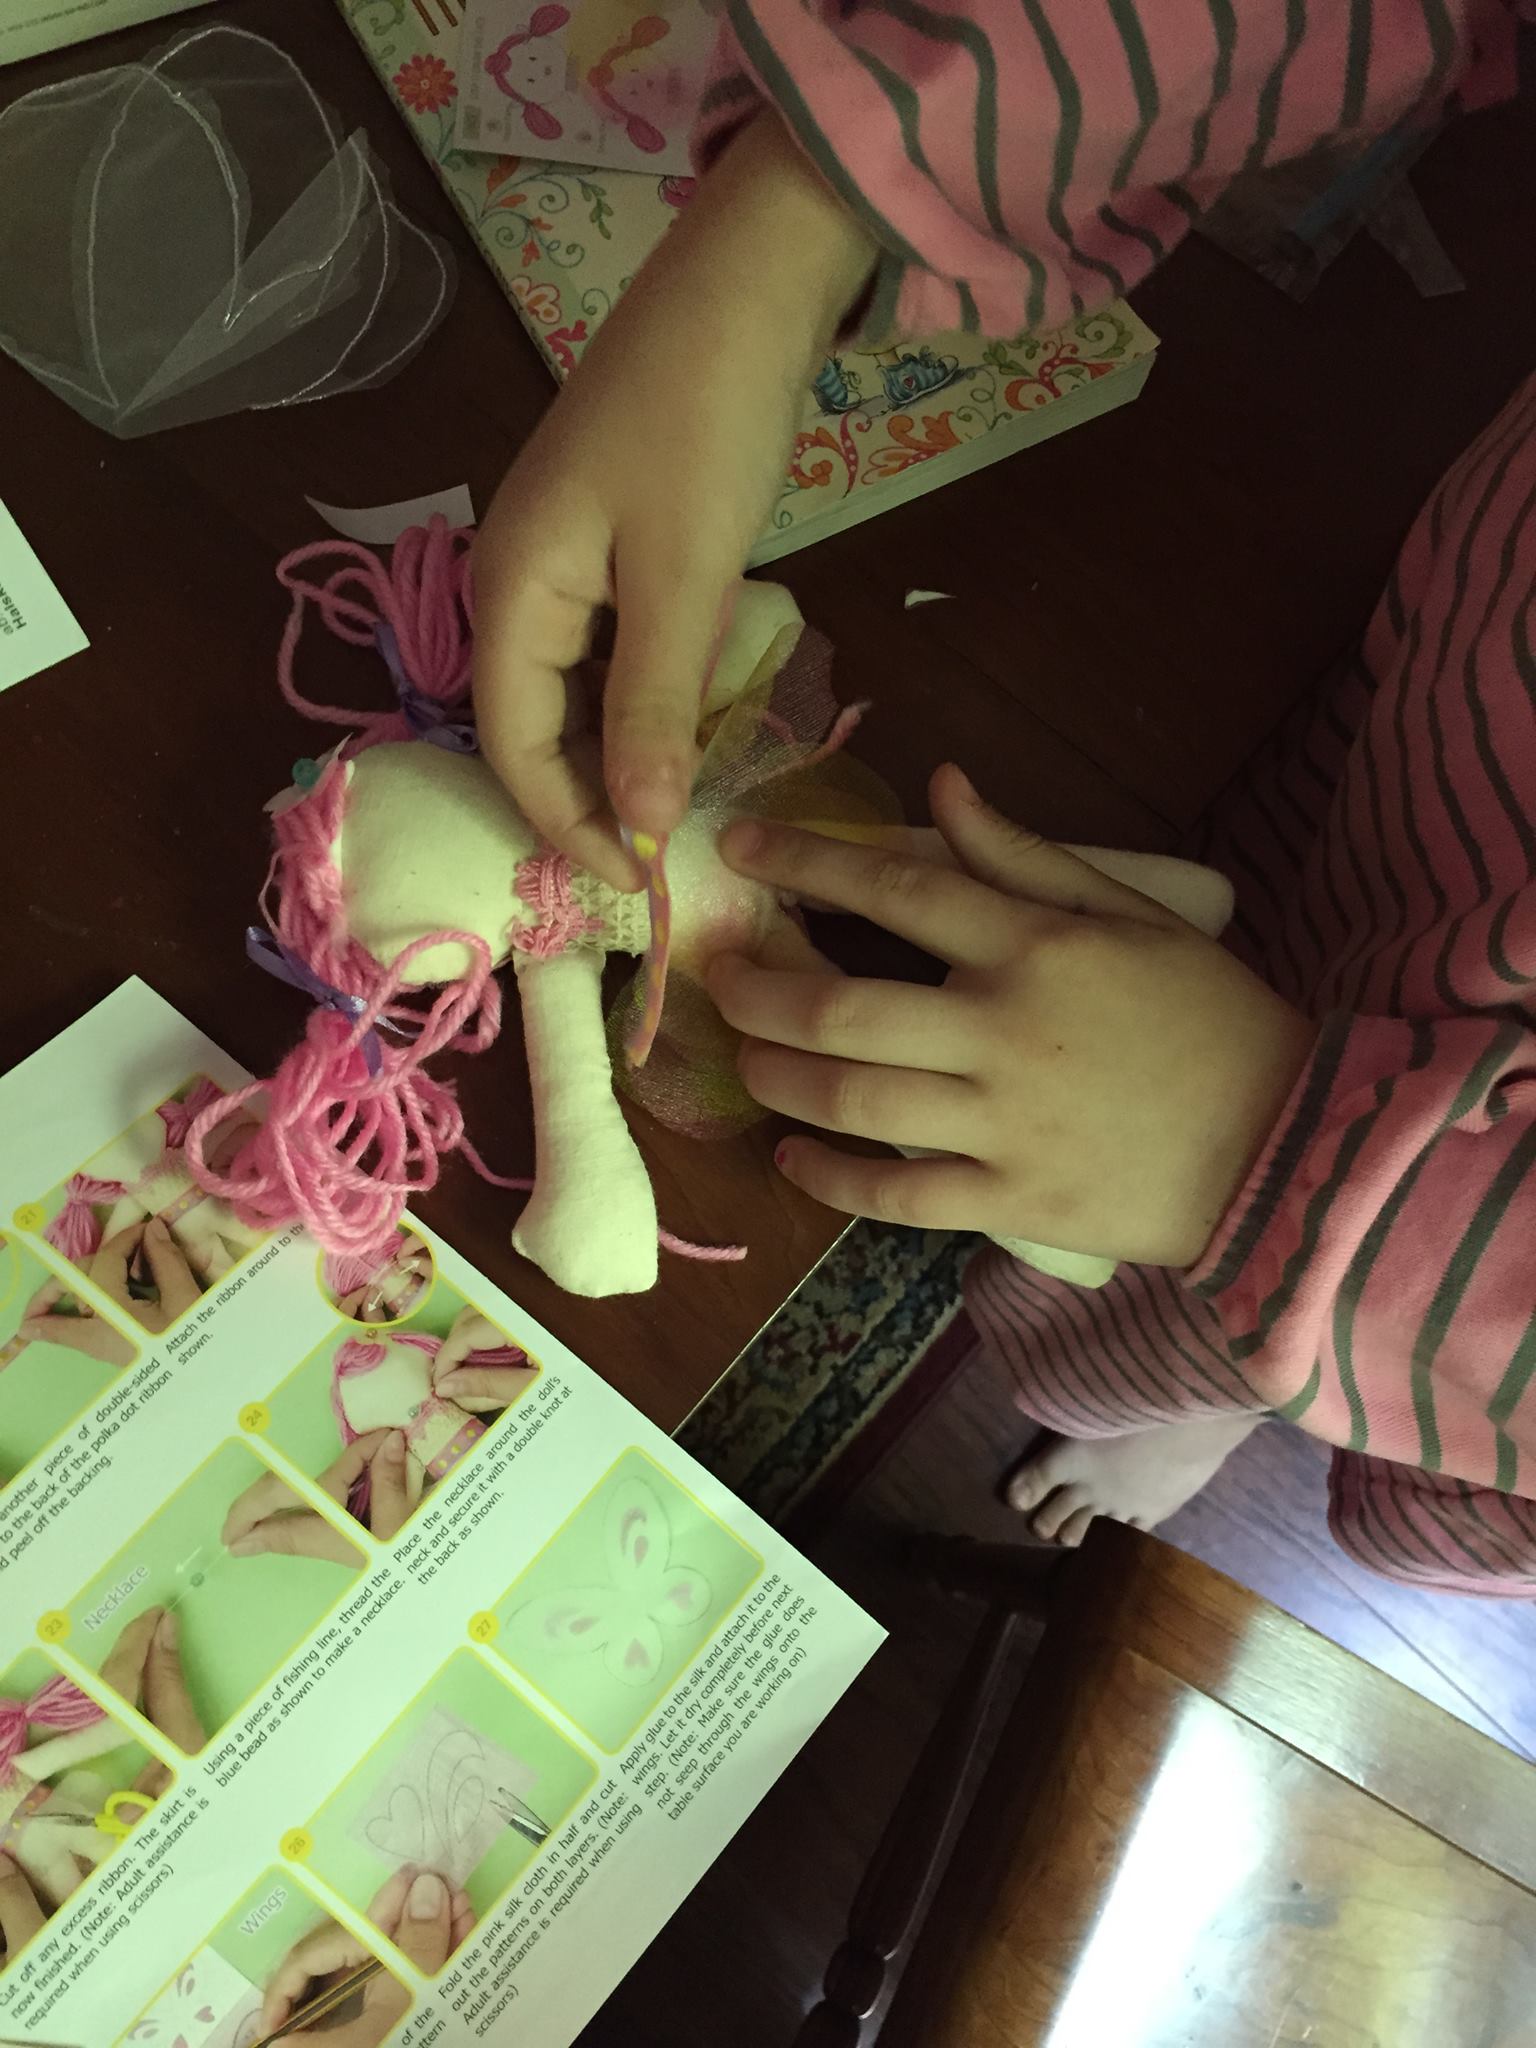
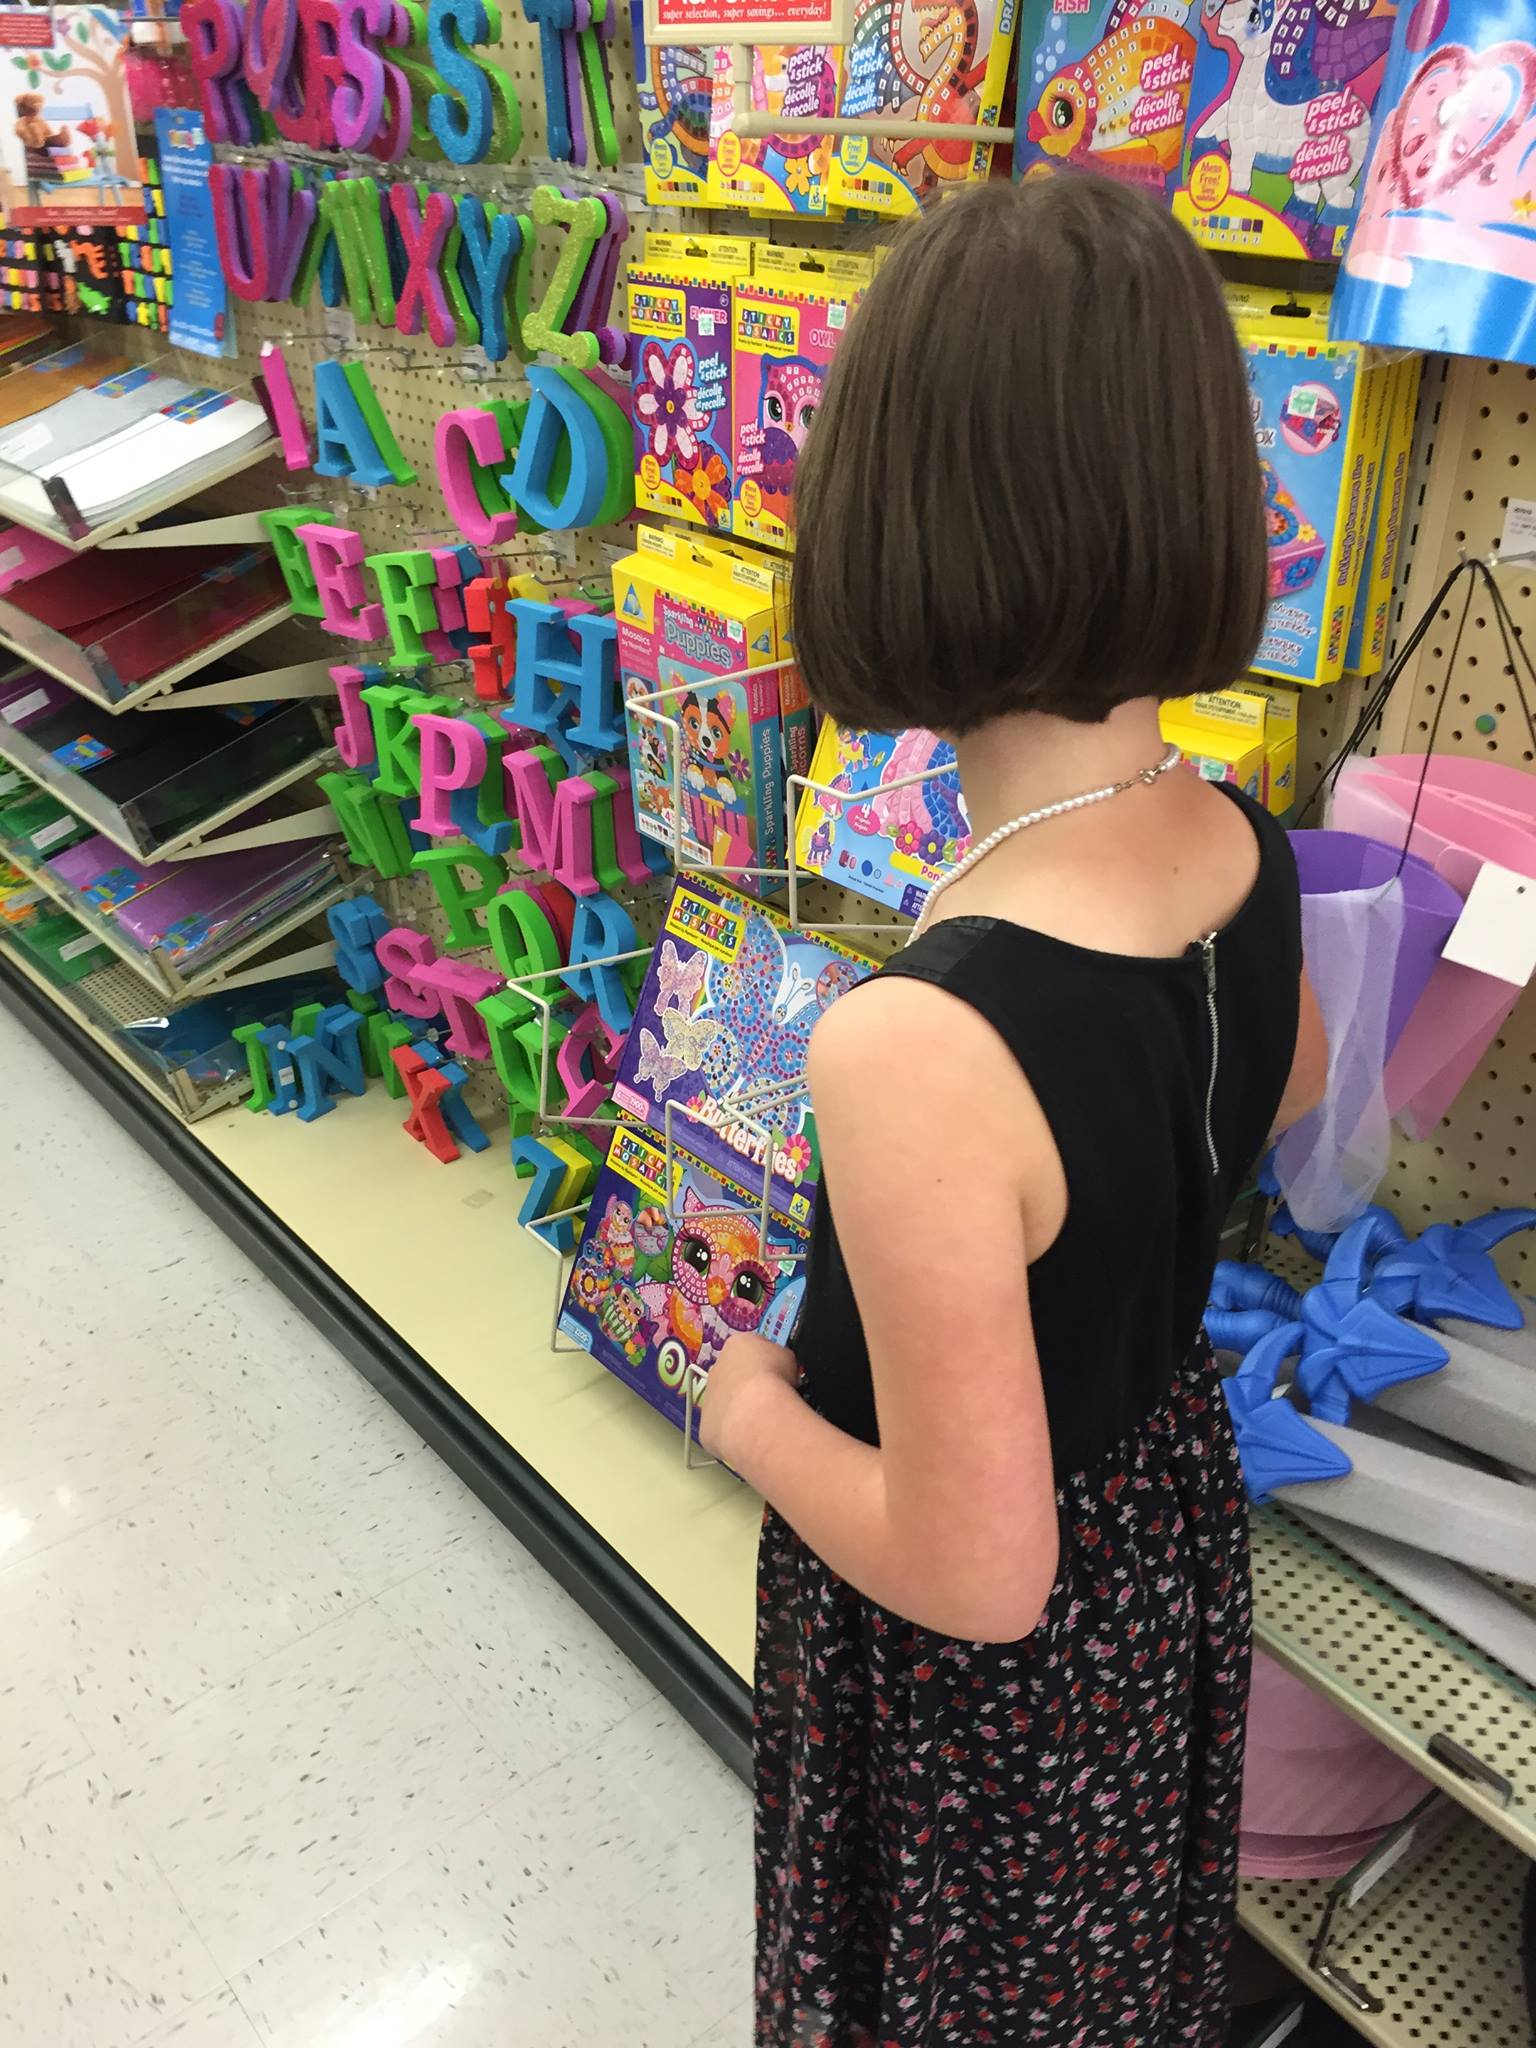
We came across this fairy making doll kit on the clearance rack of the craft store.  It looked fun!  This is a little bit more mom-intensive than I was hoping.
Easy Kids Crafts for Busy Moms
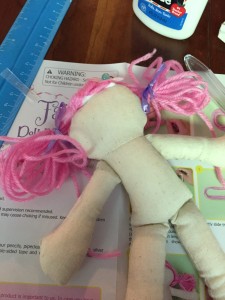
However, it was honestly a lot easier than the bunny.  No sewing required – just gluing, taping, cutting, measuring and drawing.  My daughter was able to read the directions herself.  A younger child would need much more help.  Nevertheless, this was a fun and creative kit that she and I enjoyed.  It took about an hour to complete.  The directions were pretty straightforward, too, which is always nice.

Easy Kids Crafts for Busy Moms

Easy Kids Crafts for Busy Moms

Easy Kids Crafts for Busy Moms

♥♥♥♥ Ease of Use

♥♥♥♥ Creativity


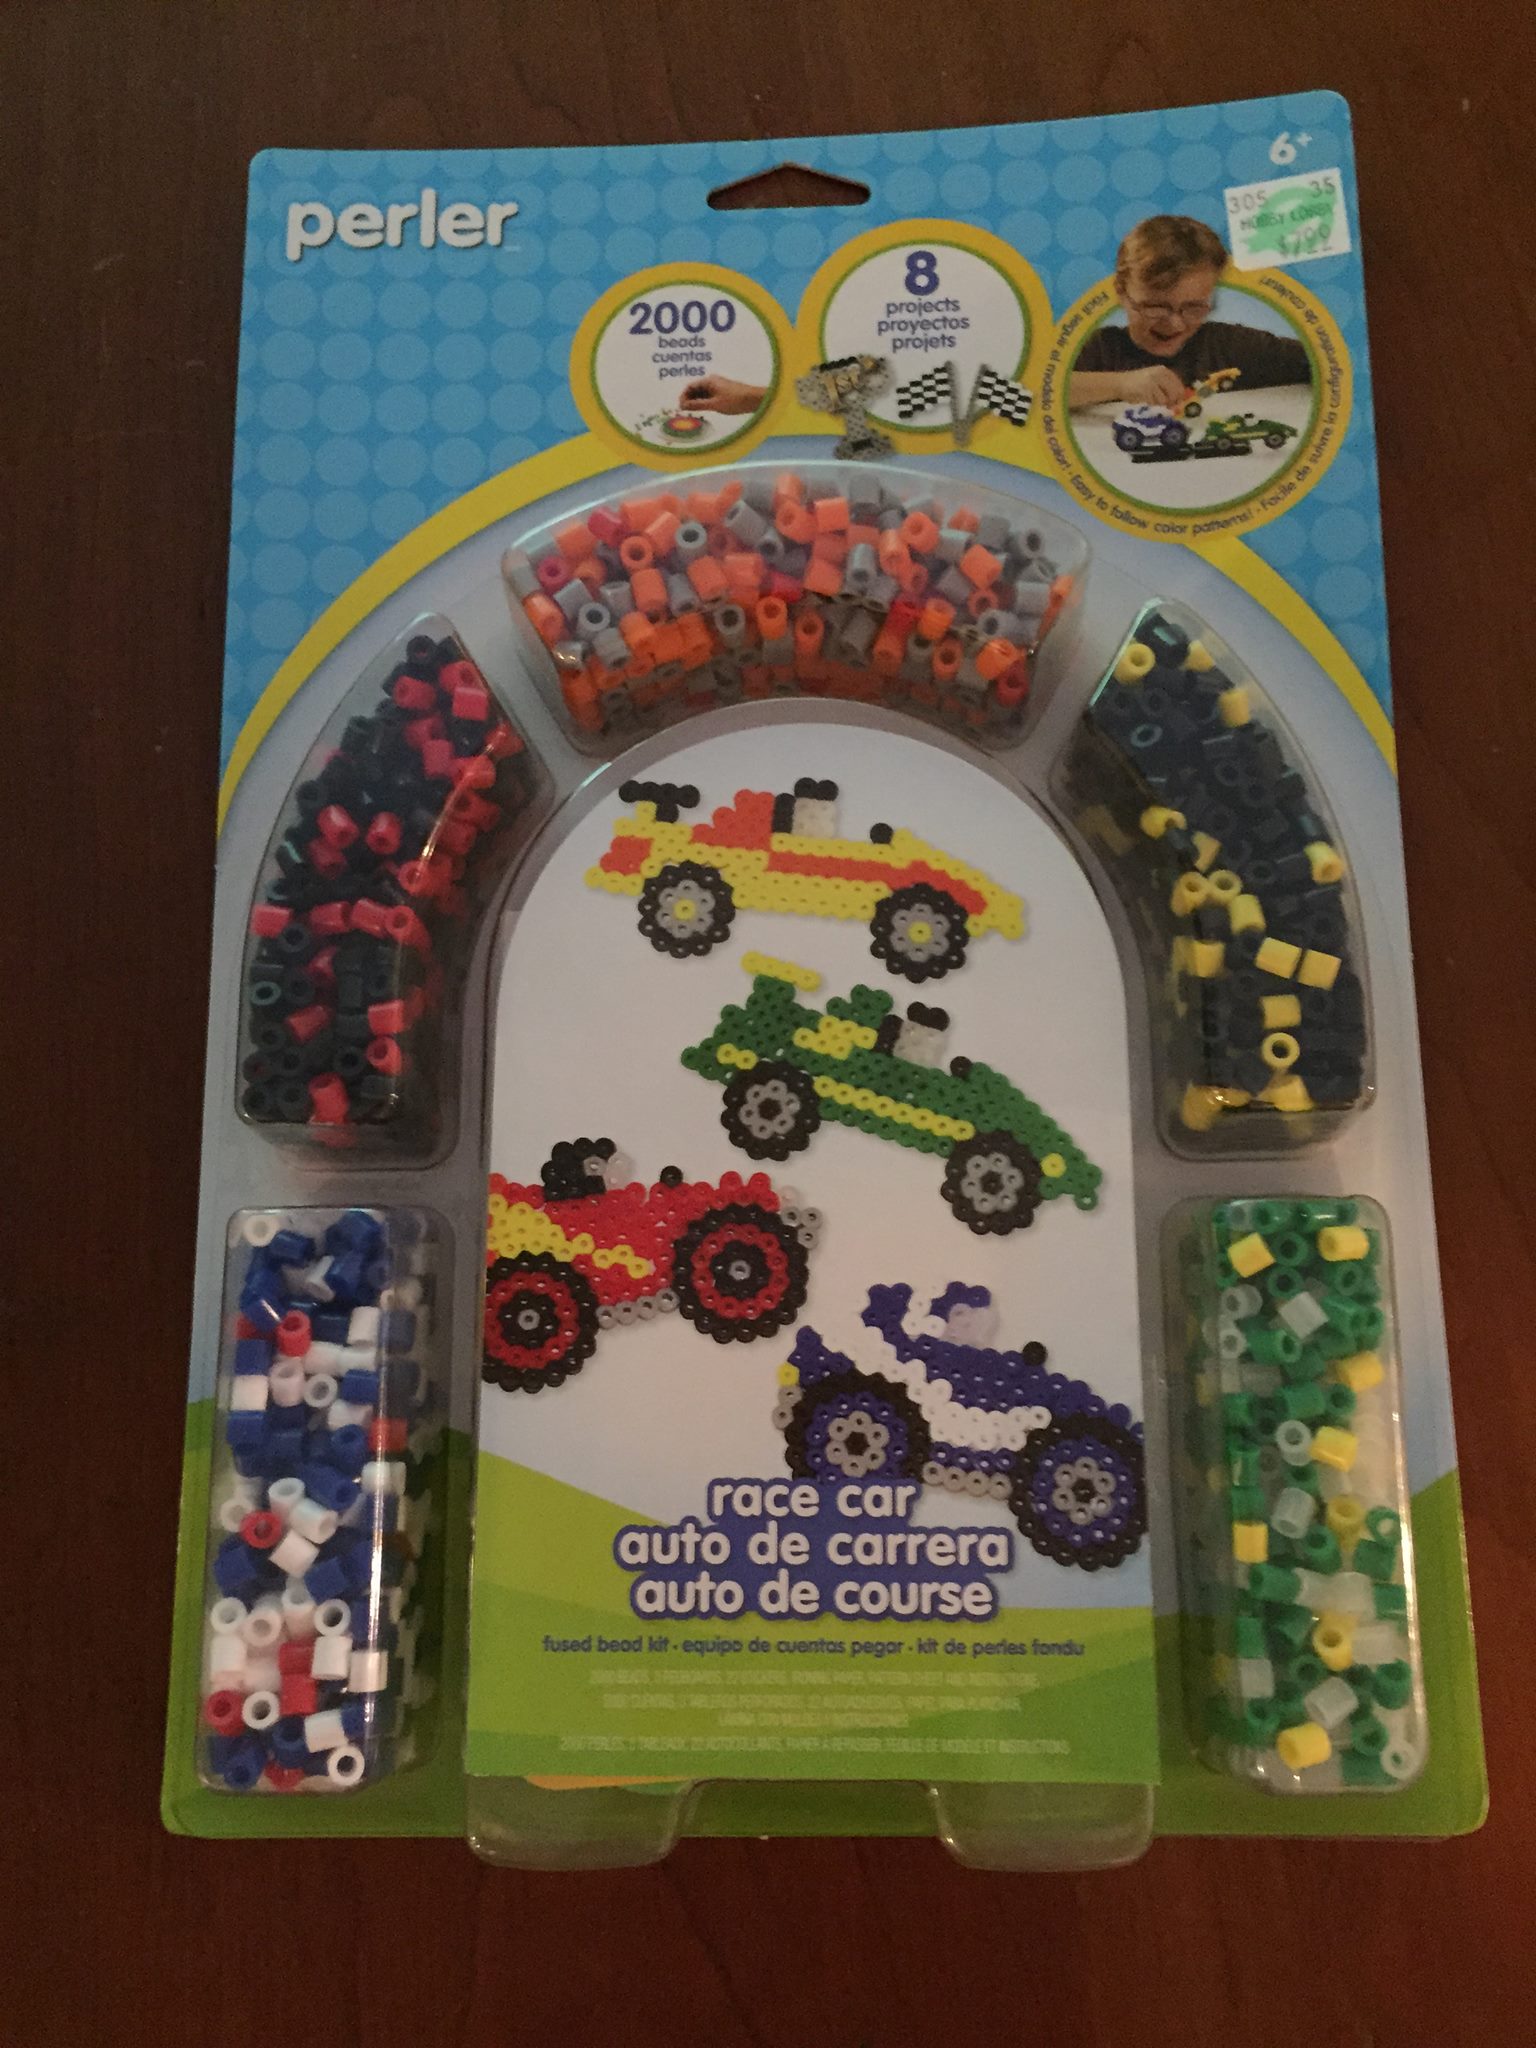
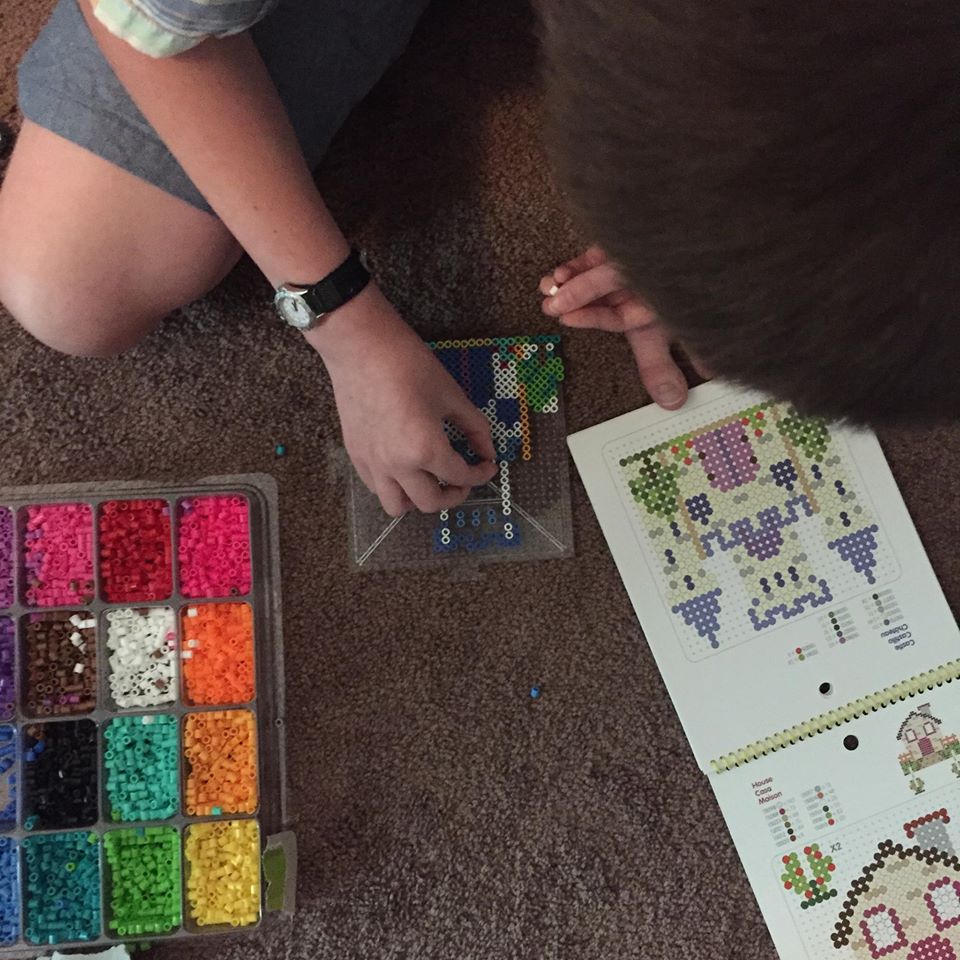
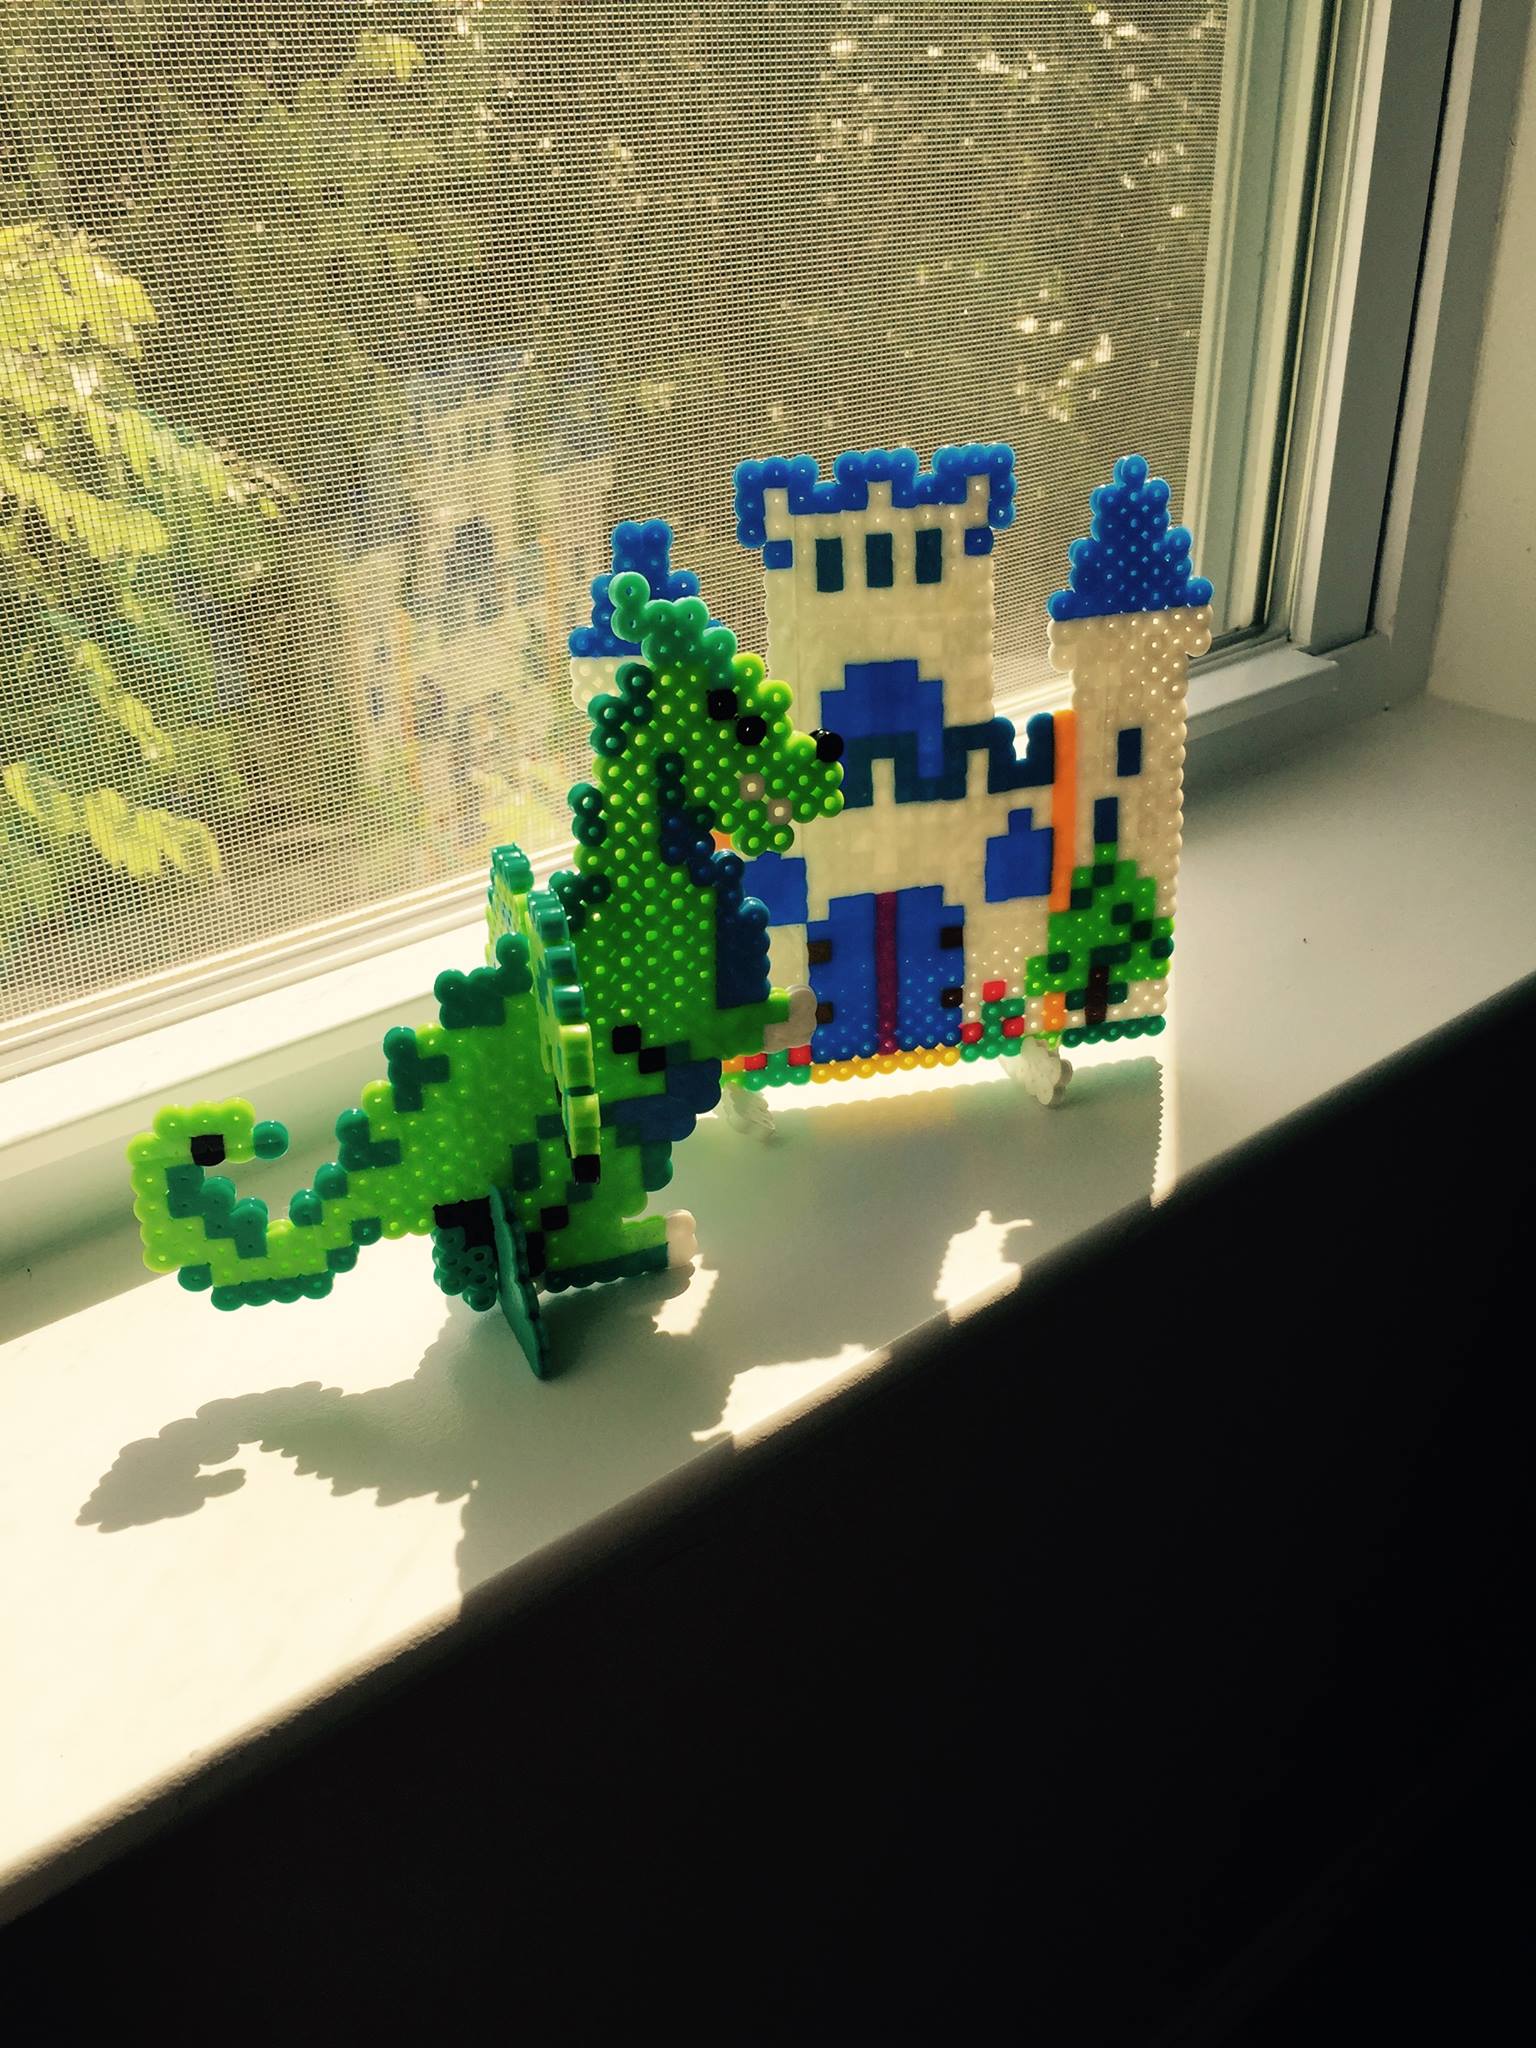
We then tried Perler Fused Beads.  The 4 year old, 8 year old, and the 10 year old tried it.  The kit we bought had race car shapes in it.  They made flags, two race cars and a motorcycle.  

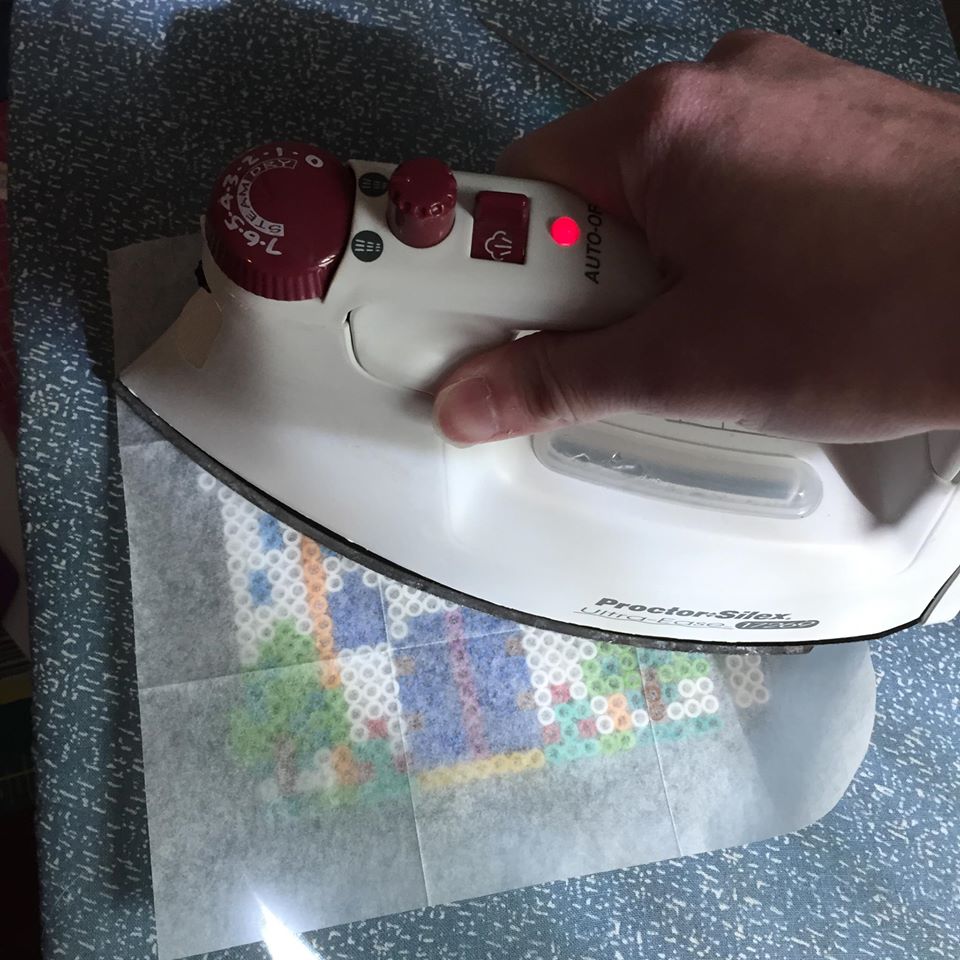
If you’ve never seen these beads before, they are small beads (most likely a choking hazard for younger kids) but they come with a small peg board either in a shape of an object (like a car) or in a plainer shape like a square that you can use to make a variety of things.  Once you place your beads where you want them, it is time to use a hot iron with a small piece of protective parchment paper (included) to iron them until they slightly melt.  When this happens the beads fuse together and they are set together.  Off comes the pegboard and once cooled, the children can play with their new toy.

Easy Kids Crafts for Busy Moms

Easy Kids Crafts for Busy Moms

Easy Kids Crafts for Busy Moms

Easy Kids Crafts for Busy Moms


Easy Kids Crafts for Busy Moms


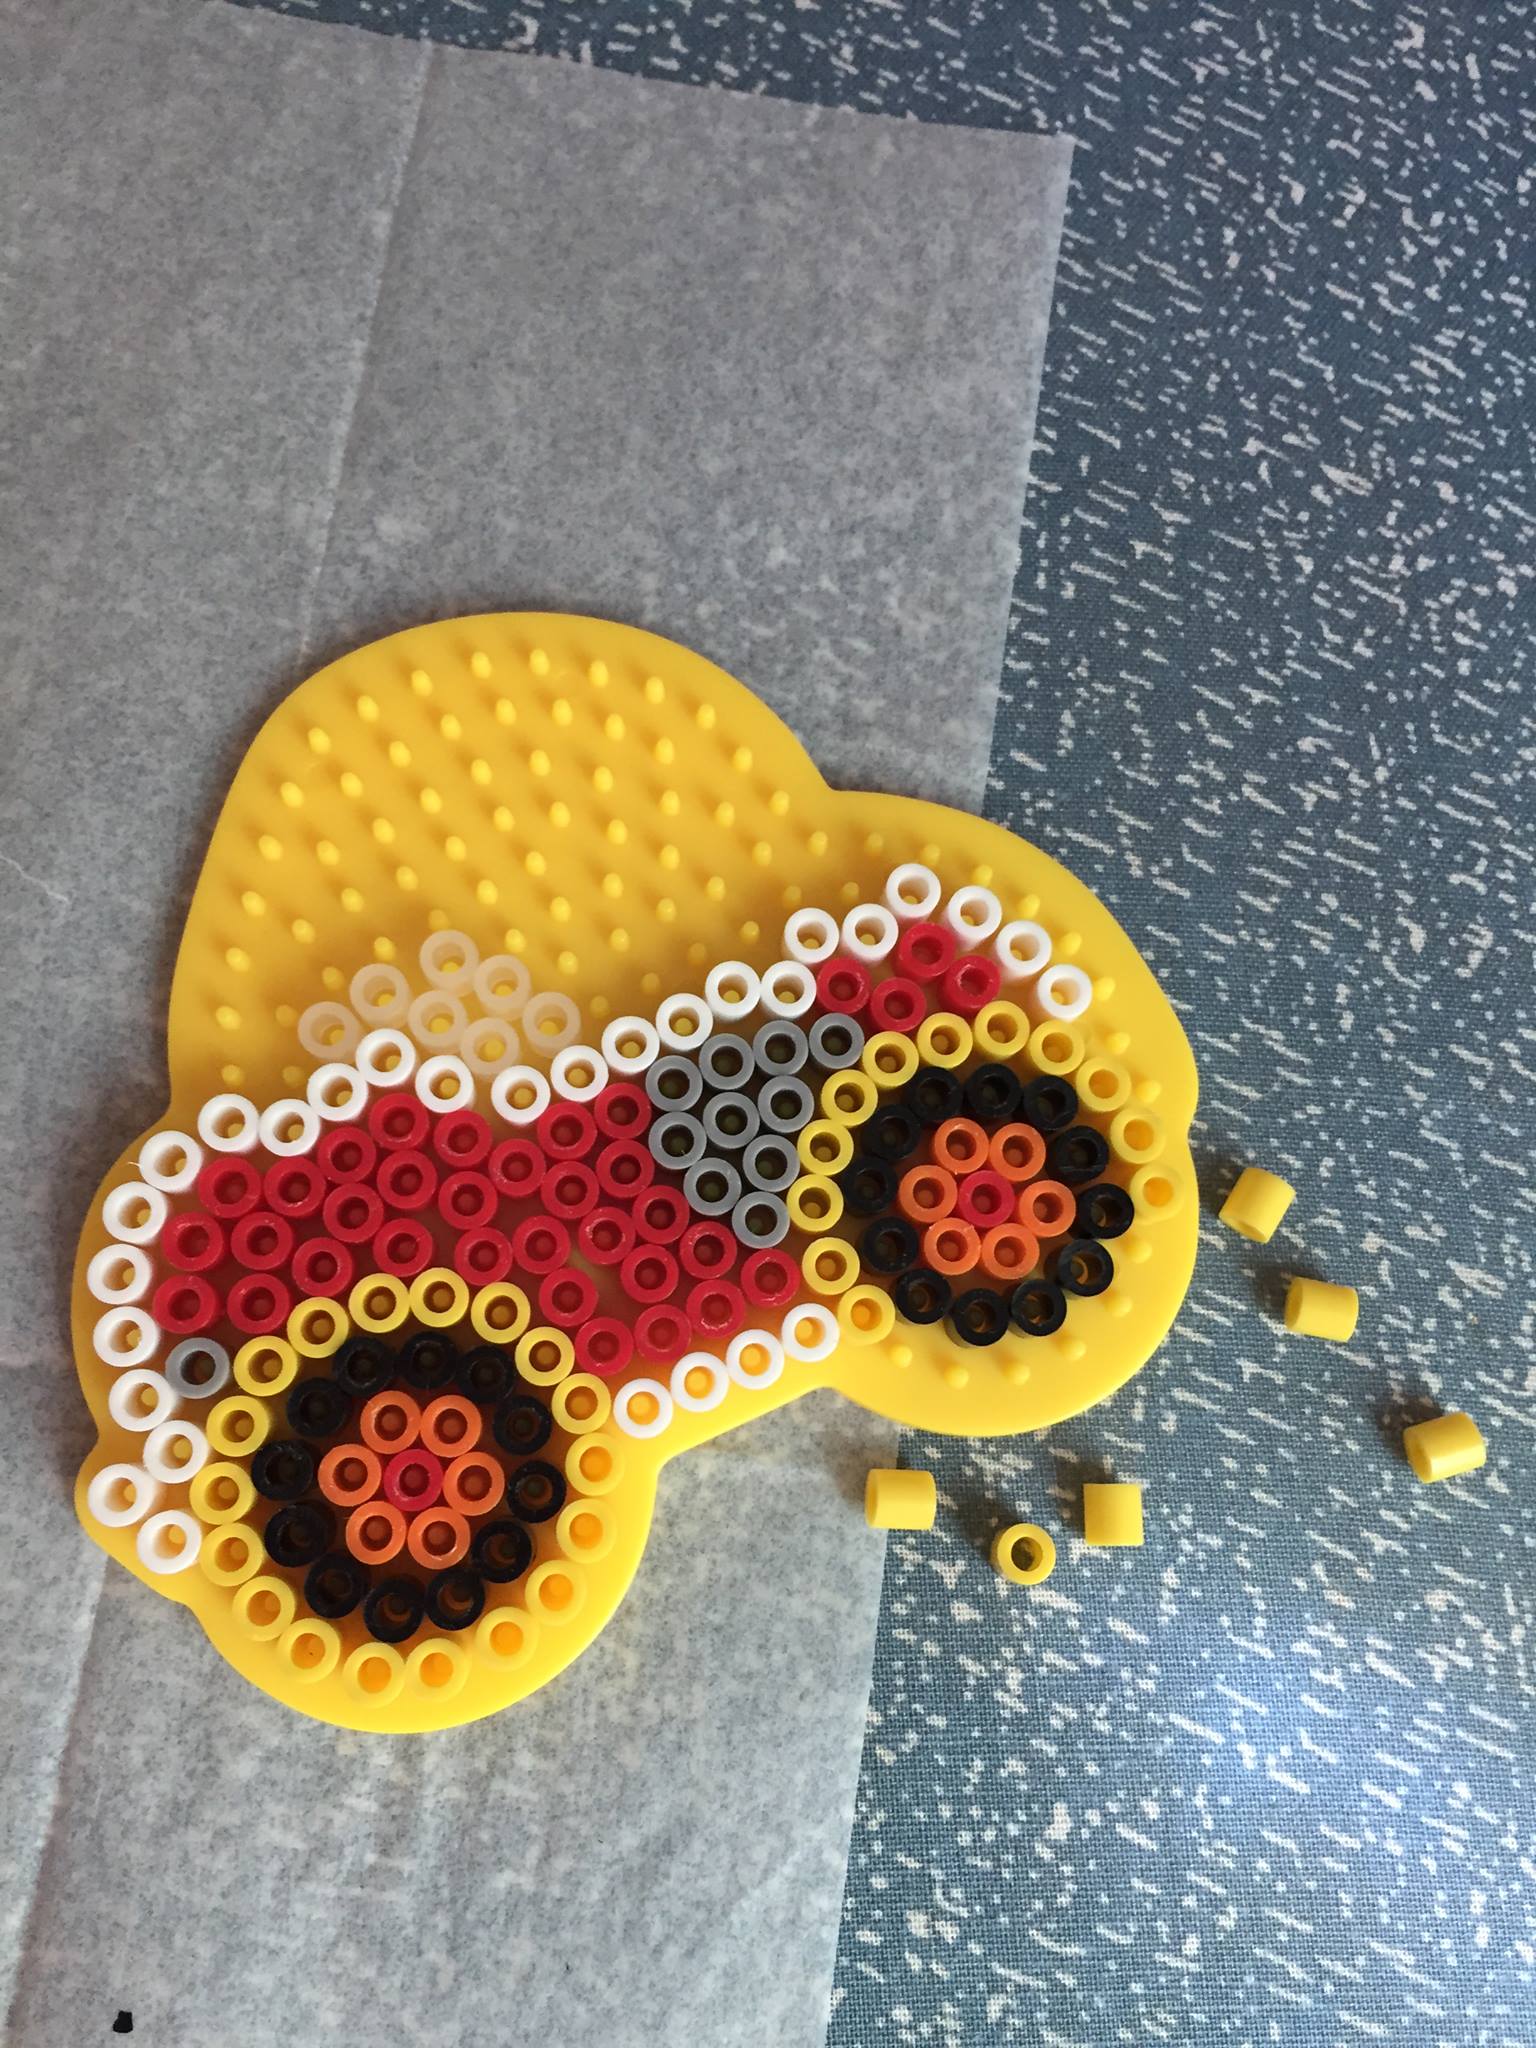
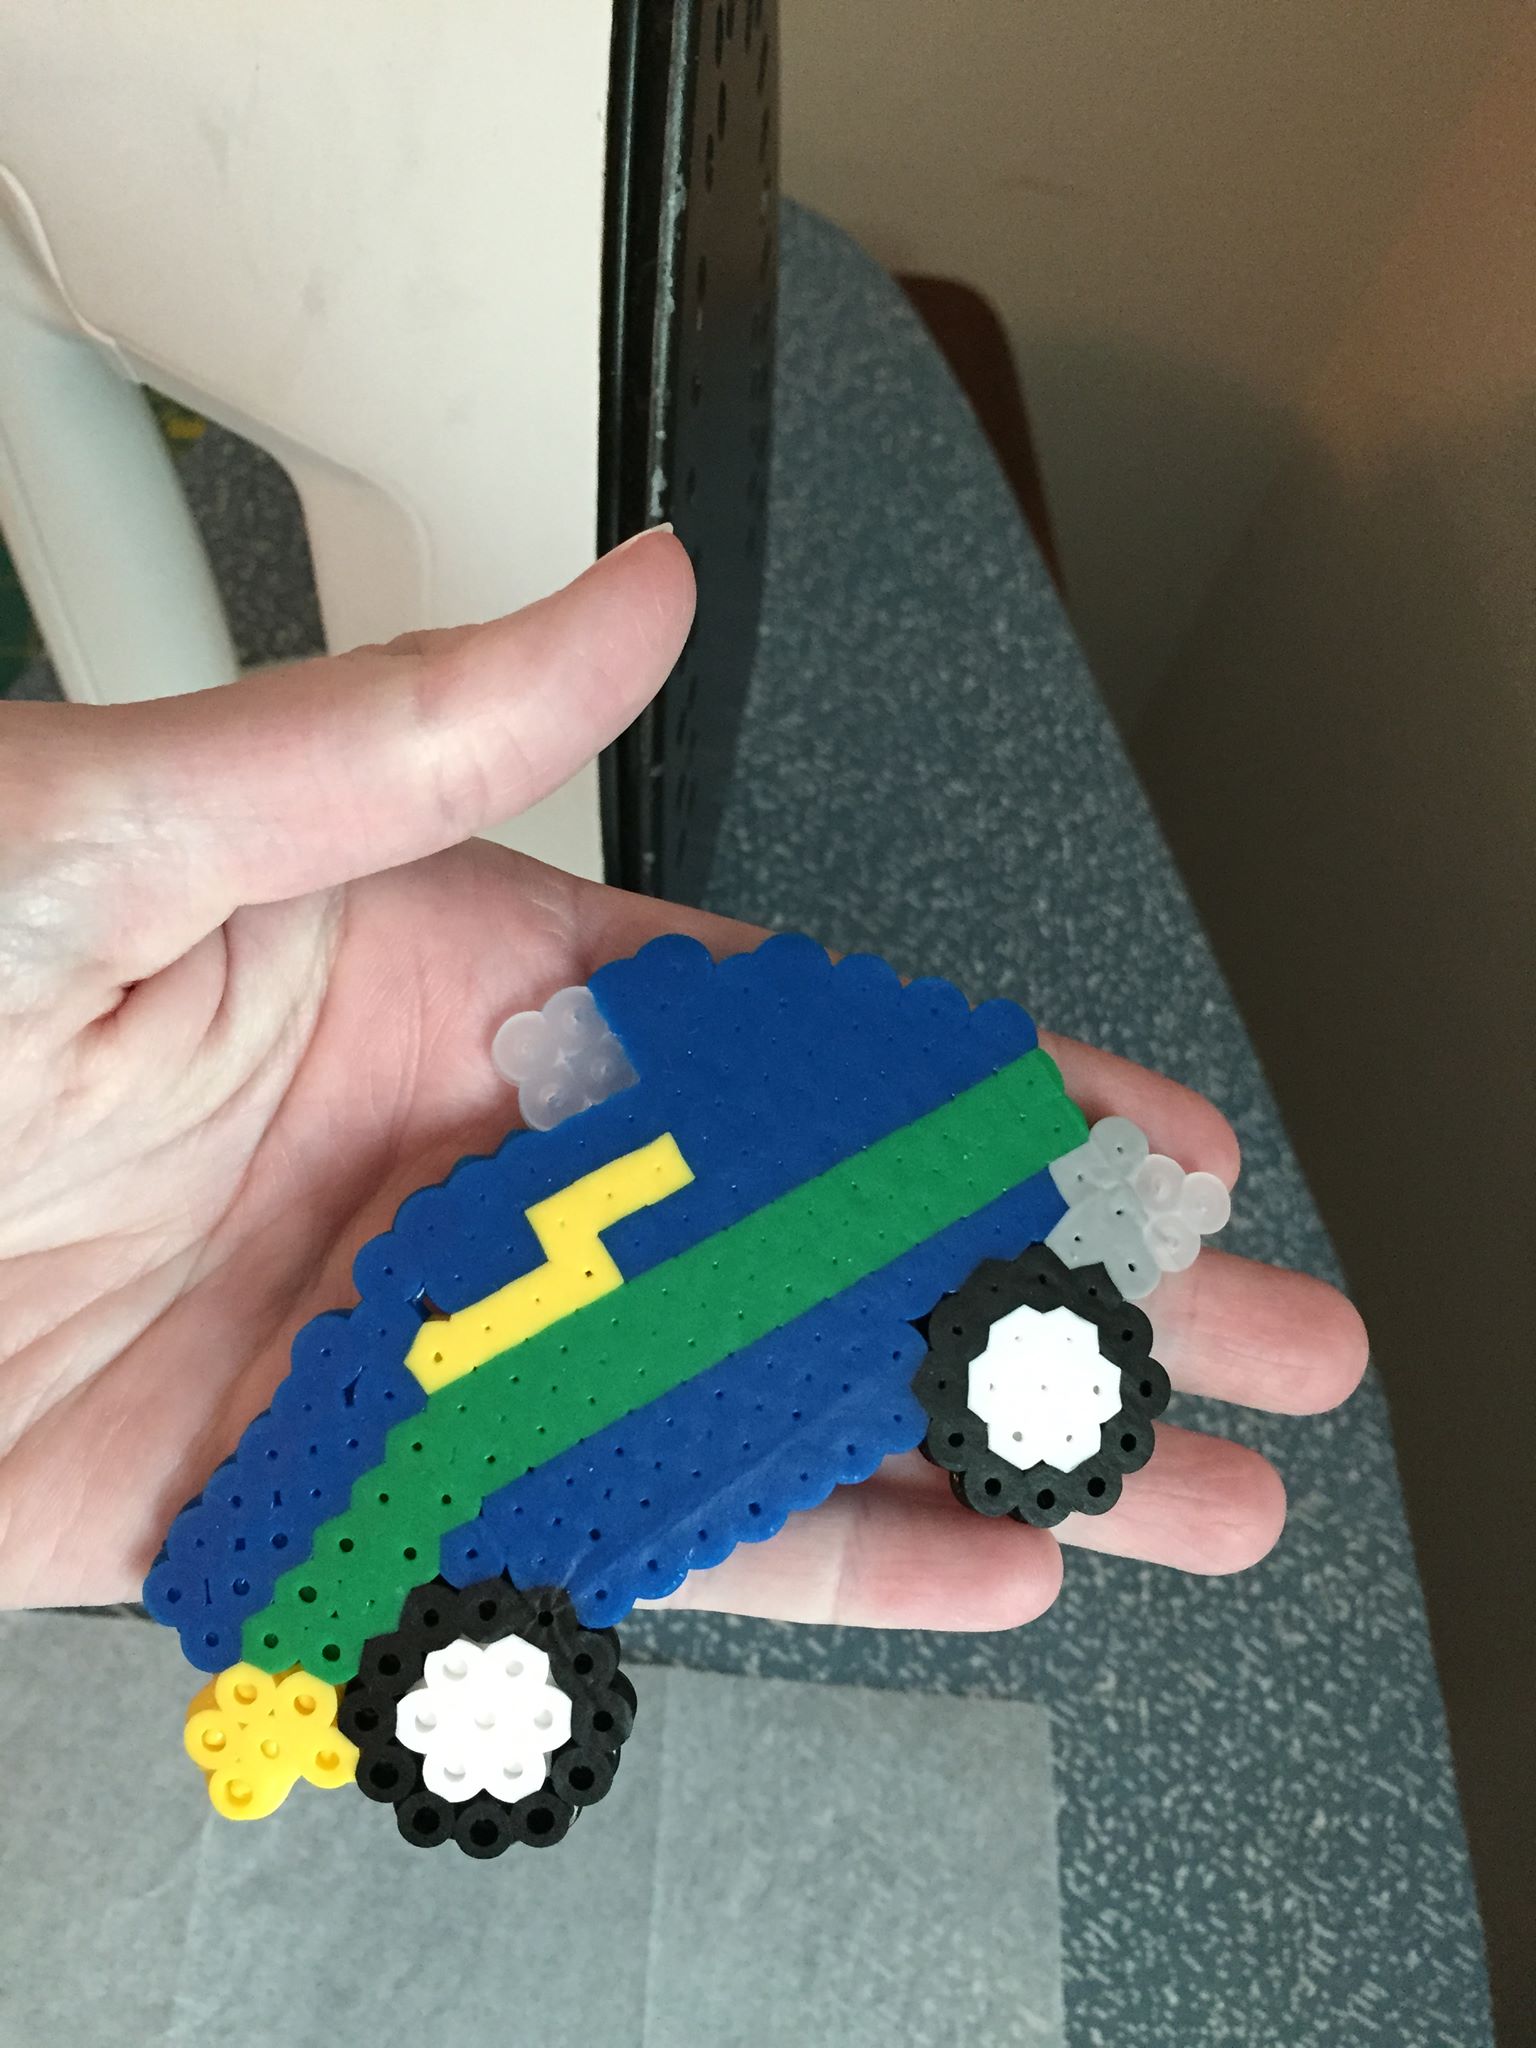
This kit was a huge hit.  It was fairly easy for all of them to make.  It took time but not my time.  They were well entertained.  They could follow the directions or make their own design.  They liked it so much that it landed me back at the craft store searching for more kits.

 Easy Kids Crafts for Busy Moms

Easy Kids Crafts for Busy Moms

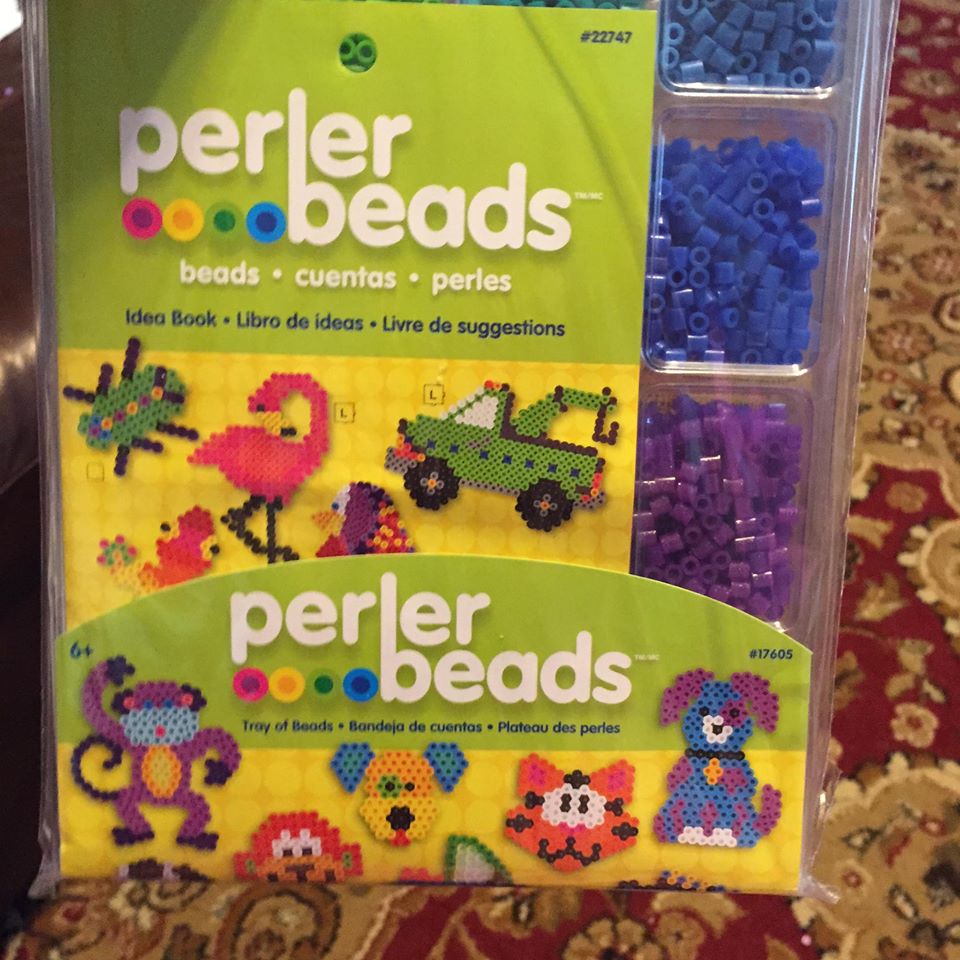
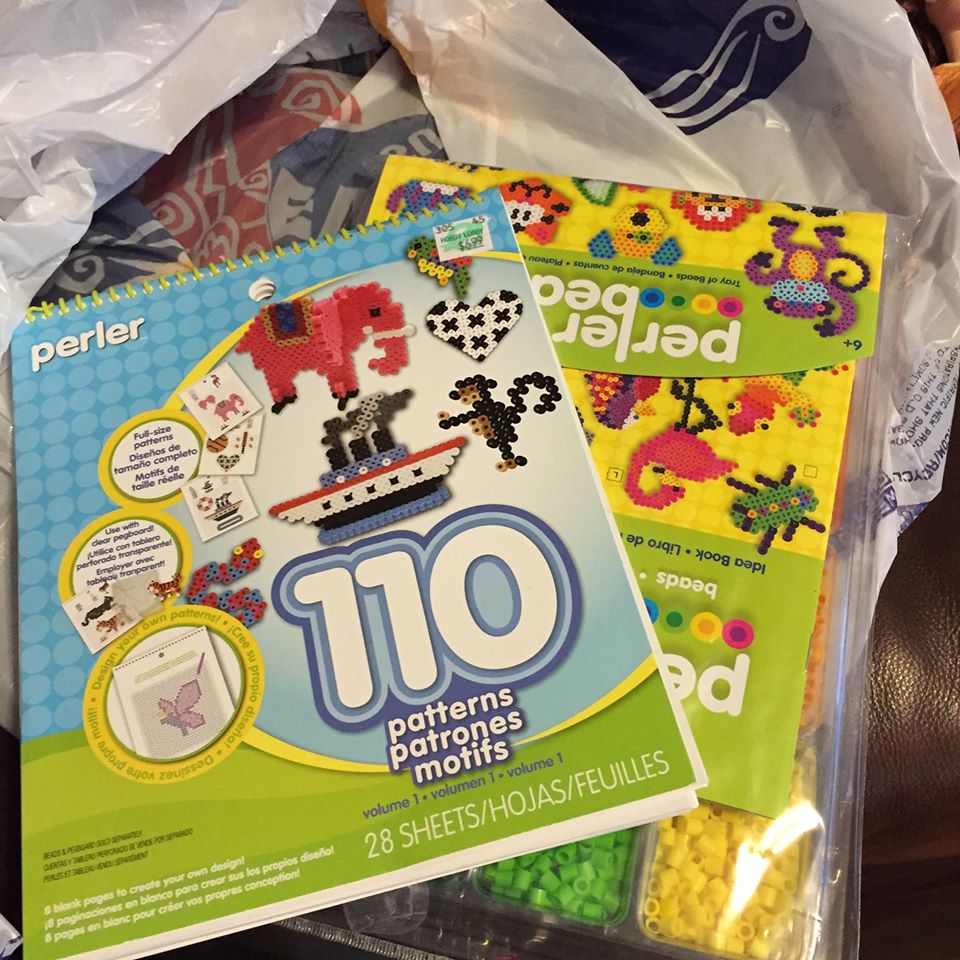
Instead, I found that they sell a large kit of beads and a separate book.  This was way better than I expected.   This pattern book comes with 110 patterns – to entertain the kids for hours.  Not only that, but it comes with several sheets of paper in the back of the book where they can draw their own designs! A 4 year old and 10 year old can both be entertained by the same project with little help from Mommy? Who would have thought that!

Easy Kids Crafts for Busy Moms

Easy Kids Crafts for Busy Moms

Easy Kids Crafts for Busy Moms

Easy Kids Crafts for Busy Moms
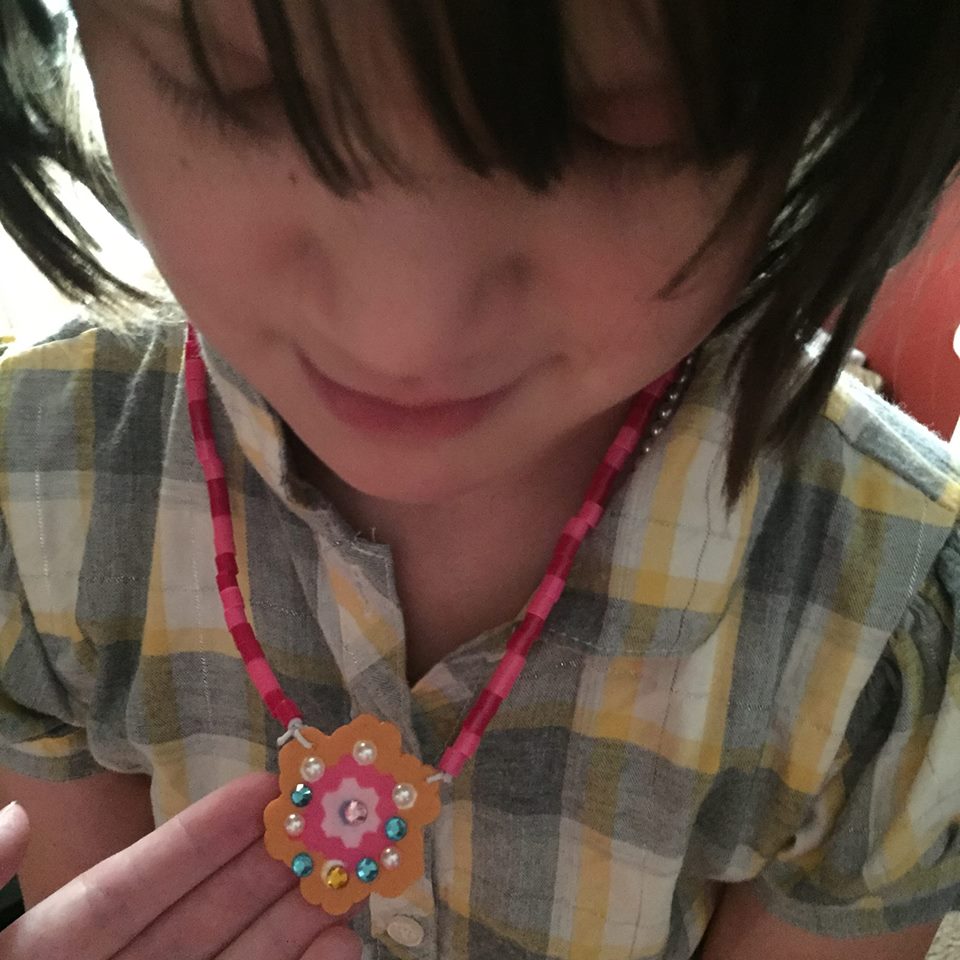
My daughter also bought a kit at the craft store to work on while the boys were using this book.  She found a jewelry making kit made out of the same beads!


 Easy Kids Crafts for Busy Moms

Easy Kids Crafts for Busy Moms


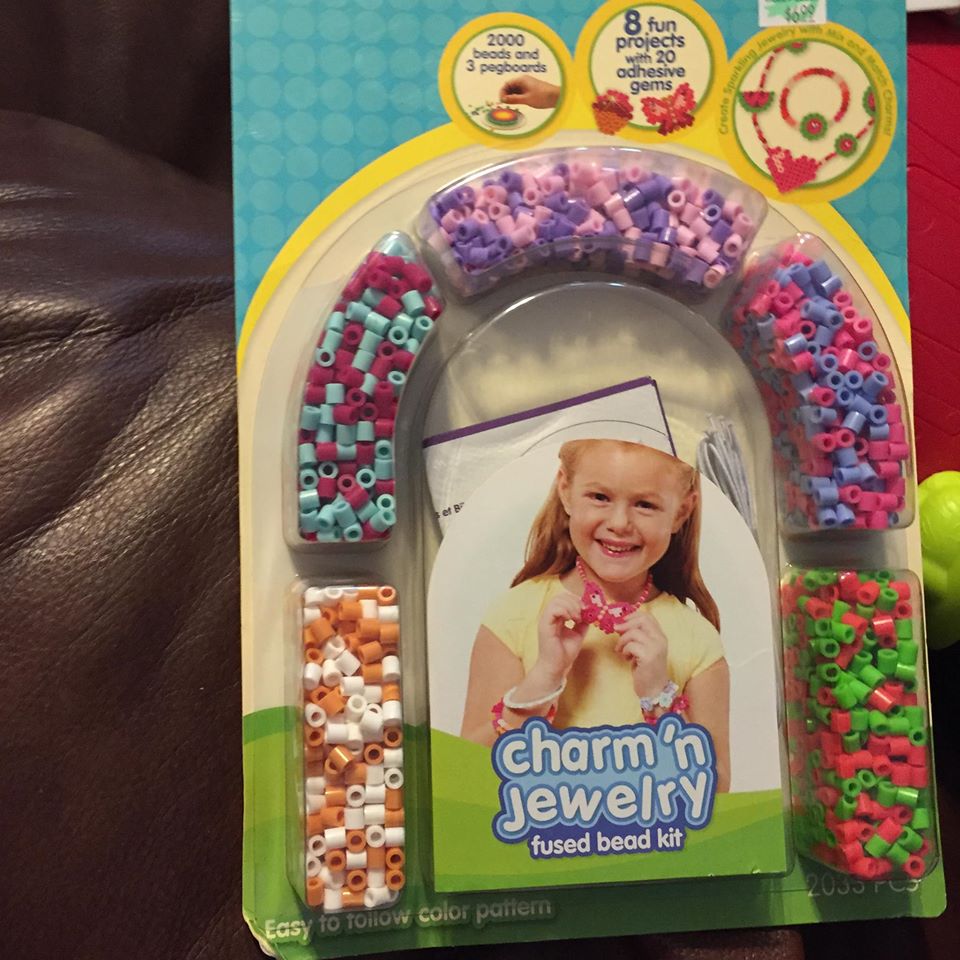
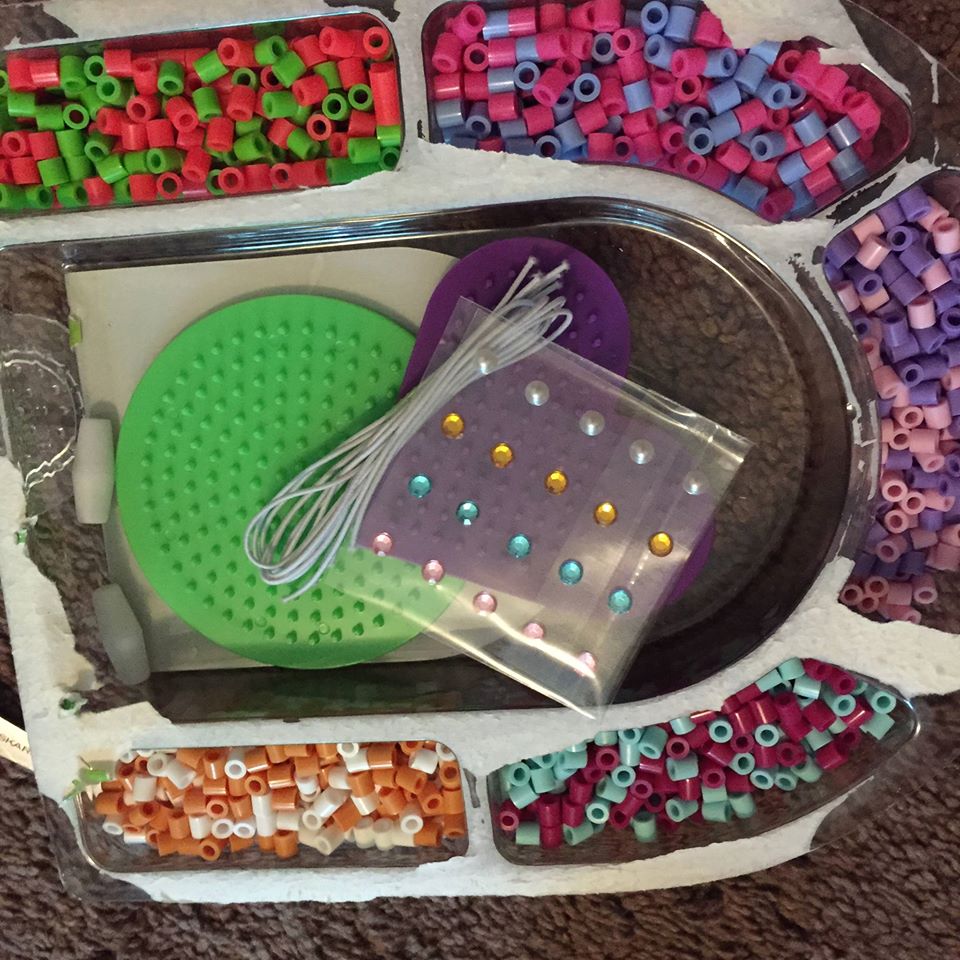
So she happily got to work making a necklace.

Easy Kids Crafts for Busy Moms

Easy Kids Crafts for Busy Moms


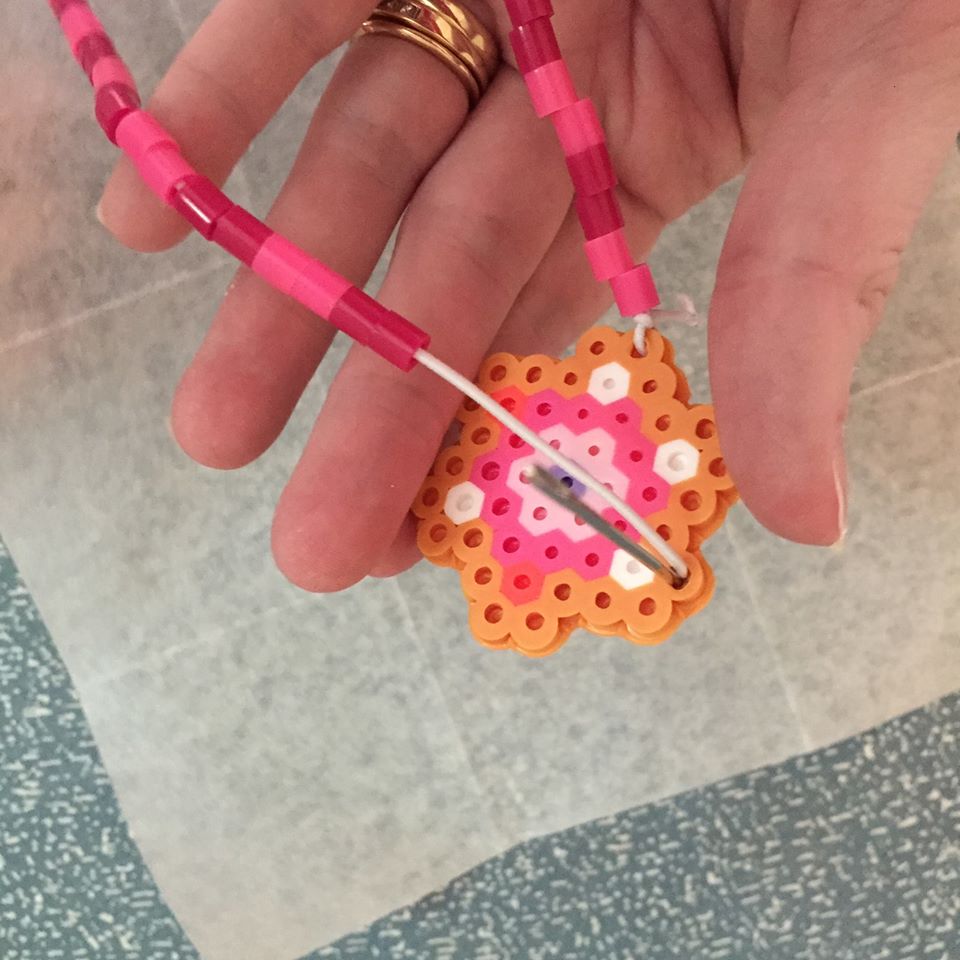
The only caution (other than the beads are not meant for very young children) is that an adult should be the one to use the hot iron.  The iron needs to be very hot in order for these beads to fuse.  This took very little time for me to melt the beads together.  Also, when you are ready to iron – take extra care with the new creation.  It is very easy to knock these beads off of their little pegboards.  The jewelry making kit was especially difficult to work with because of the stretchy string that is used to tie the charms onto the necklace.  I accidentally forgot that I didn’t want them to fuse too much – because then there was no way to push the string through.  I was able to save the charm by poking it with a sewing needle.  Just be careful at the end of the projects.

Easy Kids Crafts for Busy Moms♥♥♥♥♥ Ease of Use

♥♥♥♥♥ Creativity


(In the spirit of full disclosure, this post does contain affiliate links, which means that I may get a commissions if you decide to purchase anything from the following links. I only recommend products that I use and love myself!)

Filed Under: Arts & Crafts, Large Families, Uncategorized Sasha

06/11/2015

In the waiting


What To Do While Waiting for

an Autism Diagnosis

waiting for autism diagnosis


I don’t know you and you don’t know me, but chances are if you are reading this post you suspect your child has autism.  It was not too long ago that I was in the waiting place, too.  The waiting place is a dry and dusty desert.  It seems that there is not much to do there but – wait.  Wait for help to arrive.  Wait for someone to save you.  Wait for someone to tell you how you got there.  Wait for some escape.  The waiting place was one of the hardest places I’ve ever lived.


You see, my son was different.  He was not like the other kids at church.  He wasn’t like the kids in his pre-school.  He had fallen behind on many milestones.  What little words he had spoken he began to lose.  He didn’t crawl on-time.  He didn’t walk on-time.  He couldn’t spell his name.  He couldn’t say his ABCs. He couldn’t hold a sippy cup.  He couldn’t use a potty.  He couldn’t say “Mama”.  He couldn’t read a book.  He couldn’t sit still.  He couldn’t.  He couldn’t.  At one point it seemed that the list of what he could do was greatly outweighed by what he couldn’t do.


Time and time again we spoke with our pediatrician.  We quietly asked about milestones.  He was always behind – but at first, not behind enough.  He was a boy, we were told.  Boys were always slow.  We were told he would catch up.  Soon, I asked about autism.  I was told emphatically that it couldn’t be.  He smiled at us.  He could smile so he couldn’t have autism.  We made our way through a battery of tests.  We were still waiting.


So the years went on and so did we.  Waiting.  Waiting for help to come.  Waiting for an answer.  Waiting for a diagnosis.  Little by little we were losing our son.  We were lost, too.  No one to turn to.  No one who understood.  It’s hard not to feel the weight of blame on your shoulders as a mom.  I think it is something we moms do well.  Blame ourselves.  Was it something that happened during my pregnancy? Was it the flu shot I took?  Was it a shot he had? Was it the antibiotic they gave me in my 3rd trimester for a respiratory infection? Was it his birth?  It was a rough birth.  Maybe it was because he was a forceps delivery.  Maybe I just wasn’t a good enough mother.  Maybe I didn’t teach my son enough when he was a toddler.  Was my diet bad? Was his? How did we fail him?  Words were gone.  He battled through learning to walk, finally taking his first steps.  Losing his ability to eat certain foods without gagging.  His once healthy appetite dwindling down to only a few solitary foods that he would endure. His eyes suddenly different – empty laughter.  Flapping hands – noises.  Lots of noises.  The waiting was hard.  With no autism diagnosis, the stares of strangers take a toll on you.  The questions from friends.  Who do you turn to?  Being a mom is hard.  Being a mom with a child with autism is even harder.  Having no diagnosis is the hardest.


You are in the worst of it.  Right now.  If you are reading this and you don’t have help – you don’t have a diagnosis – you don’t have what you need to move forward.  You are in the worst but there is hope.


The problem with the waiting place is that most parenting books won’t help.  What the mom down the street does won’t help.  What you do for your other kids won’t help.  All the advice in the world might fall on you hard but you might not be sure what is right for your child.  You are in a completely unique place in your parenting journey.  That is partly because autism in all its spectrum-esque glory is like a chameleon.  Each child is slightly different with it.  Because of autism there are a lot of kids who are “higher functioning” than mine.  They may act similar in some ways.  They might be completely different in others.  They might not be like him at all.  There are children who are lower functioning than my son.  It is a spectrum.  It is hard to know how to handle this when you are in the thick of it.  I wasn’t sure where my son fell on the spectrum until after he was formally diagnosed.

Here are the steps in moving forward even in the waiting for an autism diagnosis:


Find a local support group.  You first need to find a support group that is for parents of children with autism.  You need to go to this support group.  Make yourself – even if it is hard.  It is difficult when you don’t know if you belong.  Go anyway.


Look to early intervention if your child is young enough.  In most states the cut off age is 3 years old. I didn’t learn of this service until my son was nearing his 3rd birthday. My pediatrician did not tell us about E.I.  I wish they had because this is a wonderful resource. They can do evaluations and get you connected with a speech, occupational, and physical therapist depending on your child’s needs.  There is new research that early intervention begun between 18-30 months helps improve an autistic child’s abilities.


Find a developmental pediatrician or pediatric neurologist if you are not getting any help from your pediatrician.  Maybe, better yet find another pediatrician, too.


Look for someone you can talk to.  Share what you and your family are going through.  This may be a counselor – this may be a close friend.  It might be your mom.  Find someone you can be honest with.  This might make the burden you are carrying just a little bit lighter.


Give yourself a small break.  It may be hard to find respite.  It may be difficult to find a babysitter.  Find a way to take a small break everyday.  You are a mom with needs, too.  Many times without a diagnosis, moms are the constant caretakers with no one to give them a break.  I remember full days of chasing behaviors and sleepless nights, too.  Be kind to yourself and even if it isn’t an actual day out (at first) find a way to get some alone time or time with other moms.  The isolation of managing behaviors alone all the time can weigh heavily on parents.  It is important to find ways to not lose yourself in the process.


If your child attends public preschool, fight for ABA therapy.  “Behavior analysis focuses on the principles that explain how learning takes place. Positive reinforcement is one such principle. When a behavior is followed by some sort of reward, the behavior is more likely to be repeated. Through decades of research, the field of behavior analysis has developed many techniques for increasing useful behaviors and reducing those that may cause harm or interfere with learning.” More information can be found on the Autism Speaks website.  This might be the one tool that has made the biggest difference in our family life and in our son’s social and behavioral skills.


I want to leave you with a word of encouragement.  There is hope.  My son had a late diagnosis at age 6 1/2.  Because of this he didn’t get all the therapy he needed at a very young age.  He needed speech, OT and PT along with extensive ABA.  He is doing well, today.  I’m very pleased with his accomplishments over the past 6 years.


I felt like we would never have an answer.  Even with an autism diagnosis, we still don’t know why.  At least now we know what.  We can take small baby step to finding solutions for problems everyday that arise in the sphere of autism.  The waiting place is lonely and desolate but you will come out on the other side equipped as a warrior who is ready to keep fighting for your child.


Are you waiting for an autism diagnosis?  Leave a comment and share your story.

Filed Under: Autism, Special Needs, Uncategorized Sasha

06/09/2015

Easy DIY Chalkboard Calendar Info Center

Do you want to make an easy and fun DIY Chalkboard Calendar and Information Center to get your family organized? Just read below!


If you’re like me, you need a family calendar in a central location and you need it fast!  My family is at the point of needing to plan our Summer activities, appointments, chores and menu all in one spot.  I went on a search for a chalkboard calendar but didn’t find one.  So, I decided to make my own.


DIY Chalkboard Calendar
Easy DIY Chalkboard Calendar Info Center

Easy DIY Chalkboard Calendar Info Center

I started with a framed chalkboard that I found at Target.  It came with two pieces of chalk, which stick to a little magnetic case, and two magnets.

Easy DIY Chalkboard Calendar Info Center

Easy DIY Chalkboard Calendar Info Center

Easy DIY Chalkboard Calendar Info Center

Using the chalk which came with the board, I measured a space to write the month at the top.  Then, I proceeded to draw lines in both directions, to form the squares of the calendar.  You’ll need a ruler for this part and an eraser.


Easy DIY Chalkboard Calendar Info Center

Next, you’ll need some permanent chalk markers, also found at Target.  After you get the grid drawn on with the regular chalk, take out your eraser and lightly erase one section of the grid.
Easy DIY Chalkboard Calendar Info Center

Easy DIY Chalkboard Calendar Info Center 
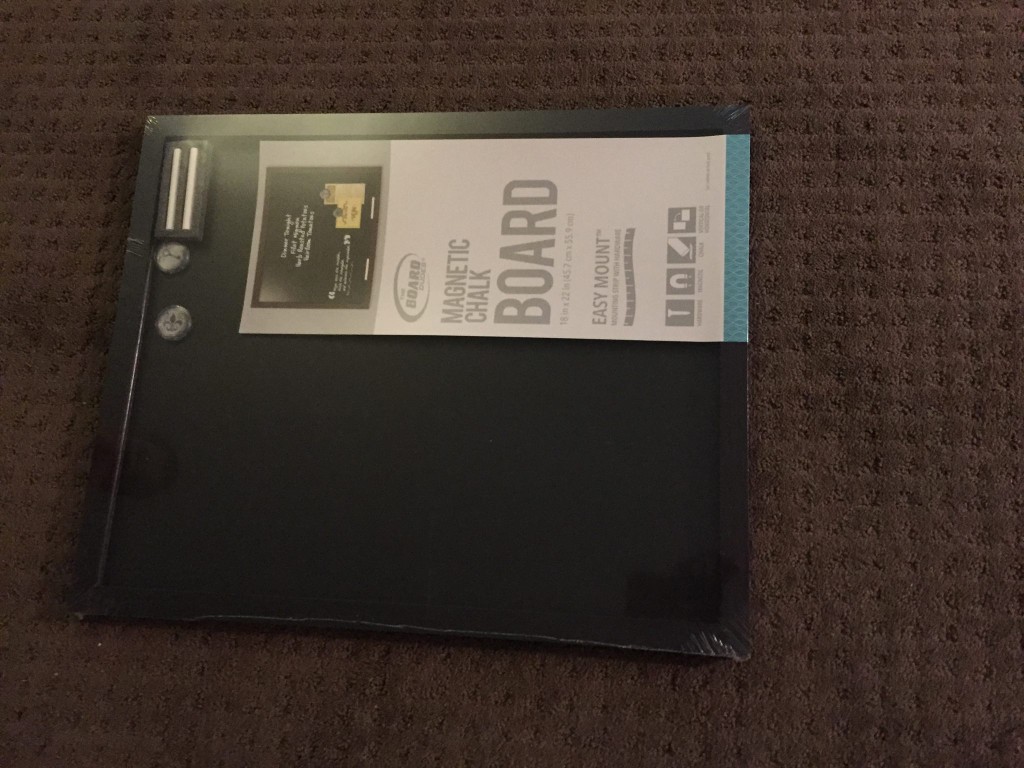
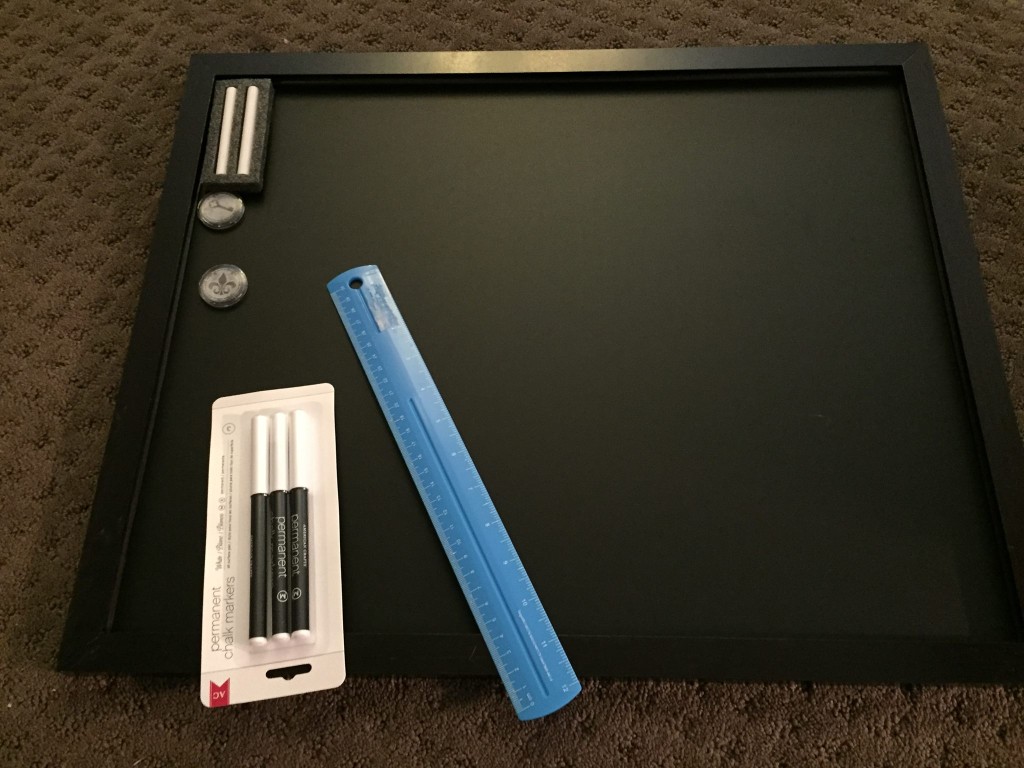
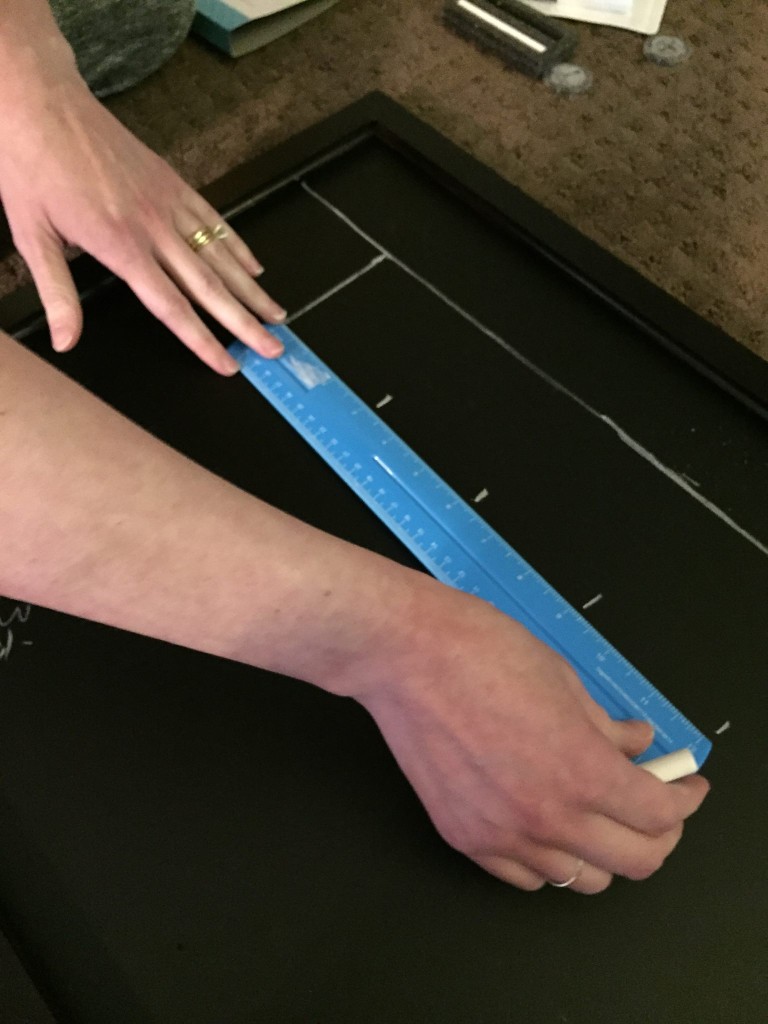
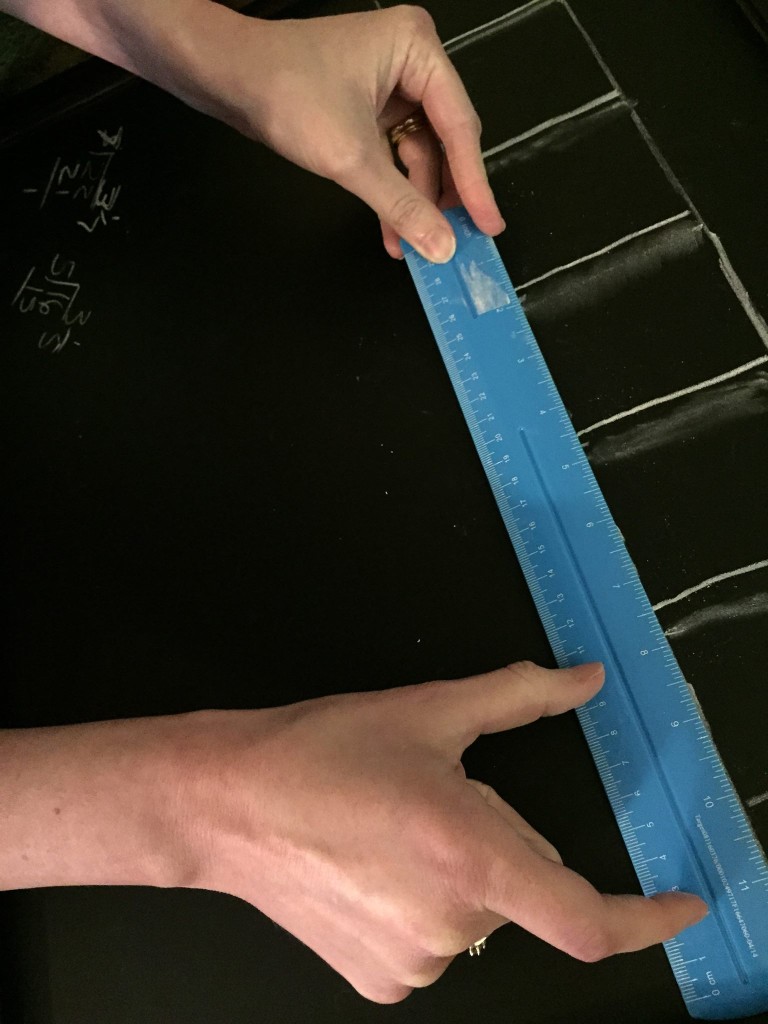
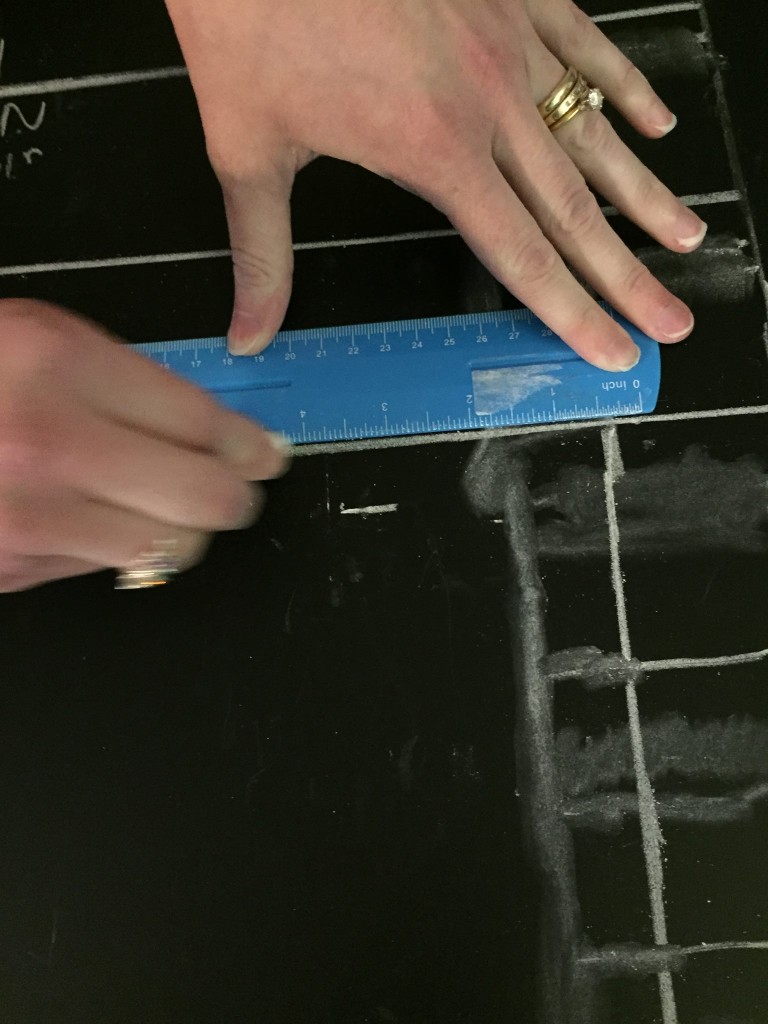
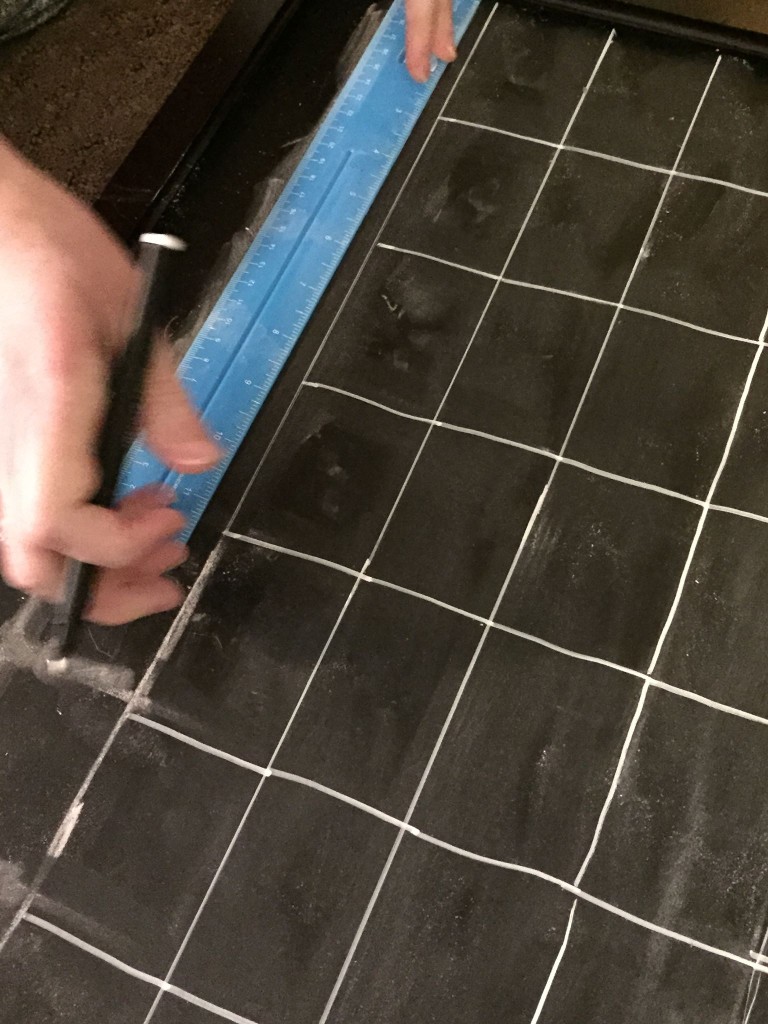
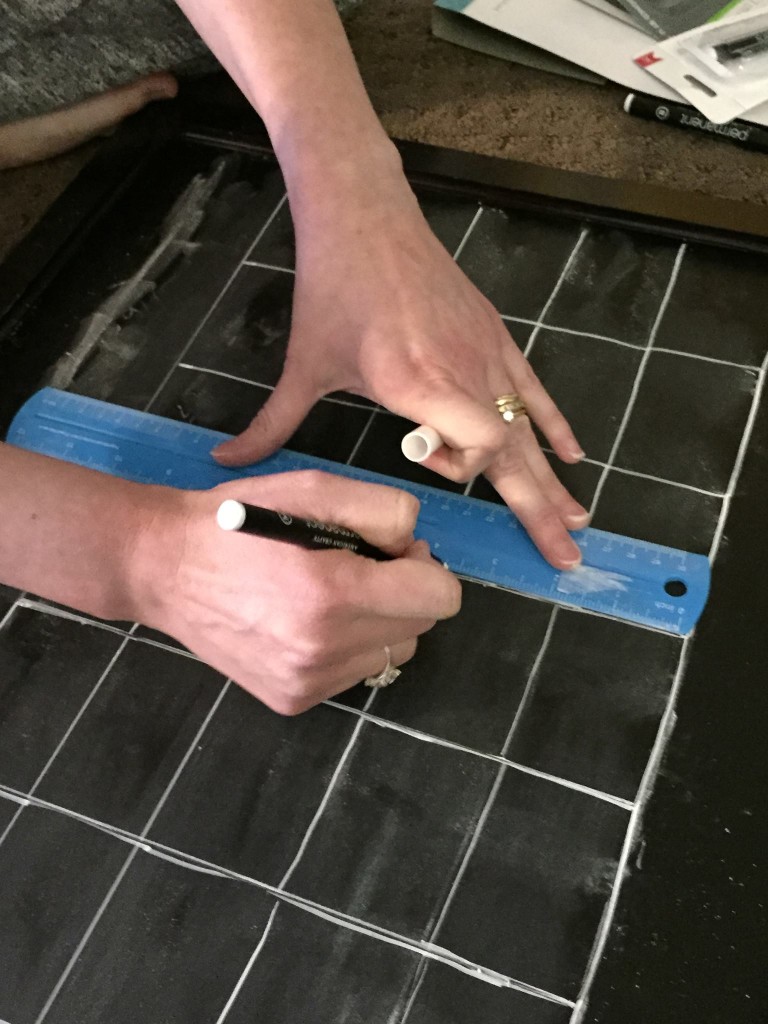
Using your ruler and your permanent marker, you’ll need to re-draw the marks onto the board.  Draw this part carefully, because once it is on it is not coming off.

Easy DIY Chalkboard Calendar Info Center


I then used a chalk pencil to write the month and the dates in the corners of each box.  You could use the regular chalk, thin chalk, or a regular chalk marker (not permanent).

Easy DIY Chalkboard Calendar Info Center


I even got one of the kids involved in filling in the calendar dates!  And our first calendar is finished!  Time to do this again on a new chalk board, if you want to do side by side months.


Easy DIY Chalkboard Calendar Info Center


I decided to make another chalk board that is dedicated to organization of the home and family.  I did a weekly view of our chores for each day.  This could also be used for specific events for each day.
Easy DIY Chalkboard Calendar Info Center


This board didn’t take nearly as long as the two calendars.  I drew 6 horizontal lines about half way across the board.  These I’m using for the days of the week.  2 vertical lines help to create a space to write about the chores for each day.  There is a space at the bottom for our vocabulary word of the week and another spot for our scripture memory verse.  The other side of the board I’m using for prayer request and answered prayer.

Easy DIY Chalkboard Calendar Info Center


The final smaller board is being used as a menu planner for the week!  I just wrote the days of the week and the word “menu” at t


he top.  This board was found next to the other boards at Target.  Now you just need to hang them up.  You’re all done!  Hooray for having a chalkboard information center!!!


Filed Under: DIY, Family Life, Large Families Sasha

06/05/2015

Summer Arts & Crafts Ideas for under $8

Summer Arts & Crafts Ideas for under $8

Just in time for Summer vacation, I decided to do a little experiment and drive the kids over to the local Hobby Lobby to find some art supplies to try this Summer.  The goal was to find some Summer arts & crafts that were under $8 a kid.  I wasn’t sure if my experiment would work but I was willing to give it a shot.  arts & crafts ideas
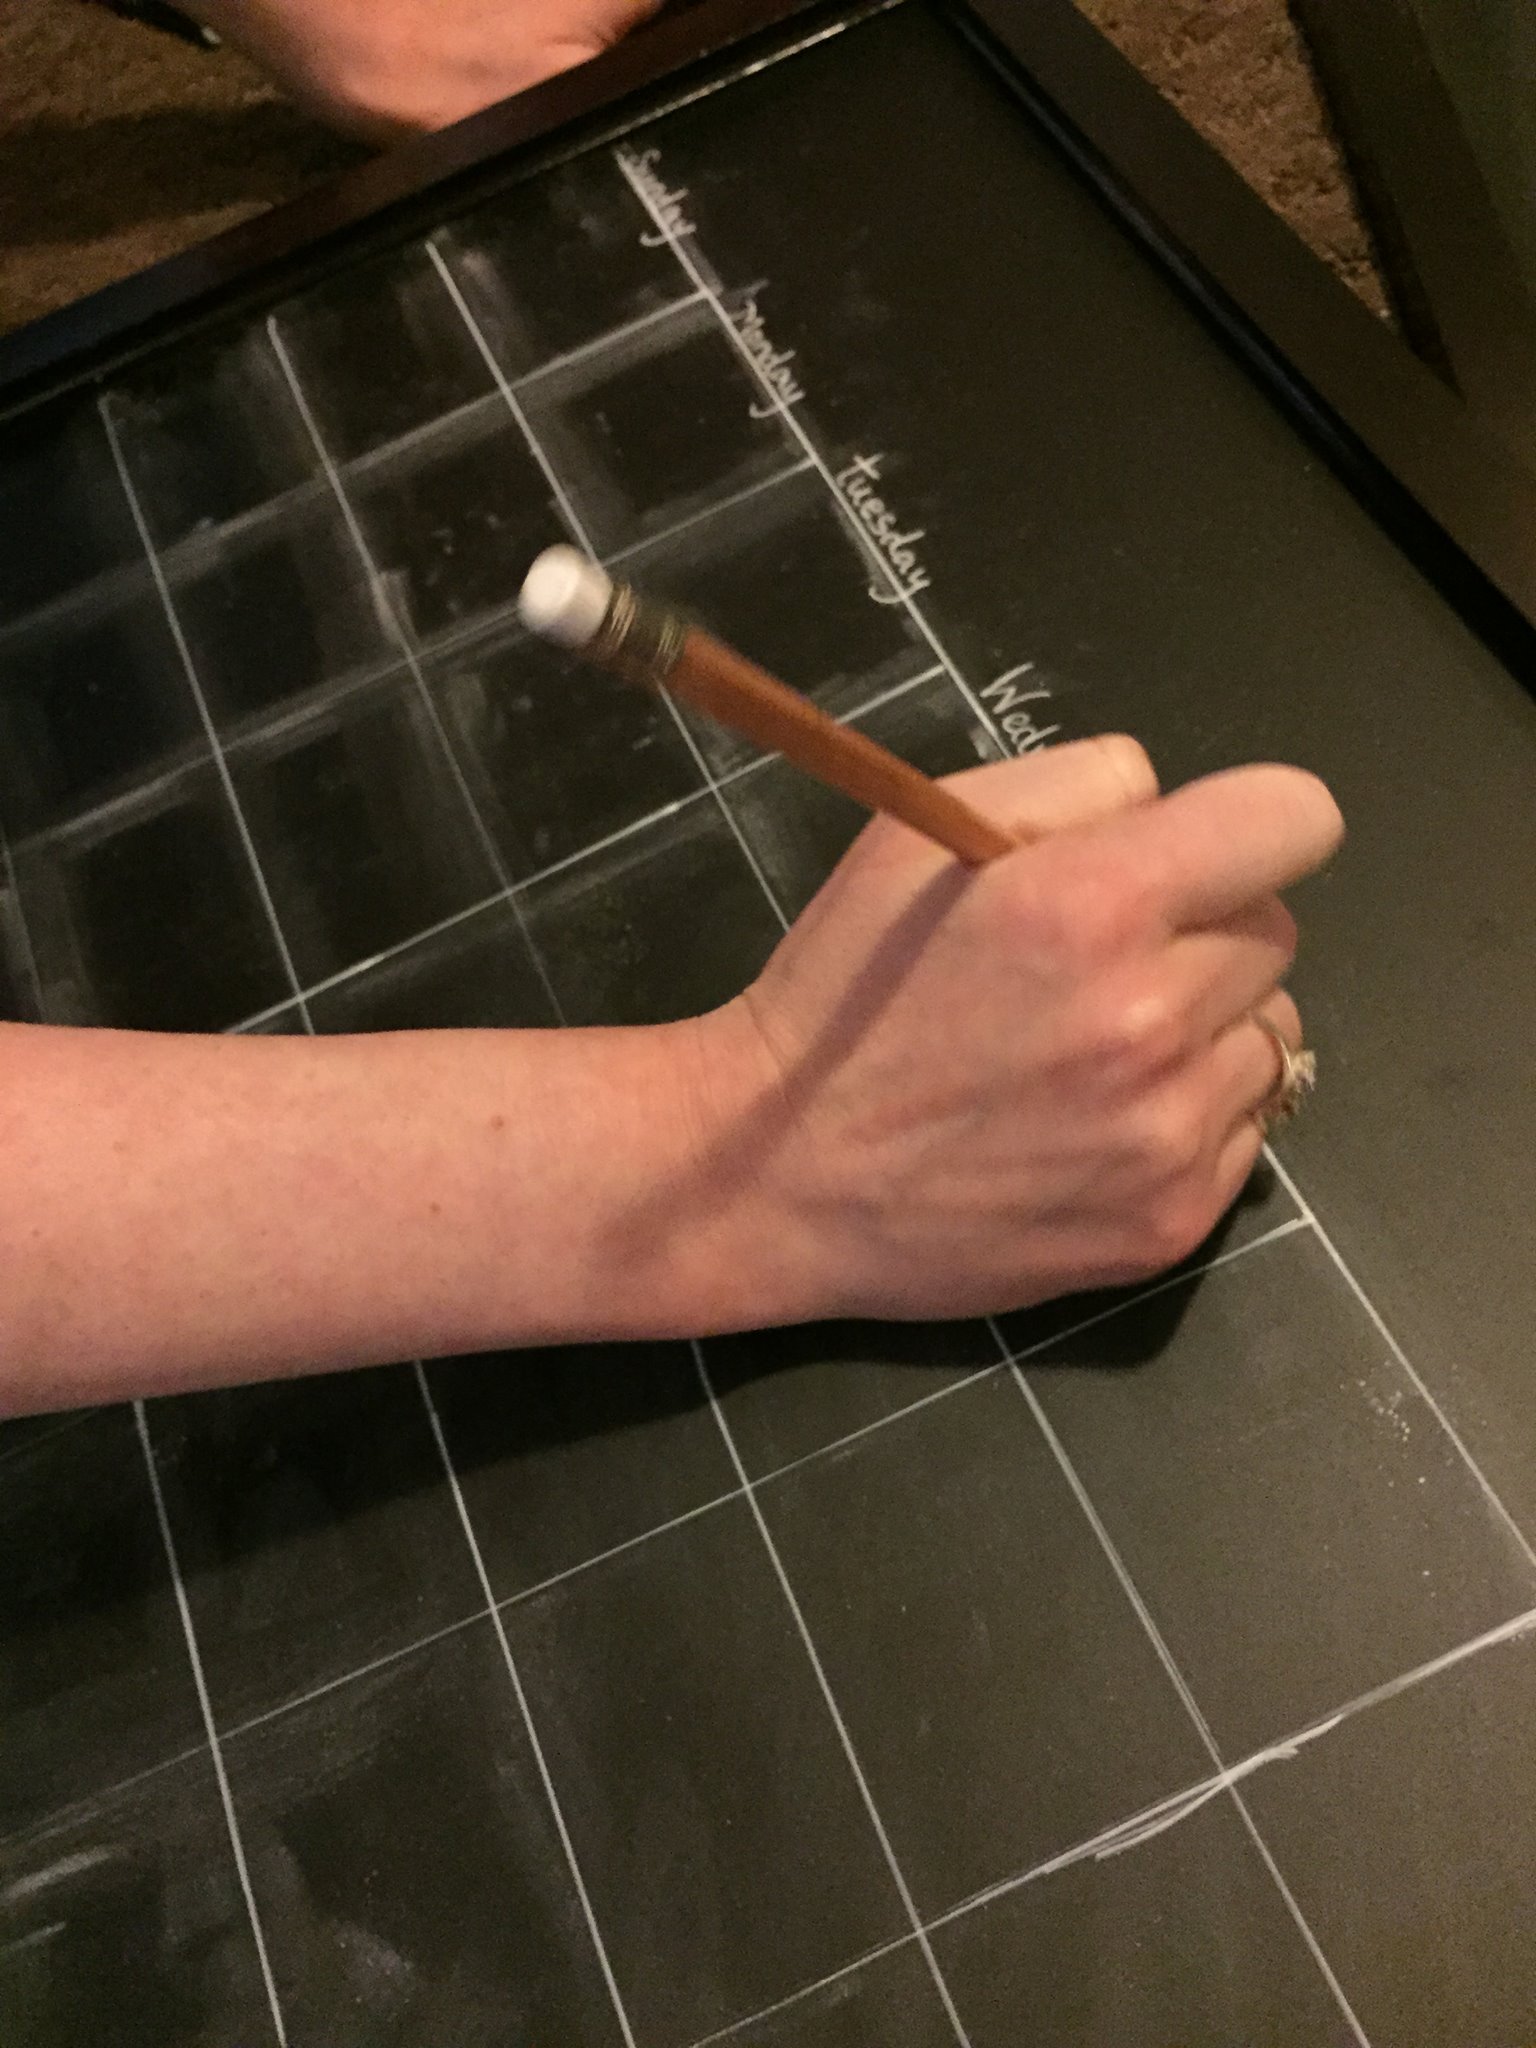
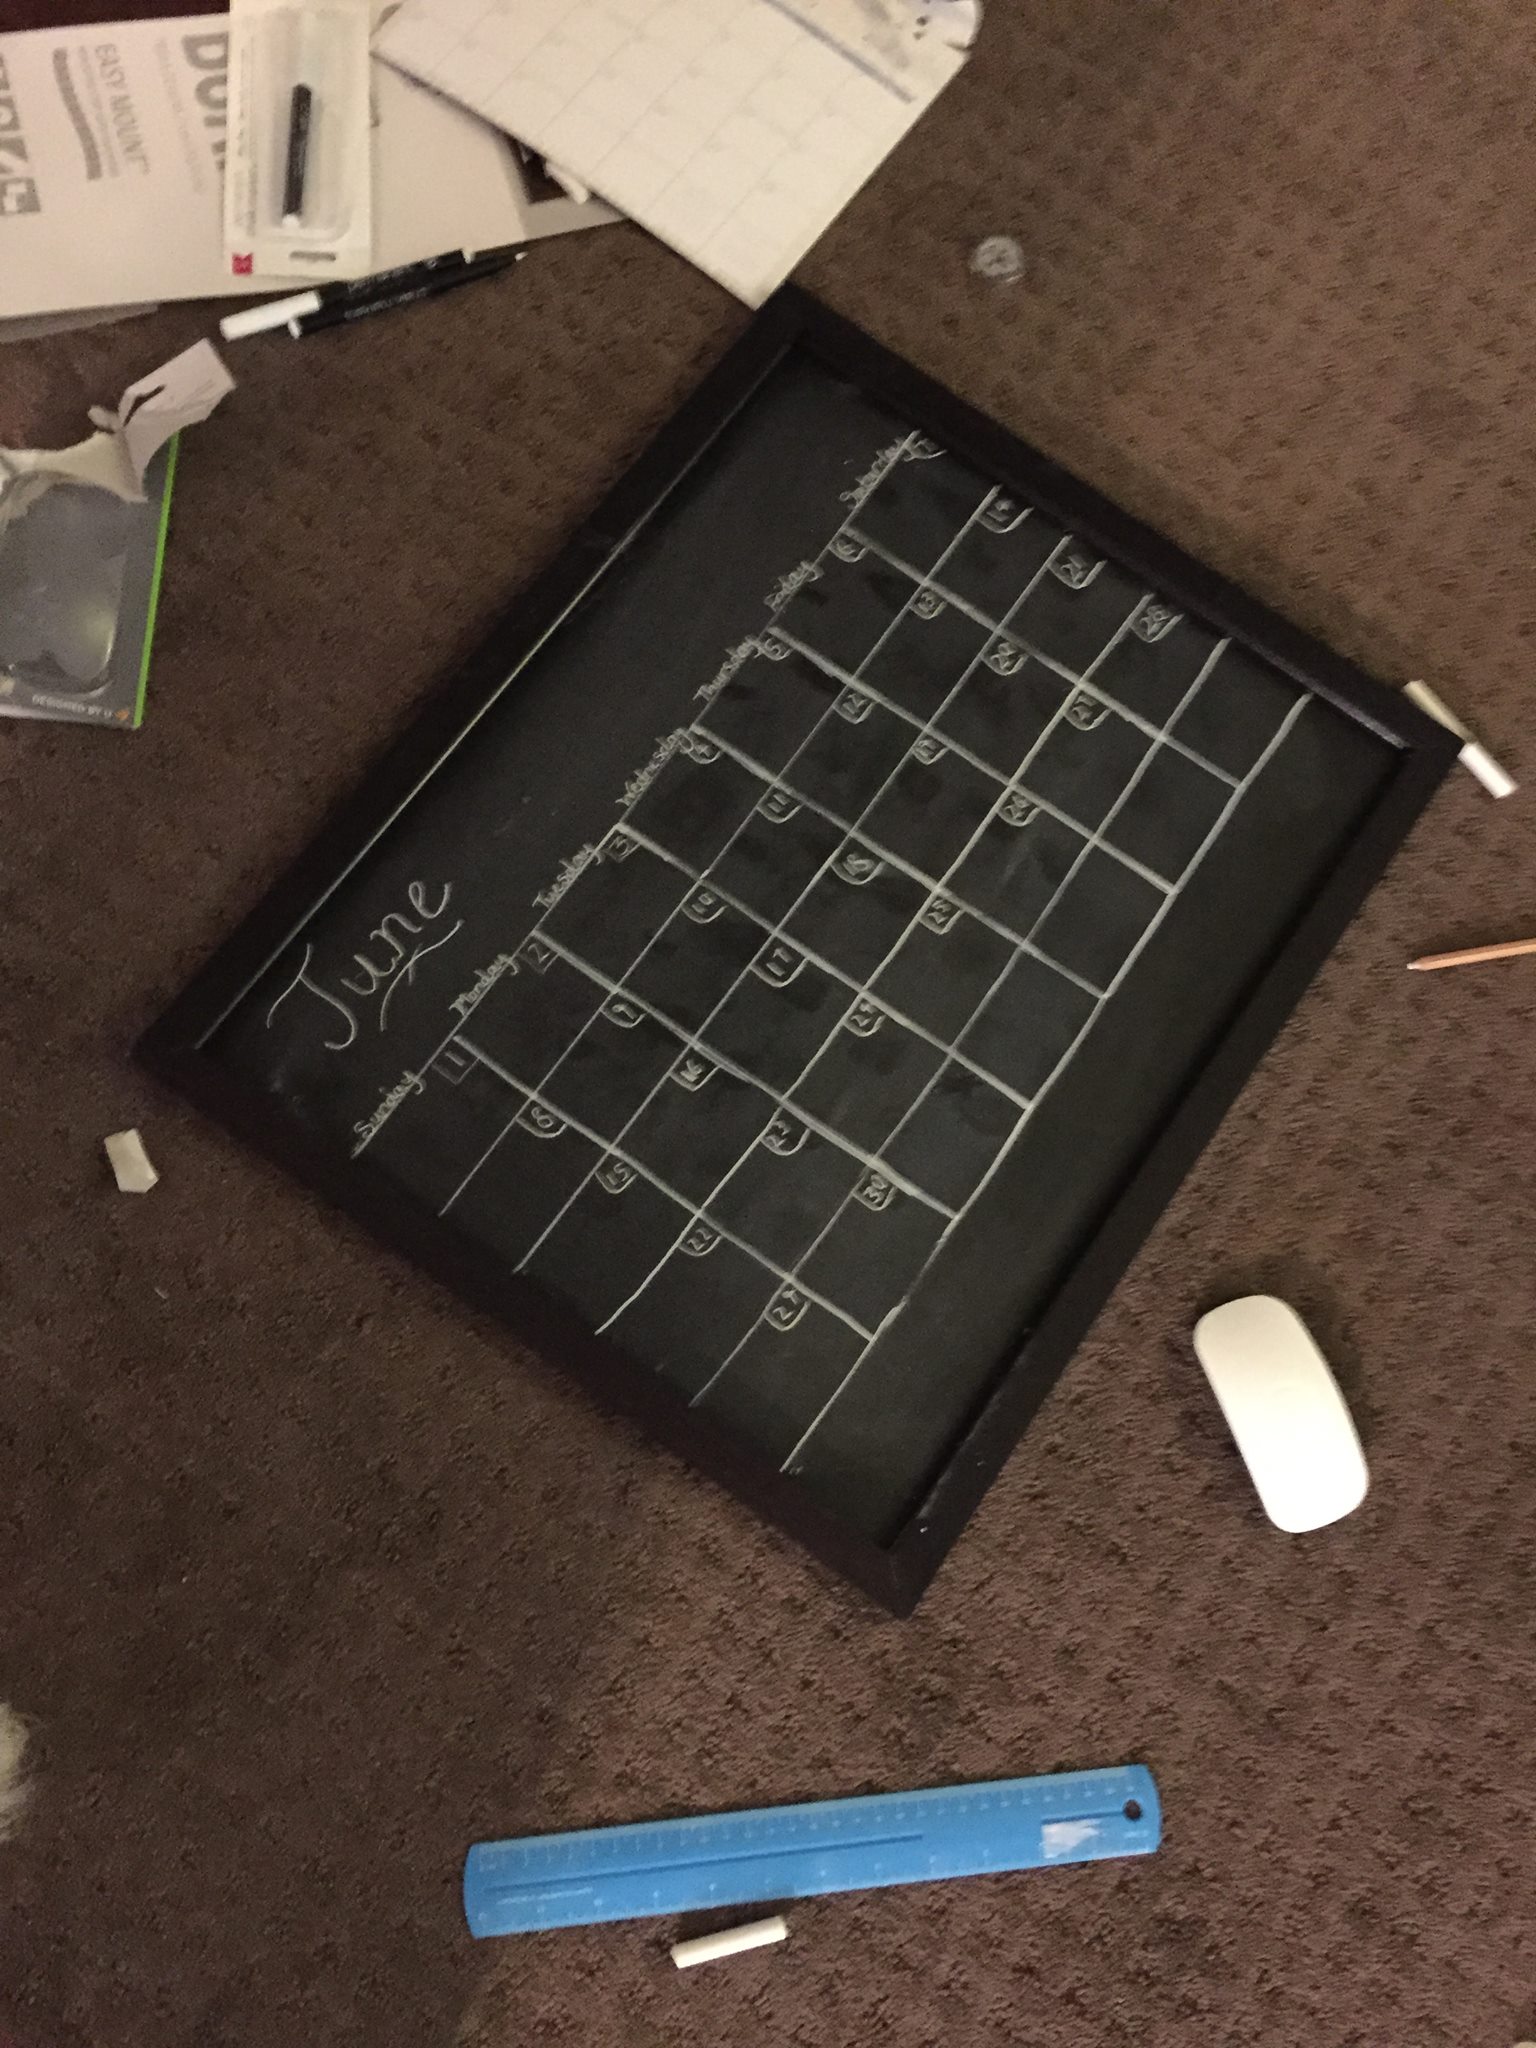
Here are my findings:

Hypothesis: Kids will be well behaved in craft store.  They will search out a craft for under $8 each.  This craft will be fun and entertaining.

Procedure: Drive over to the craft store and let them wander down the aisle until each child finds something that catches their eye…for under $8 each.  They each will find 1 item that looks like fun.  arts & crafts ideas

Conclusion:  Hobby Lobby is  filled with a lot of fun crafts  for kids!  We were able to  meet our goal of spending less than $8 per kid on fun crafts.  See below for more details on  what they made and how they turned out.


arts & crafts ideas

Royal & Langnickel Sketching Made Easy – $4.99  

arts & crafts ideas

My 10 year old picked this out.  This was a nice kit! It came with several graphite pencils ranging from 3H to 6B.  This kit also includes a pencil sharpener and a nice eraser.  It came with detailed instructions on how to shade in your artwork.  It also includes a very lightly sketched drawing (outline sketch) of whatever picture is on the cover of the kit.  The goal is to learn about value and shading through cross hatch, smudging, and a few other styles of shading.  It taught him how to create depth in his artwork. This was fun for him to learn and it truly allowed him to create a nice looking piece of art.
arts & crafts ideas

arts & crafts ideas

arts & crafts ideas

Melissa & Doug Create a Craft Flower Mirror $5.99

arts & crafts ideas
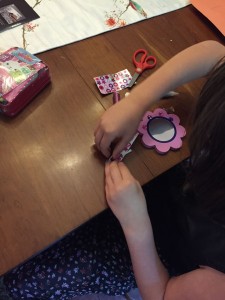
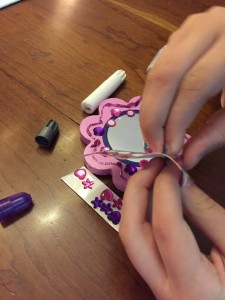
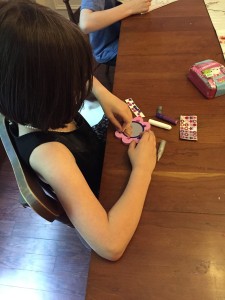
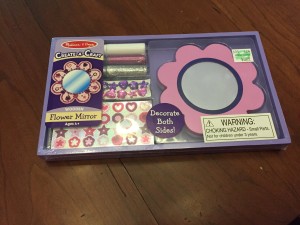
The 8 year old found a mirror decorating kit.  The kit contains a wooden mirror which is painted pink and purple.  It also includes glitter glue, stickers and decorative sticky gems.  She had tons of fun creating her mirror.  It is listed as appropriate for ages 4+, and I could tell as it didn’t take her long to complete this craft.  She did have a blast doing it and she insisted on buying this particular kit.

arts & crafts ideas
arts & crafts ideas

arts & crafts ideas


 Crayola Color Alive Coloring Book $7.99  

We also chose a Crayola Color Alive coloring book which works with a new iPad app by the same name.  We chose that to share with our special needs kiddo and our preschooler.      arts & crafts ideas


This kit contains 7 crayons including a special “Fire Breath” crayon which unlocks “virtual effects”!  The premise of this coloring book is that you can download their free app on your tablet, take a picture of your finished coloring page (through the app) and the creature on the page comes to life.  You can then proceed to take a bunch of pictures with your scary creature.  I have to admit, I thought this was gimmicky when I first saw what it was.  I tend to value teaching art to our kids and not allowing technology to cloud that.  arts & crafts ideas

However, my son who has autism is not into creating anything.  He doesn’t enjoy art.  He doesn’t like crafts.  He did enjoy this.  I begged him to try it, but once he heard that the creature will come to life in the iPad, he was sold.  He actually colored his picture all by himself and then enjoyed watching it move on the tablet.  Our 4 year old also went crazy over this project.  Surprisingly, it was a hit!

arts & crafts ideas


Come back next week when I review our next three projects:

11289644_10152775018512811_1003274450172730140_o arts & crafts ideas arts & crafts ideas

Filed Under: Arts & Crafts, Family Life, Homeschooling Sasha

05/29/2015

Are You Afraid of a Painful Birth?

From Epidural to Natural

Natural Birth after Epidural

This is the second installment of a series on childbirth.  Click here to read the first section: 3 Reasons Why It’s Impossible to Have a Natural Labor.


There was a time when I longed for a natural birth and instead I opted for an epidural. 
Actually there were three times where I did just that.  The truth is I was terrified of the pain.  I was anxious about what the pain might be.  I told everybody I wanted a natural birth and once I got in the delivery room I gave in to my fears.  


The older I’ve gotten and the more babies I’ve had, I realize that there are so many reasons to prepare for natural childbirth even if you don’t want a natural childbirth.  Mothers who have certain drug allergies may develop problems from certain types of pain medication.  Precipitous labors might happen too quickly for the drugs to take effect.  Low platelet counts can make epidurals dangerous to the mother and possibly against hospital policy.


Warning, warning! Sometimes, plain and simple, there is a problem and the epidural doesn’t work.  Yeah, ask me how I know.


Whether this is the case for you or not, it is good to know what your body is capable of.  It is good to know what is normal and what is far from it.


Maybe you, like me, have been longing to go natural but haven’t pushed past your fears.  Go for it! Below continues the story of my journey from medicated births to unmedicated.

[Read more…] about Are You Afraid of a Painful Birth?

Filed Under: Large Families, Pregnancy, Uncategorized Sasha

« Previous Page
Next Page »

Primary Sidebar

Welcome

Hi There! I'm so glad you're here! I'm Sasha, wife to my best friend and mama to 7 kids. My passion is homemaking, homeschooling, and encouraging parents of kids with special needs. We are all on a journey. Find what you were made for with some hope and encouragement on the way. xo Sasha

Free Printables

homeschooling homemaking printables

Pinterest

Looking for something?

Footer

Archives

Looking for something?

Recent Posts

  • Gluten-Free Candy Cane Cookies
  • The Best Gluten-Free Chewy Gingerbread Cookies
  • My Pandemic Birth
  • Hope When There Is No Hope
  • When You Walk Through The Fire: An update on our Year (2019)

© 2015 Pretty Happy WordPress Theme · By: Pretty Darn Cute Design